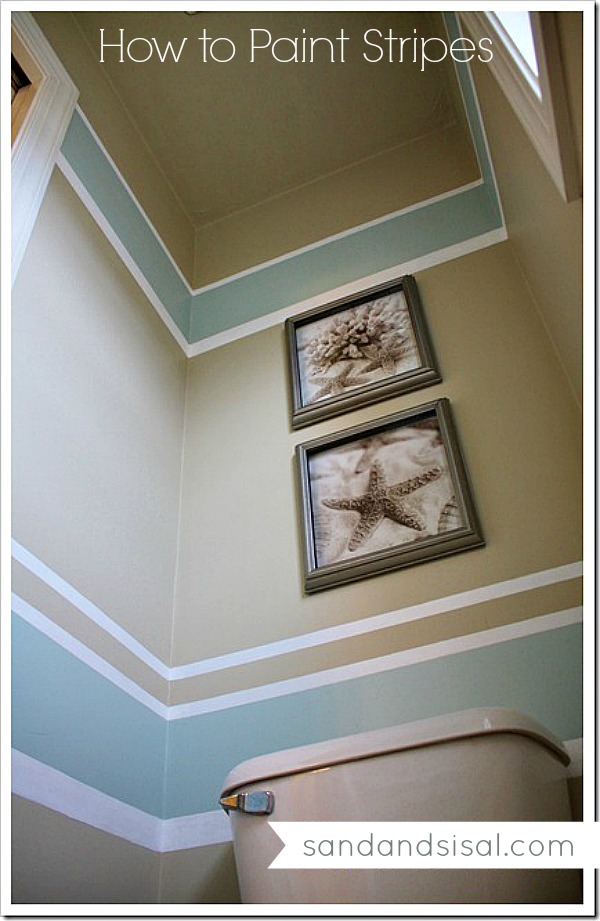
 Love the idea of beautiful panels of color sweeping across your walls, but fear is holding you back from attempting it?
Don’t let the idea of painting straight, clean, level stripes intimidate you.
There is an easy way with NO measuring!
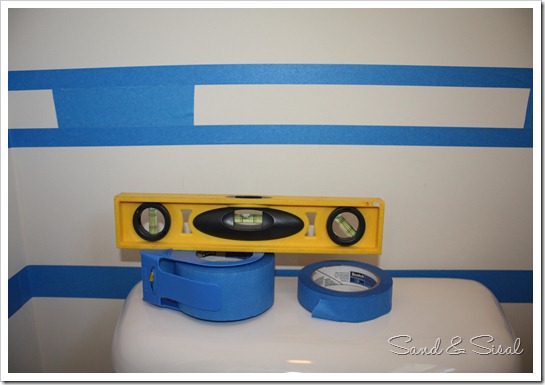
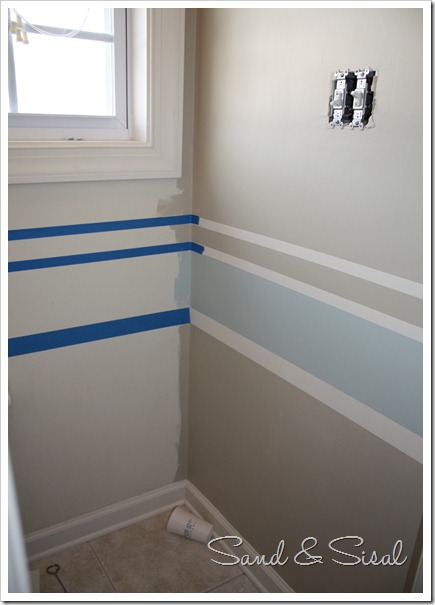
Start with a few rolls of painter’s tape of varying widths and a level. These will help determine the widths of your stripes.
Choose a height and hold your level against the wall. Adjust level so bubble is level and hold in place. Then place your tape under the level and continue to run it across the wall horizontally. Recheck for level every foot or so. Next, place a strip of tape (largest width) directly under your first. This is a guide for how thick your stripes will be (no measuring!). Finish the bottom with another skinny tape strip.
Once you have all your tape in place, you might want to lightly label with pencil where you want certain colors placed.
|
Tips to prevent “bleed through”
|
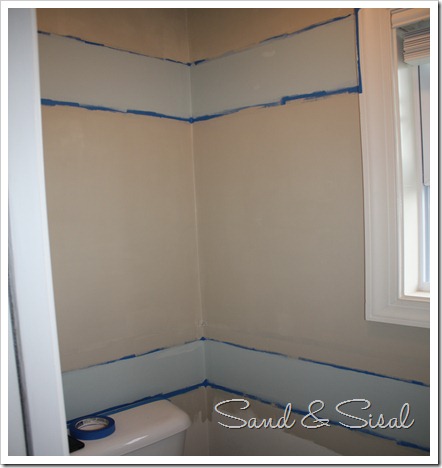
Fill in your color. Painting overtop the tape if desired.
Work in sections so you can remove your tape before the wall is completely dry.
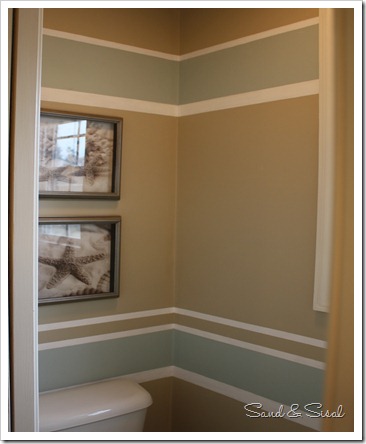
Peel off your tape. Now Oooooo & Ahhhhh at your beautiful stripes!
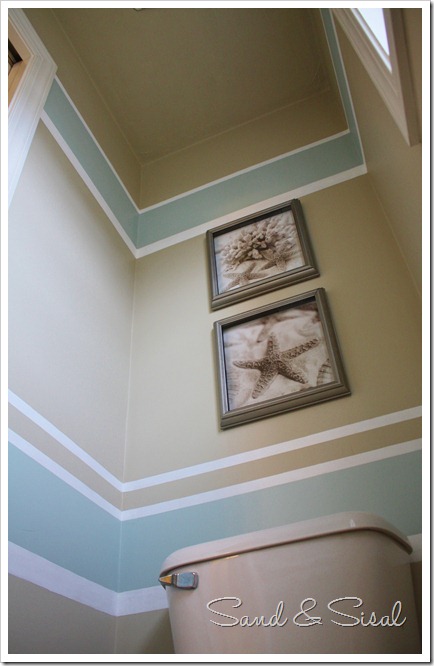
Stripes of varying widths and limited color will give any boring room a clean, contemporary look.
Give it a try now that you know how simple stripes can be!
Kim
Amendment: 4/23/2012 – So many have inquired as to the type and color of paint used in this project. It is Sherwin Williams in Urban Putty and Rainwashed.

Great tips! The woman I used to nanny for did an amazing plaid painted wall for her twins and used this technique for both horizontal and vertical stripes- works like a charm! Thanks for reminding me!
P.S.- miss you already! Blissdom was not long enough!
Thanks for this great tip, Kim! I am planning on striping my mom-room if/when I get it started and this will be a big help!
btw, I am lovin’ the colors you used. Most of our home is blues and tans
A lot of work, but the result is gorgeous!!
Thanks so much! I love the colors you chose!
XO,
Jane
This was my first visit to your beautiful blog. I will be returning! Thank you for sharing this useful tip. Saves a lot of work and frustration for me somewhere down the line.
I loved you post and photos on Blissdom. Unfortunately I was not able to attend this year but look forward to the next.
Deborah
Your room turned out beautifully! Thanks for the great tips. I want to try some stripes this year. I like the way you spaced them – very nice!
Hi – I’m a new follower. I love the stripes! Thanks for the tutorial.
Love the STRIPES! Can you share what colors/brand paint you used. I like the combination. THANKS!
Great post Kim. I hope lots of people that are reluctant to paint stripe read this post and have a go!
Angex
Thanks everyone! The colors used in this bathroom are both by Sherwin Williams: Rainwashed & Urban Putty.
Would you mind posting the measurements of your stripes? How tall are your walls?
Love how this turned out. Beautiful color combination
Thanks for sharing the color names, I meant to ask
I love the choice of colors. Beautiful!
I am loving the look of those stripes! Thanks for the tips.
The result is beautiful. I love the color combination you used. And thanks for the tips!
Match up color palettes for a nice stripe on the wall.
Kim, Great design, I love the colors with the stripes. I have a new tool called the U-Stripe It & Design Tool. This tool can help all your readers do stripes, plaids, circles, etc hassle free. DIY named it Cool Tools for 2010. It takes the tedious work out of painting stripes and makes you designs more fun believe or not. Looks great. http://www.ustripeit.com Thanks. Phill
I love the colors that you chose. What a beautiful bathroom!
Hi I was wondering, if you have had problems painting over stripes(that is if you have change a room with stripes)? I painted horizontal stripes in my great room and no amount of paint with ever cover up where the stripes were. I know to some this wouldn’t bother them but for me it does. I was wondering if you have painted over stripes before and if so how did you approach the showing through, if that was a problem for you.
Thanks! Love your work!
Jessica
Hi Jessica! I’ve never painted over stripes before but I have painted over a few wall murals I’ve done in the past. Are you having issues with coverage or issues with the line texture (where 2 colors meet)? If it’s the line texture, then you can run a super fine grit sanding block along the line to smooth it down and then paint over again.