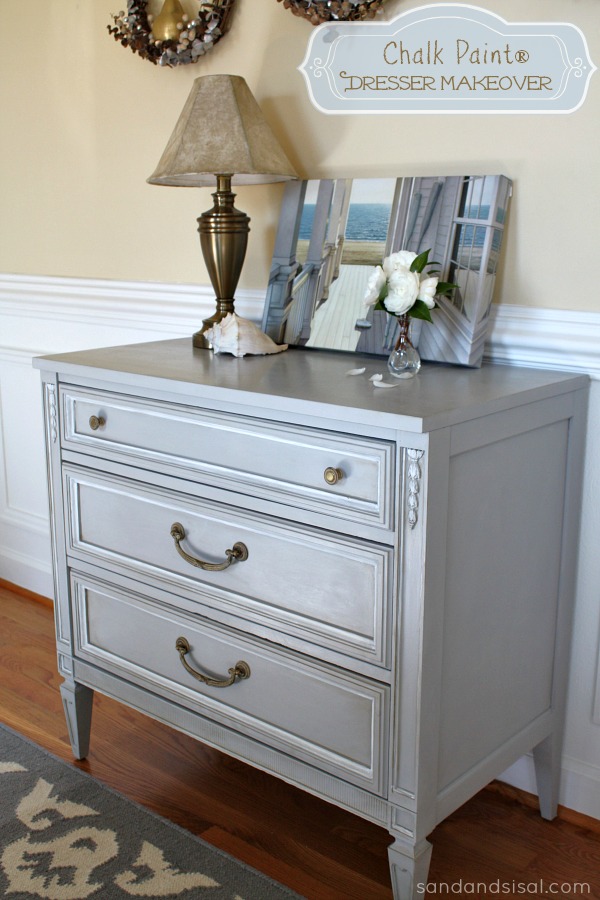
Yesterday we talked about how I used Chalk Paint® decorative Paint by Annie Sloan to give my childhood 1970’s dresser a makeover (Chalk Paint® Dresser Makeover Part 1). Today I want to explain what brings the Chalk Paint® alive! We are going to discuss how to use Soft Wax both clear and dark. I’ve heard many people complain that they don’t like how chalk paint looks BUT in every case, they never used the wax! The soft wax is key to Chalk Paint®. I hope y’all follow along with Sand & Sisal on Facebook, because yesterday we were having a wonderful question and answer time with the experts at Annie Sloan Unfolded.
How to Use Soft Wax
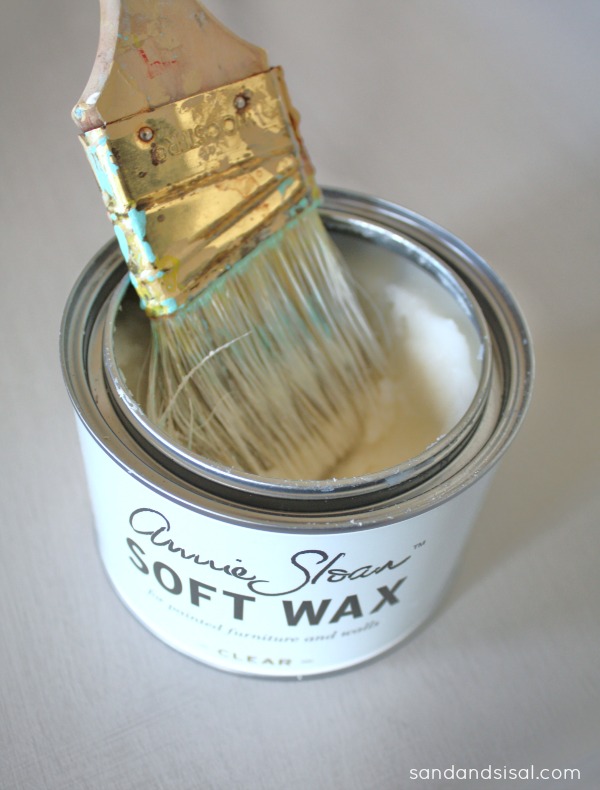
Below is a picture of my clear soft wax by Annie Sloan. The wax has the consistency of Crisco, just not greasy. It smooths on beautifully with cheesecloth or a brush and then you wipe it off in a circular buffing motion and wow-o-wow! After several projects I have switched from using cheese cloth to using an old paint brush. I do not own a waxing brush, but this old brush has been working pretty good so far.
Tips for waxing:
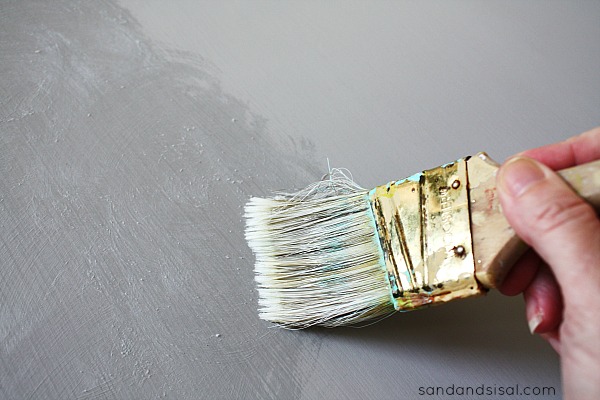
When you are ready to wax, swirl your brush into the creamy clear wax and apply to your surface in a swirling manner. Chalk Paint® is very porous, so you need to work or massage the wax into the paint. You will instantly see how the wax brings out the gorgeous depth of color in your Chalk Paint®. You should apply an even, yet thin layer to your surface. I usually only wax an area of about 1 square foot at a time. Then you need to IMMEDIATELY buff off the wax with either cheese cloth or an old rag, like a t-shirt. Do NOT let the wax sit for any more than 5 minutes before you buff it off. Trust me, this is where most people make their mistake. They wax an entire piece and only THEN begin to buff it off. You are asking for too much work and a sticky mess. Waxing is easy. Keep it simple and small. Wax on and wax off, then move on to the next section.
In the words of Mr Miyagi, “WAX ON… WAX OFF.”
Feel free to add as many THIN coats of wax as you like, just be sure to buff to a shine each with a soft cloth each time. You will be absolutely amazed at the glass like shine you achieve! Just look at the pic below! That is with just ONE COAT OF WAX! My photography doesn’t do it justice, but I promise you, it looks and feels like glass! That is the one thing that everyone raves about, the feel of the surface. It is buttery soft and smooth. This is also the time that if you would like to do any distressing, you can go right ahead. The wax will help cut down on a multitude of chalk paint dust. So distress away if desired, just be sure to give the piece an additional coat of wax after distressing. 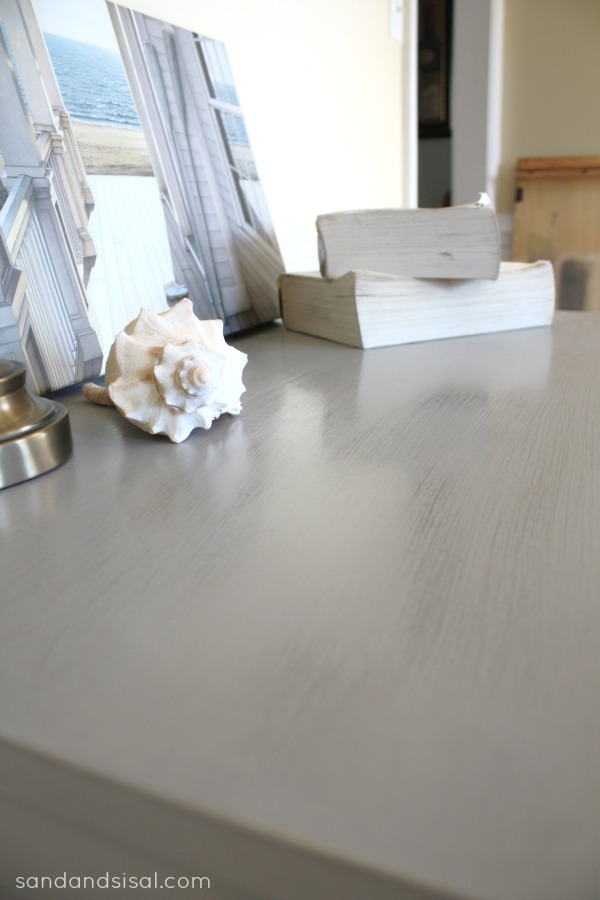
What I love too about Chalk Paint® and the wax is that if my kiddos (all 4 of them) mar up the surface in any way, then it can easily be fixed in just a few minutes without any clue that it was touched up! All you have to do is paint on a thin layer of the Chalk Paint®, lightly sand if needed, and then wipe on some clear wax and voila! Perfection again! Latex does not allow you to do this without visible marks. 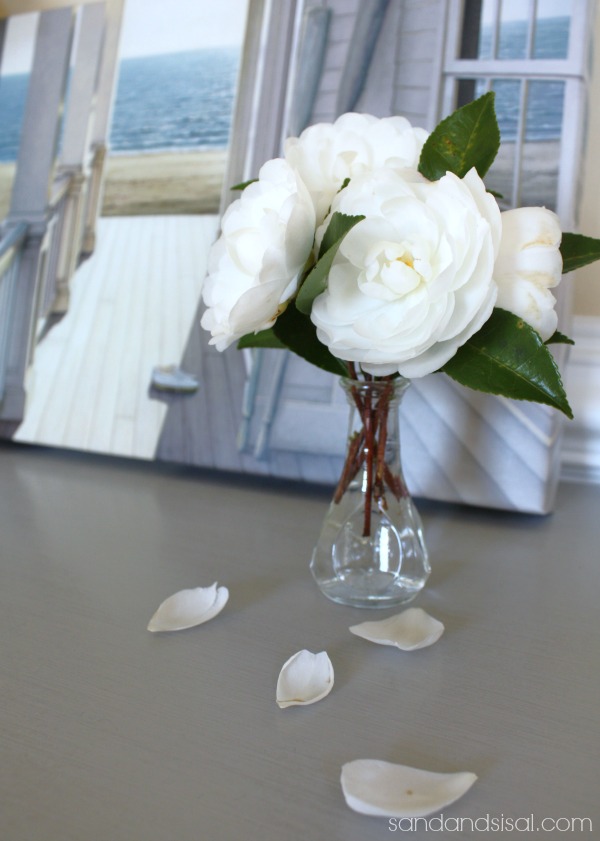
The wax is very water resistant and great for kitchen cabinets or table tops even! Look at how the water beads up. Like water on a duck’s back. 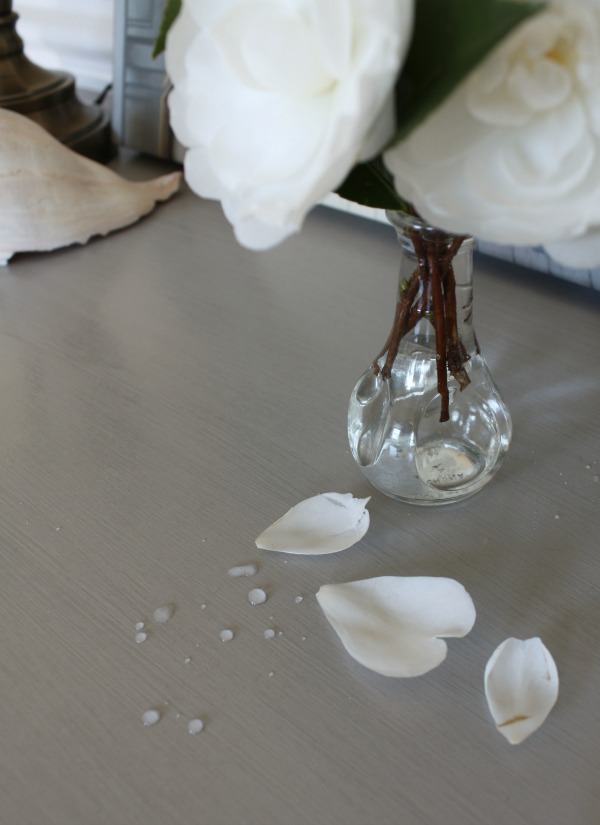
How to Use Dark Wax
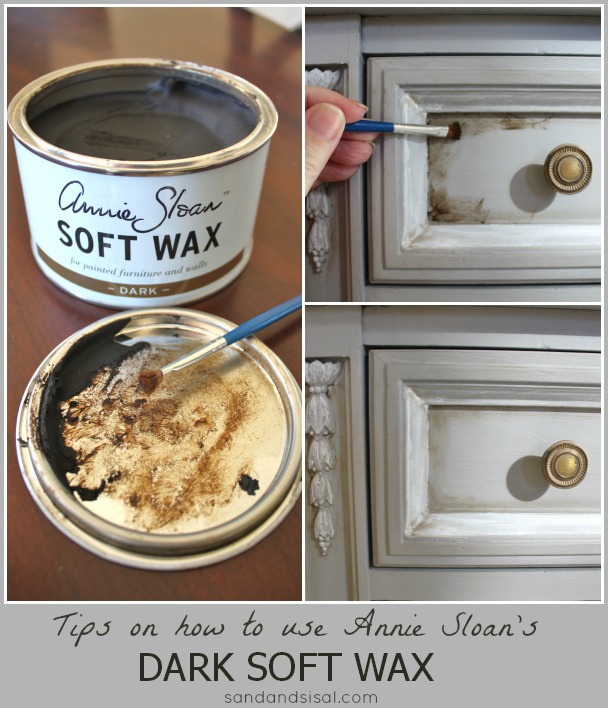
What about the DARK WAX? There are a few very important things you must follow when working with dark wax. First, you always need to coat your entire piece in at least one coat of clear wax. Remember the Chalk Paint® is very porous, so if you apply dark wax to raw Chalk Paint® then the paint will suck in the dark pigment and you, most likely, will not be a happy camper.
To get a bit of an aged look on this dresser I used the dark wax with a stubby paint brush. It doesn’t take much wax at all to create an aged effect. There was a lump of dark wax on my lid and that is what I used. I dabbed my brush into the wax and then worked the wax into the brush by dabbing it more on the lid. I applied the wax by rubbing the brush into the corners and edges. Then I IMMEDIATELY (and I mean IMMEDIATELY, like within 30 seconds) wiped off the wax with a paper napkin. I’d let it sit for awhile and come back and repeat the process if I felt an area needed it.
You can use that same wax wiped napkin or cloth to rub any of the raised areas or edges of your furniture. This will result in a faux distressed appearance. The process is very fast and easy and seriously, please do NOT over think it. Just wax, wipe, and go.
MEGA HELPFUL HINT! But what do I do if I don’t like how the dark wax looks?
Guess what? This answer is easy! Shortly after you have applied the dark wax and you think you’ve gone too far, then rub on some clear wax and buff off. It will help dissolve and remove a bit of the dark, to leave you with the aged appearance you were originally striving for.
I so hope these tips and tricks helped you feel more comfortable and confident to try Chalk Paint® decorative paint by Annie Sloan, soft wax, and her other products. Please share with me your experiences with chalk paint in the comments or ask any questions. I’ll try to answer to the best of my ability or help lead you to the best answer.
Happy painting!
Kim
Linking up to: Tidy Mom

Thanks for showing such a great tutorial. I’ve been afraid to use chalk paint, but you’ve shown us how easy it really is!
Thank you Cari! You are so kind. 😉
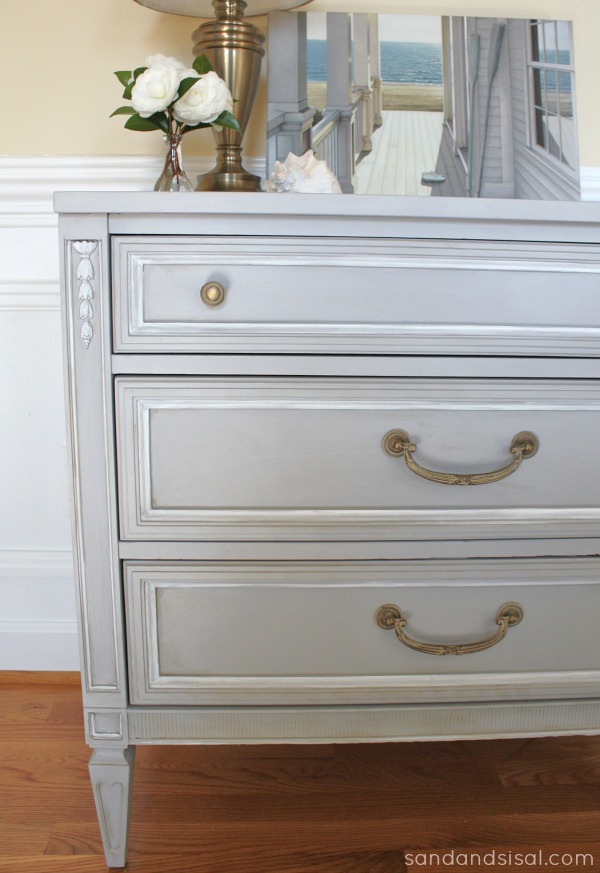
This is just gorgeous! I LOVE that canvas on top of your dresser!
Thank you! The canvas is from Joss & Main.
GORGEOUS makeover Kim!!
Thanks Martina
😉
Great tips…. I haven’t tried the dark wax yet, but plan to.
It’s fun wax to work with. Think of it like an antique glaze, then you won’t be as nervous about it. 😉
oh it’s beautiful Kim!! We actually have my old bedroom furniture (dresser and nightstand) in our room from growing up – they are oak and I’m DYING to change them, but I know people cringe at painting oak…….but I think they would look much more current if I did it and I think chalk paint would be just the thing they need!!……want to come help?
Haha! Sure! I’d love to come to your home Cheryl!!!! Thanks!
Thanks for sharing this technique. I love the look, but didn’t know how to achieve it.
Thanks Brooke!
Pretty chest! Love the color 🙂
Well done, Kim! Beautiful transformation & an excellent tutorial – many thanks for posting.
Thank you Dena! I appreciate it!
Oh wow Kim, this is so awesome! You did a great job and thank you so much for all the fantastic tips! Have a great weekend friend! xo
Thanks Cyndy!
Great post on the correct way to wax!
Thank you Sandi! I appreciate it!
Thank you for this tutorial. I have two Bergere chairs that I have been anting to paint with chalk paint for awhile – the chairs have ratten/wicker/cane material on the backs. Is it possible to use the wax on that? Thank you.
Oh yes, absolutely! You can use chalk paint on anything! Now, I believe that chalk paint is best used when the wax is applied over it. So, if these chairs are to be used outside then you CAN NOT use the wax. Why? Because, being wax, it melts. IE: no direct sun allowed. If these are in your home then, absolutely go for it.
Great tutorial on waxing. I am a decorative painter and just recently went to a clients house to fix a piece of furniture that she converted into a sink. The top had been waxed and the water over time, she had this piece for approx. 5 months, left marks and went thru the wax. There was a ring left on top from a soap dispenser and the water that ran down the side when quests used it. I was surprised that you mentioned waxing kitchen tables and cabinets, from what I have been taught wax needs to be maintained and water and heat is very hard on wax. If you have other info than this I would appreciate your advice.
Thanks
Hi Johda,
Yes, I agree with you that maintenance is the key if using wax as the protective barrier on a counter top. To be honest, using it on a counter top would never be my first choice. But there are some solutions to consider. ASCP does have a lacquer that can be applied to the paint in lieu of waxing. Here are 2 posts that can explain it further. PS: The Annie Sloan Unfolded site and Pinterest board is a great resource of information and tips.
http://www.savvysouthernstyle.net/2013/02/kitchen-cabinets-tutorial.html & http://www.anniesloanunfolded.com/products/other
The lady bought this piece from an antique store and decided to use it as a bathroom vanity. I don’t believe she had any idea the top had wax on it and probably wouldn’t have thoug
What color did you use on this piece? I love it.
Hi Kim! I just found your site and love it! I have a questionn on your chalk paint dresser re-do – can I use chalk paint on fake (laminate) wood, and if so, do I prime first? (I read your tutorial on painting fake wood, but wondered about the chalk paint with wax – love the look). Any input would be helpful. p.s. This piece will go in my laundry room. Thanks!
Hi Joni!
Here is the recommendation from the official ASCP website:
Q. Can I paint my melamine or laminate furniture with Chalk Paint®?
A. There are many success stories from people who have painted their melamine or laminate furniture with Chalk Paint® decorative paint, including pieces from IKEA. A little bit of prep and some patience are needed. New IKEA pieces may be coated with a light oily film for packing and shipping purposes and this should be removed with a cloth moistened with mineral spirits. Lightly sand the melamine or laminate with fine grit sandpaper and dust off. Next, apply a thin first coat of paint, and let dry about 48 hours to encourage the paint to bond to the surface. After that, you can continue painting for your desired look.
Thanks so much for the info, Kim – I finally feel ready for my own laundry room re-do! I will try to send a pic to you when done! Love your site!
I can’t wait to use this chalk paint/wax on an old end table. I’m going beachy so I think the Duck Egg Blue will be perfect. Thank you so much for this very informative paint lesson.
Wow ! I’ve been doing so many things wrong…but, I did like the way my table looks when I used Versailles & dark wax…but, now that I know how to properly use the waxes, I feel better ! I’d heard that wax isn’t good on outdoor items that will take in sunlight…it melts. But, not sure if this is true…on AS website, it says outdoor furniture is fine..but, she may mean only w/ chalk paint, not the waxes….anyway, I enjoy your information. Thank you, as I am very new at this !!
What colour is this chalk pain that you used? It is absolutely beautiful!!
love your dresser- I have a very ornate cedar chest I would like to do with the colors. Could you please tell me what colors you used & how. Thank you
Thank you so much Rita! At the very top of the post I link to the dresser makeover Part 1 where I explain how to paint the dresser and what I used. Here is the link to the full tutorial https://www.sandandsisal.com/2013/11/chalk-paint-dresser-makeover.html
Thank you for sharing, I love the dresser makeover it’s lovely and has inspired me to try something similar with an old coffee table I have that’s in need of some TLC :
Thank you for this! This is by far the best tutorial I have seen!! I have my chalk paint, my furniture – and now I just have to go for it!!!!!
Why Thank you so much Lilli! That is very kind of you to say! Send me a before and after pic of your furniture piece if you want! You never know, I just might share it on my FB page!
All my best,
KIM
I definitely will Kim! I’m wondering – how much do you have to prepare the piece before starting it (if you don’t mind me asking you)? The nice man in the store was trying to sell me a degreaser, but said I could just use any degreaser home – just not murphy’s oil soap. Is a damp cloth enough? In all the ones I’ve seen, I don’t remember a degreaser being mentioned…. :/ If you don’t mine letting me know – that would be great!
Oh, btw, when i’m done with the desk, I have a gorgeous wing chair that will be next – painting it up! I just wish I knew how to stencil! Thanks Kim!!!!
Just make sure it is clean, free of grime, grease, dirt, and dust. You need to make that judgement call based on the age,color and type of finish that is currently on the piece of furniture. For my dresser, which had basically a faux wood grain laminate type finish, I simply just sprayed it with my favorite all purpose cleaner (Target’s Method brand).
Thank you! Ok – then I’m going to start one drawer on this desk! lol. There really was nothing on it – it’s a dry piece of wood – looks like someone stained it 10 years ago – lol. I’ll send pics when i’m done!
Hi Kim!
Well I did it!!! I was a labor of love – I must have painted and repainted it 10 times but I’m happy how it came out – When I was almost done with the desk/vanity – I found a chair. I do have before and afters – so let me know how I can show you them! Every time I see someones pics, I think of new ways to play around. I have two side tables I’m going to do next – AND I learned the easiest way (for me) to apply a graphic using wax paper!! Can’t wait to show you that one! I’m in a cast right now, and wouldn’t be able to paint in all the lettering by hand, but this was perfect!!!
So excited to show you!
Thank you for the tips. I wish I’d have read them BEFORE I attempted to paint! 🙂 At least I read it before waxing! I too was scared to try this kind of paint, but I am finding so far that it is so easy to work with and so far I really love the look.
I have a bare wood table I want to seal. Can I use the clear wax on it? Or does it need to have a stain?
Hi Mae! Absolutely! Go ahead and use the wax. It does not need to be stained to be protected by the wax.
Thanks for the great tutorial! I just bought a dresser which was painted and distressed already, but unfortunately it was the wrong shade of blue! I would like to try the chalk paint and waxing but was unsure if I need to strip the paint off first? Or can I just paint over it? Also, this is my first project. Thanks for your help!
Hi Kim!
That’s the beauty of chalk paint! You can use the chalk paint directly over the old paint. Because it was already distressed, that texture will be apparent but will most likely add even more character to the dresser. I always like to used a fine grit sanding block to lightly scuff up the surface so ensure the paint sticks really well. And make sure to clean the dresser well before you start painting.
Happy Painting!
KIM
what colour did you paint that dresser?
The color is Paris Gray. There is a link to Part 1 in the first paragraph which gives all painting details and directions.
Ok so I need help. I painted this cute mini secretary about 2 months ago. Then I applied the wax (a day after the second coat) ASCP pure white, over the whole piece and I wiped it off but it’s not really off. I realized about a week ago that it was tacky andi need to buff it because I unknowingly skipped that step. Big but. Now it’s dusty. I tried buffing a tiny spot and the dust buffed into the wax. It looks dirty. What do I do? First time ever on the paint and the wax.
Hi again
when i waxed with the cheese cloth it took all the paint off? i let it dry for 72hrs?
but only did one coat? could that be y?
i have now painted over it again, can i paint over the waxed area?
Hi Sheena,
Hmmm, that’s pretty rare. I’m not sure. Here are a few reasons that possibly could have caused this: 1) the wood surface was not cleaned properly (the paint will not adhere to an oily surface). 2) the chalk paint was not stirred enough. 3) the single coat of paint might have been applied too thin. And to answer your question, yes, you can use chalk paint over the wax. I recommend lightly sanding that area first, wiping it down, then painting. Also, be sure to use a soft cloth to buff the wax. You can use cheese cloth to apply the wax but I recommend a softer cloth for buffing.
Hope that helps 😉
How did your dry brush the drawers without going outside the lines? 🙂 I’m having a hard time with it, even after watching a few YouTube tutorials. Any tips on dry brushing? It seems like a tricky thing to master.
Hi Tabitha!
I’m sorry you are having trouble with it. I actually explain how I did the dry brushing in “Part 1”. There is a link to part 1 at the top of the Part 2 post. Go ahead and check that post out. Also, if your hand isn’t quite as steady as you like and find that you are placing paint where you don’t want it, then I find it helpful to have a damp wash cloth on hand and simply wipe off any mistakes immediately after. Hope that helps! 😉
All my best,
KIM
I recently purchased a small shabby chic anquie French dresser. I bought it home and went to wet dust it and clean it up. The paint started coming off. This is for a child’s room so it has to have a dust able and wipe down surface on it. Next I tried some sort of clear coat in a spray can. And it feels rough and still dusty when I run my finger over it. Then lightly sanded. Now Lowes told me to do polyacrylic but they didn’t have it. Then I went to ace, and they told me something different but I didn’t want to buy a gallon. So I’m thinking about driving 40mins to go buy Annie Sloan wax and maybe paint. Here is my question; can I just wax over the top of this paint that was rubbing off when dusted with a wet cloth or is this going to get messer and keep rubbing off. And if I get really adventurous can I paint over this with Annie Sloan or will it make the Annie Sloan paint rub off to since the base not stable? Help, I have spent more and and money on trying to fix this dresser than it cost, but now I’m into it. Or should I just totally sand it down. It seems like the first person applied some type of white paint over the dresser without prepping the surface. The original surface since I can see it in the rubbed off shabby distressed has a super suing smooth top coat like something you’d buy from thomasville or Drexel.
Hi Tiffany. This is not what you want to hear, but if the paint is coming off that easily with just dusting then that tells me it wasn’t primed or painted properly to begin with. Most likely the previous person used latex paint over oil based paint. You will need to sand it down (use an electric sander) and start over. If it is truly antique, then you also need to test the different layers for lead paint, especially if it is going in a child’s room. I’m so sorry.
Thanks for the advice. I’ve re-read part 1 &2 several times and also some other Annie Sloan blogs, etc. I still have one question that I’m confused about. Can Annie Sloan paint really be applied over any surface without sanding, primer, etc. The little dresser I’m working on os not a true antique, I’d say it’s late 1980ish Drexel or ethan Allen county french style thing so no lead based paint. However under the crappy latex paint I’m going to sand off, it has this varnish, shellac or lacquer type clear finish on it? Does that need to be sanded off completely? I also have this other little table I want to do now but has some sort of varnish type coating on it. I really appreciate your in sight.
Most likely it does not need to be sanded off. Here is a great thread on FB that talks about this issue : https://www.facebook.com/FrenchCountryCottage/posts/308091165874204
I would like to re-finish my kitchen cabinets (not countertops), but I am concerned about your comments that wax melts. In a room that gets warm when the oven/range is heated, is this a concern? Also, I live in Texas, so summers routinely get in the mid- to upper-80’s indoors, even running the air conditioning. How hot is too hot for wax? I don’t have direct sunlight on any of my cabinets from the windows, which is a plus.
No, don’t worry about that. Tons of people have refinished their kitchen cabinets with ASCP and the wax. If you visit Annie Sloan Unfolded (their website0 then you will see all the possibilities and forums. They just do not recommend using the wax outside in blazing sun. I’m in Virginia Beach and our summers are in the high 90’s-100 and all my indoor pieces are still looking great. (I keep my AC at 78 in the summer)
I didn’t realize you were supposed to buff so soon after you apply the wax. What can I do if I already applied the wax and it has been there for days before buffing?
This piece is beautiful Kim! And it’s kinda crazy, I repainted it’s big sister just a month or so ago 🙂 I found the matching tall chest of drawers on Craigslist and finished it in Duck Egg with white accents and dark wax. It’s on a post titled “One Day Chest Makeover” on my blog, check it out if you get a chance. We both highlighted the exact same areas in white!
Thanks for the great tips!
I’ve just completed 3 projects n Annie Sloan paint. And used the clear wax. I was noticing the can says you can tinit the wax with paint? To make colored wax. Any experience with this. I was thinking of trying to make a gray wax instead of the brownish dark wax.
I have also seen that you can tint wax to any color and it will add such awesome dimension to your painted piece. You can do any color, and I think you can do any kind of paint too. I was going to tint my Minwax clear wax and do the same thing as a dark wax because I don’t have Annie Sloan’s wax at the moment. Check it out on pinterest and see what paint is recommended. I think you can use any. Gray wax would look awesome, I was thinking about making a white wax too which would look cool.
Hello! Do you just wax the top? Or do you wax the entire thing after it’s chalk painted?
Hi Liz,
You wax the entire piece. 😉
Thanks,
KIM
HI! What color of chalk paint did you use?? I love this!!!
Thank you Lisa! It is Paris Gray. I love the color too! Here is the link to the painting tutorial https://www.sandandsisal.com/2013/11/chalk-paint-dresser-makeover.html
hi there!
I recently redid a crib and dresser and although I love the colors I let the wax sit for way too long and didn’t even attempt to wipe it off because I didn’t know that was a step I needed. I stupidly just dove head first into painting and then waxing it without really reading up on the proper steps.
My question is….is it too late to buff the piece? You can see my paint brush strokes from the wax and where the wax was applied a little heavier than other areas.
Thank you!!
If u already have a piece painted with flat black paint… can u use the wax over it without having to repaint? Thks for the great tutorial!!!
Hi Bobbi!
You can finish most furniture with wax. The wax will give the flat black a bit of a sheen and protect the finish.
Thanks!
KIM
Hi Kim,
I have been looking how to fix a few pieces I bought that I was told had been painted in ASCP. I had never heard of this paint before…but I loved the furniture. (I hate showing my ignorance.) Now I have fallen in love with it after reading your part 1 and part 2 and can’t wait to get started!
The pieces I purchased have only 1 coat of the pure white color, however I love your example with the Paris Gray.
My question is, would you recommend me doing 2 coats of the gray, or would one be enough?
The handles are all painted too so I am not sure how hard it might be to remove it.
I have at least found a place I can buy it here in Australia, but it is miles away, so I want to make sure I buy the right things before I start.
Thanks again for a great tutorial and giving me the bug to really make these pieces look fantastic! 😀
Hi Susan! You most likely will not need to apply 2 coats of the gray. But see how you like it after one coat and then proceed from there. One can of the paint will cover several pieces of furniture so don’t worry about not having enough paint. 😉
Now are far as the handles are concerned… I’ve never tried to remove the paint from hardware before. You might want to research that a bit. You can always switch out the hardware or spray paint it to a metallic color you prefer.
Have fun painting!
KIM
Thank you!! I can’t wait to get started. Everything I look at now I imagine how it might look with a coat of ASCP. 😀
Wondering if I should wash my wax brush afterwards and how would I do it if I should?
I haven’t personally. I keep one brush solely for wax. It’s just an old paint brush. You might want to search the official Annie Sloan Unfolded website for answers to that one. 😉
Hi Kim,
I think my comment has landed in your spam! I want to go shopping, but want to hear your thoughts on what I should do. Thanks!
I found it! 😉
I was so happy you did!! 😀
I am a newby and am starting with a table, 8 chairs, 3 leafs and a china cabinet. I have been researching and I believe you have really helped me. What I want to know is, after you clean, primer, paint, repaint, then wax, can you polyurethane it to keep it from chipping or scratching? Also, I think I am understanding that using dark wax is the same as antiquing? I’m looking for a clean finish and not a distressed finish. Thank you for your help. Your pieces are beautiful. Loveta
Hi Loveta!
Wow, you are taking on a lot for your first time! Priming isn’t necessary unless the existing finish is heavily laquered or if the wood has a tendency to leak tannins like mahogany. Be sure to use superfine sanding block to get a buttery smooth finish after painting. And yes, you can think of the dark wax as an antiquing technique. The clear wax is sufficient for your pieces, you can’t poly over wax. It will protect the furniture and they should not chip or scratch easily at all. The gray dresser I show has been used in my daughter’s room and she is NOT gentle with it. After 2 years it still looks fabulous with no signs of wear. Hope that helps! Best of luck! ~KIM
I refinished a small dresser that I put in my living room. I put come picture frames and a candle on it. When I went to dust, I noticed the items on top had left a mark. When I inquired at the store where I bought the paints (Annie Sloan) they said I needed to “seal” it with a clear sealant even though there was wax on it. Do you find the same thing?
Hi Tina,
No, I’ve never used a clear sealant over the wax. I’ve also never had any problem with marks being left either. I’m not sure what to tell you. When you say “marks” are your meaning discoloration or indentations?
The beauty of chalk paint is that you can easily touch up those areas though with the paint again, then lightly sand the touched up area with an ultra fine grit sanding block , and re-wax (lightly) and immediately buff to a sheen.
~KIM 😉
Thank you so much for the straight forward approach to your tutorial. It’s great to get to the point! I’m going to try your applications today!…….I hope…….after groceries, laundry, dusting, vacuuming…..lol!!! Lisa
Thank you Lisa!
I am having such an issue with lint. I thought your cheesecloth suggestion would work but it seems to leave more lint than my tshirts fabric scraps. Any suggestions? It drives me crazy.
Hmmmm, I’m sorry about that. Use what ever works best for you. There are no specific rules for the type of cloth to use. Cheesecloth is just what I’ve always used and had on hand and I haven’t had a lint issue with it.
I think the issue was that I used the paint color graphite which is really dark and any light colored fabric was leaving noticeable lint. I switched to an old black tshirt and that worked much better.
i have chalk painted kitchen table put sealer on when dry it showed brush marks what am i doing wrong
When you say sealer, are you meaning the wax?