Have you ever achieved something you didn’t think you could accomplish? I’ve laid a floating laminate floor before, but never a prefinished hardwood floor. That required a floor nailer, which scared me because I had never used one. There was no way I could do this…. could I? Yes I could! Installing hardwood floors was easier than I thought.
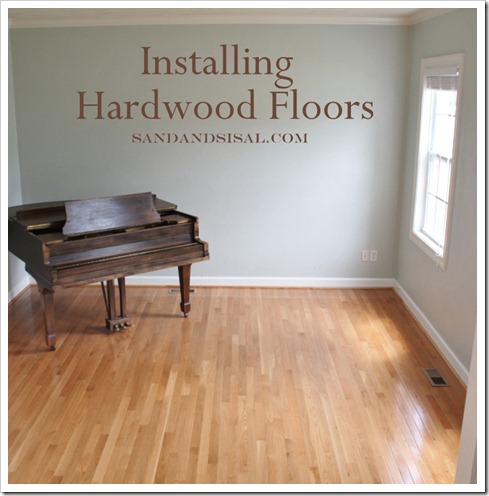
Installing Hardwood Floors
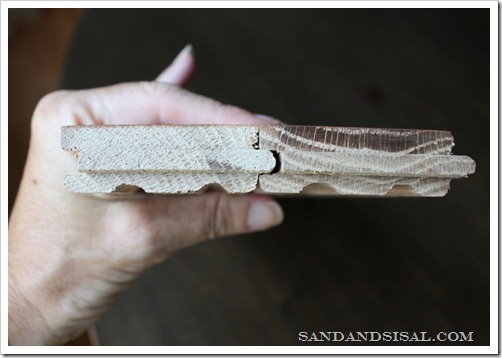
Back in the winter I showed you all how we had ripped up the carpet in our music room and painted the subfloors. We had removed all the baseboards and bought prefinished 3/4” solid oak flooring in Butterscotch by Bruce. This was the closest match we could find to our existing hardwood floors. The flooring is tongue and groove which locks the planks together.
Preparation and safety are key before starting any DIY project that involves power tools. 3M Tekk has all the gear you’ll need to keep your eyes, ears and lungs safe during construction. I love my 3M protective eyewear. They are comfortable, and I have a pair for inside and outdoor use. Stylin’! And trust me on this next tip, you will want to use the 3M ear plugs. After a while, the saw and nail guns drive your ears crazy!

To install hardwood floors you will need the following:
-
Prefinished hardwood flooring
-
3M Tekk Eye & Ear Protection
-
miter saw
-
Pneumatic floor nailer, rubber mallet, and flooring nails (day rentals at most hardware stores)
-
Chalk line or string
-
Carpenters square
-
Pencil
-
Scotchblue tape
-
optional tools: small crow bar, nail pliers, hammer.
I put together a short video that explains how I installed the flooring and reveals some really cool tips and tricks that will save you time and frustration!
Installing Hardwood Floors – video tutorial
When installing the first row of planks which will butt up against other flooring, you must make sure your row is perfectly square. You don’t want a crooked looking flooring right? Interlock a row of flooring down the length of your wall (you are basically doing a dry run). Set a carpenter’s square against the existing flooring and your row. Adjust the row to achieve square. I have a very large carpenter’s square but because I had a pillar in the way I had to use a small one. Use a large square if possible.
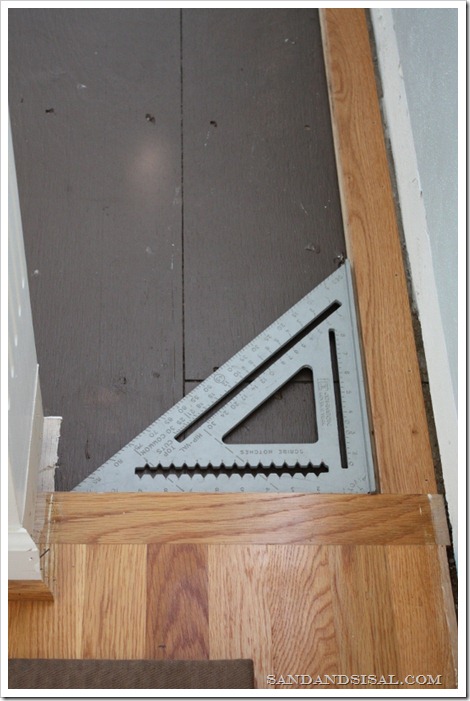
Using a chalk line (mine broke right at this point.. of course…) or string, stretch the line along the carpenter’s square and row and snap a guide line. This is the line that you will make sure your row of flooring aligns with.
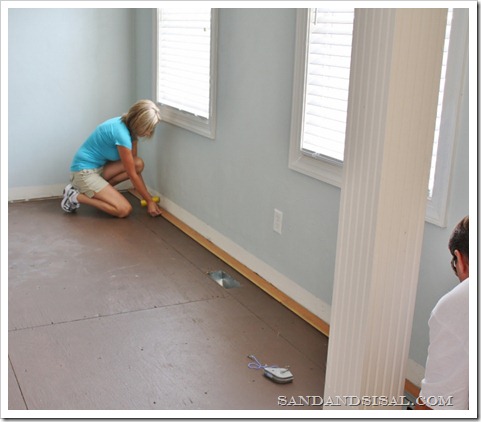
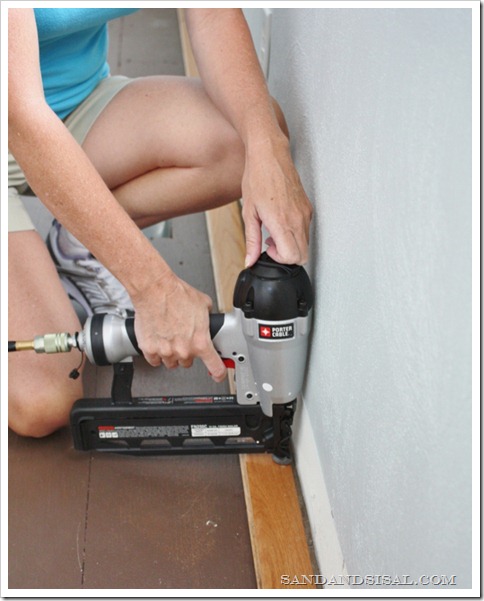
Your pneumatic floor nailer will not fit on the first row of flooring, so you will have to nail it with a nail gun. Be sure to nail in the center of the board and not near the groove. You can fill the tiny holes with wood filler later. Follow the flooring manufacturer’s recommendations on which nails and spacing to use for the pneumatic floor nailer and nail gun. We put nails about every 6-8 inches. After this first row is done you are good to go!
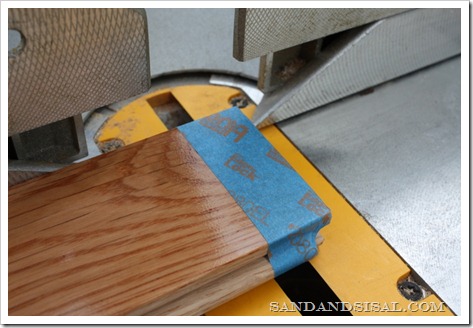
Each box of flooring will come with about 7 different lengths. Be sure to stagger the lengths of your boards so none of the joints are too close to each other. When you come to the end of the floor, near your wall, you will have to make a cut. (Be sure sure to watch my video for a cool trick that will save you tons of time and headache measuring!) To prevent splintering when you cut your boards, you can wrap the end in 3M Scotch Blue tape before you cut. Remove your tape after cutting.
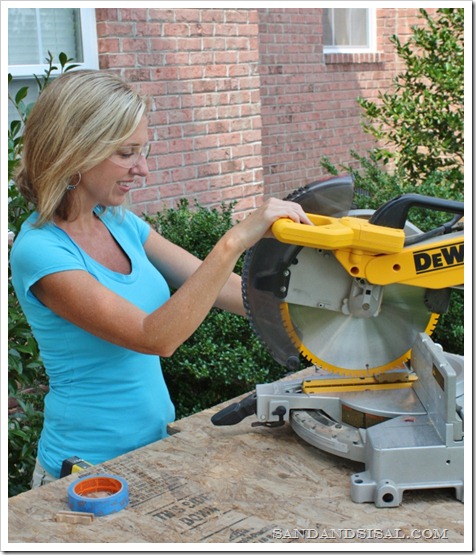
Always wear your 3M Tekk protective eyewear and earplugs when using the saw or nail guns. Pretty stylin’ huh? I cut all my flooring board with my favorite gift ever… my miter saw!
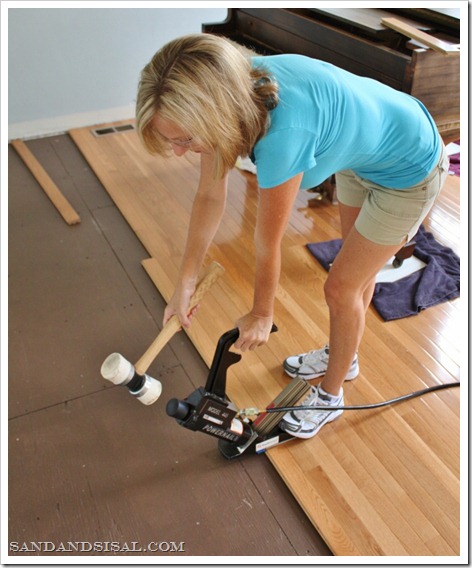
When you rent the pneumatic floor nailer it will come with a rubber mallet. Use the mallet to tap in stubborn pieces nice and snug. Line the floor nailer along the side of the plank, keep a foot on it so it won’t move, depress the finger trigger, and firmly strike top with the mallet. That’s it! It is seriously easy.
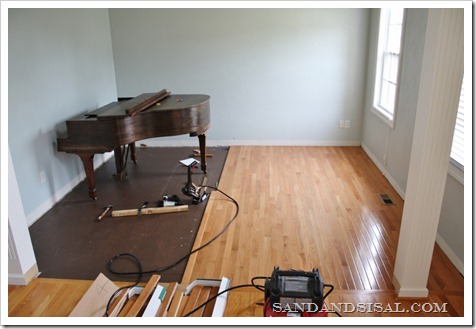
My piano weighs about a ton (literally) and we needed to work around it. The pic below is the floor almost done. I was getting excited!
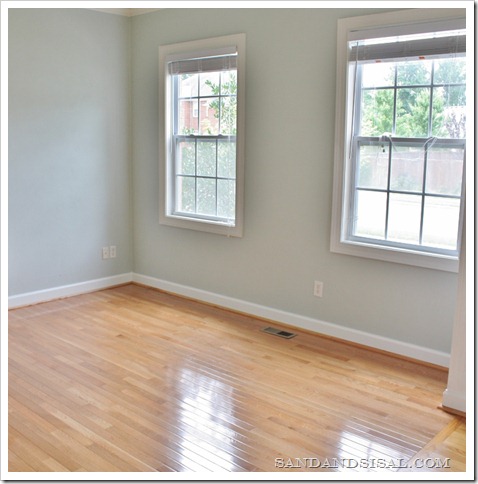
Ta-da! It’s finished! I’m so excited that I accomplished installing hardwood floors, a project I was terrified of trying.
 You all know what comes next…the fun part… decorating this room! Yay!
Kim
For more ideas stop by 3M DIY Starts Here, Facebook, Twitter, & YouTube
This post is a collaboration with 3M DIY. To learn more about safety and preparation, visit 3MDIY.com.
Join Sand & Sisal on FACEBOOK, TWITTER, PINTEREST, G+ or SUBSCRIBE.
of all the DIY projects around my home this is one that I have never tackled. Impressed!! Can’t wait to see the room.
It all looks GREAT! What a big project to tackle!
WOW, that is pretty amazing! I thought you had to have coveralls and a beard to install a new floor – you made it look like a project that I’d actually be able to do. Thank you for the great tips and tricks as well.
The floor looks lovely – So wonderful that you did it yourself. Inspiring!
It looks fabulous Kim and you made it look so easy! Congrats on your beautiful new floor… You must love them! xo Jenna
Your new floor looks fabulous Kim!!
Thank you Martina
Beautiful!! Seeing you install the floors DIY style makes me a little less scared to try something like that!
Thanks Sara!
Ok if you can do this, Bill can do this. All of the newer houses here in CO have carpet everywhere except the kitchens and foyers. I miss my hardwood floors and I have vowed that when we buy I am putting in hard wood all over the main floor. Love you!!
Oh whatever you do to your home will look amazing my friend! You have fabulous taste! And I swear you can do this! Miss you!
Your floors look fabulous and what an accomplishment! I had no idea 3M had earplugs and they look comfy! PS. great job on the video
Thank you Jess! They are comfy in fact. I used them especially when I’m using the electric sander.
Totally impressed. I want to do this so bad. Great job and thanks for the tutorial!!
Thank you! If you DIY at all and are comfortable with a miter saw then I promise you can do this!
Looks so beautiful, Kim! We’ve attempted to do this before and it felt great to complete the room. I’m sure you get the same satisfaction when you see your beautiful flooring now.
I do! My hubs always said we could install the pre-finished flooring ourselves and I fought him tooth and nail on it. I swore we’d screw it up, but wow, it was so much easier than expected. THANK YOU!
Great job!! I may have to give this a try. Never realized 3M made all those things.
Thank you! They make a ton of great DIY products.
Kim! You are Awesome- HIGH FIVE girl! Loved the video, you made it look so dang easy! Thank you for sharing all your knowledge with us!
Oh thank you Jen! You are too kind!
Great job, Kim! You are just a DIY Rock Star now. Your video was good too…nice to hear your voice! This post is a fabulous, Pin-worthy tutorial.
Thank you Amanda!
great job! lots of good tips. I’ve done floors, but they were floating…so I didn’t have to nail. It was a challenge, but it felt so good to achieve it and see the beauty of it all.
gail
Oh my goodness, it looks beautiful! You did an awesome job.
The floors look amazing! I wish we could get rid of our carpet in our living room and do wood too. You did a great job putting the floors in.
Awesome job on the video Kim and your floors are gorgeous!
Kim you did a great job on both the floors and the video–you are a natural!
I love it! You just inspired me not to use laminate when we re-do the flooring in our foyer. Thanks for the inspiration!
So impressed , Kim! Great job girl. I’ve helped install prefinished like this before & it’s not so bad. Since I had a whole house to do this time, I let a pro handle it. You did a really nice job, kudos on the tools too!
Now that is impressive Kim…just beautiful!
Okay, come on over to PA and help me lay a floor in our master bedroom :). Great video and awesome tips! You’re so cute :).
You make it look so easy. I never thought the steps could be as effortless as this one. I’ll definitely recommend this kind of project to a friend of mine who’s doing some repairs on her house.
The floor looks great! I got so carried away that I left another comment on your post from last February…lol.
Hee,hee, I saw it Karin… Thank you so much! ;)You made me smile. (and I’m envious of your dark floors!)
Girl! You are so multi talented!
Great tutorial, i am sure it will really helpful for those who are planning to install hardwood flooring on their own, this certainly helps to save some money but basic knowledge and skills are required to do this job.
Thank you for some other great article. The place else may
anybody get that type of info in such an ideal manner of writing?
I’ve a presentation subsequent week, and I am on the search for such information.
cleaning hardwood floors
Also visit my web site: hardwood floors installation
Hi! It looks like there’s a gap between the first plank of wood you installed and the wall. What did you do to fix that gap?