This is a sponsored post written by me on behalf of Nationwide Mutual Insurance Company. All opinions are 100% mine. Nationwide provided me with information regarding its blog post.
Let’s talk installing and refinishing hardwood floors. You all know the long and arduous process we went through last year when our kitchen and family room was flooded by a dishwasher malfunction. The best thing that came out of the ordeal was a new kitchen and newly refinished hardwood floors. One of the top questions I receive is about refinishing the floors. I learned so much throughout that process and today I want to share my insight and tips for installing and refinishing hardwood floors.
Choosing Hardwood Flooring
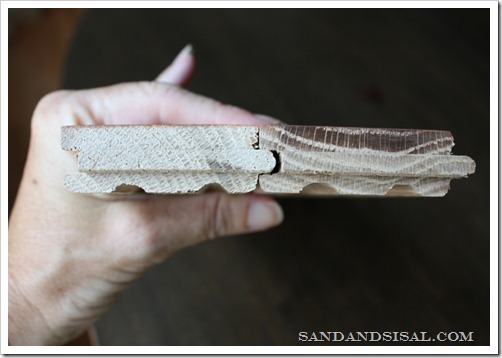
Over the years I have installing many types of flooring, hardwood, laminate, prefinished (engineered) hardwood, tile and vinyl. My personal favorite flooring for any home is solid hardwood flooring with prefinished hardwood as a close second. Both choices can add value to your home. Many of you might not know but I was a former Realtor and I saw first-hand how homes with hardwood flooring sold faster and for more money than homes with other types of flooring. A National Association of Realtors study indicates homeowners are willing pay an extra $2,080 just for hardwood. Hardwood and prefinished hardwood floors are an investment, but it is an investment that can deliver nice returns! Prefinished or engineered hardwood is made by fusing layers of hardwood together. The bonded layers create planks with strength and stability. Engineered hardwood can be installed in baths and basements because it tolerates higher levels of humidity. Installation is done though nailing, or gluing, or installing a floating floor system. Click HERE to see my video tutorial on how to install prefinished hardwood floors. 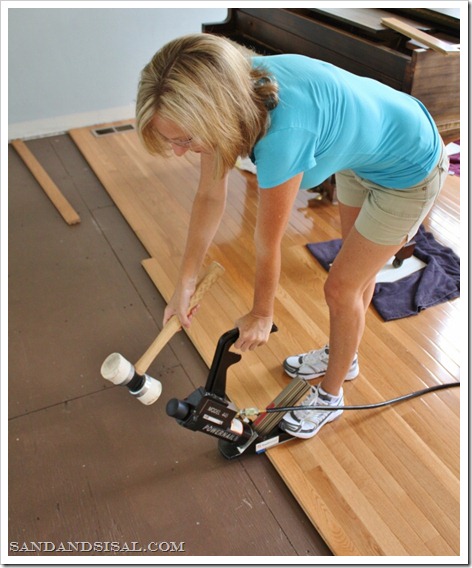
Solid hardwood flooring is made from a solid piece of wood. The advantage of solid hardwood is that it can be sanded repeatedly and will last for decades. Installation requires nailing the planks into to a wood subfloor. A disadvantage is that solid hardwood is susceptible to moisture damage and therefore is not ideal for moisture prone areas such as bathrooms or basements.
Questions to Ask Before Refinishing Hardwood Flooring
The average home with hardwood flooring most likely will need refinishing once every 10+ years. We found this true in our home which is less than 10 years old and though most of our floors looked ok, the areas that had high traffic were worn and scratched. In our specific situation, 1/3 of our hardwood oak flooring had been damaged by the flood waters and needed to be ripped out and replaced. This was an opportune time to refinish the entire existing flooring and make it our own. Here are some to questions you should ask before refinishing your floors:
- Can your floors even be refinished? You need at least 1/8″ hardwood to be able to safely refinish the flooring.
- Can you tackle this job yourself or do you need to hire a professional?
- If I hire a professional what should I expect?
- What steps do I need to take to prepare?
- How long will the process take?
- Do I need to move all furniture out?
- Do we need to stay elsewhere during the refinishing process?
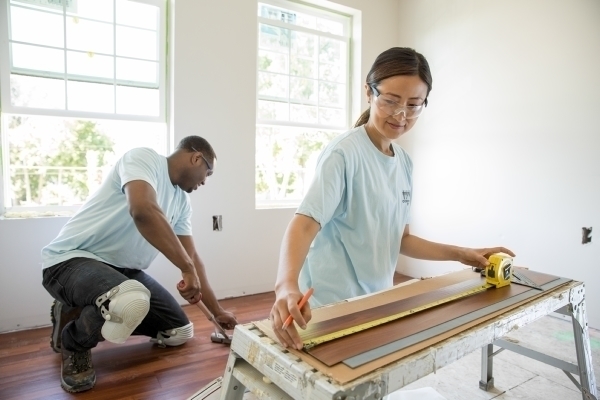
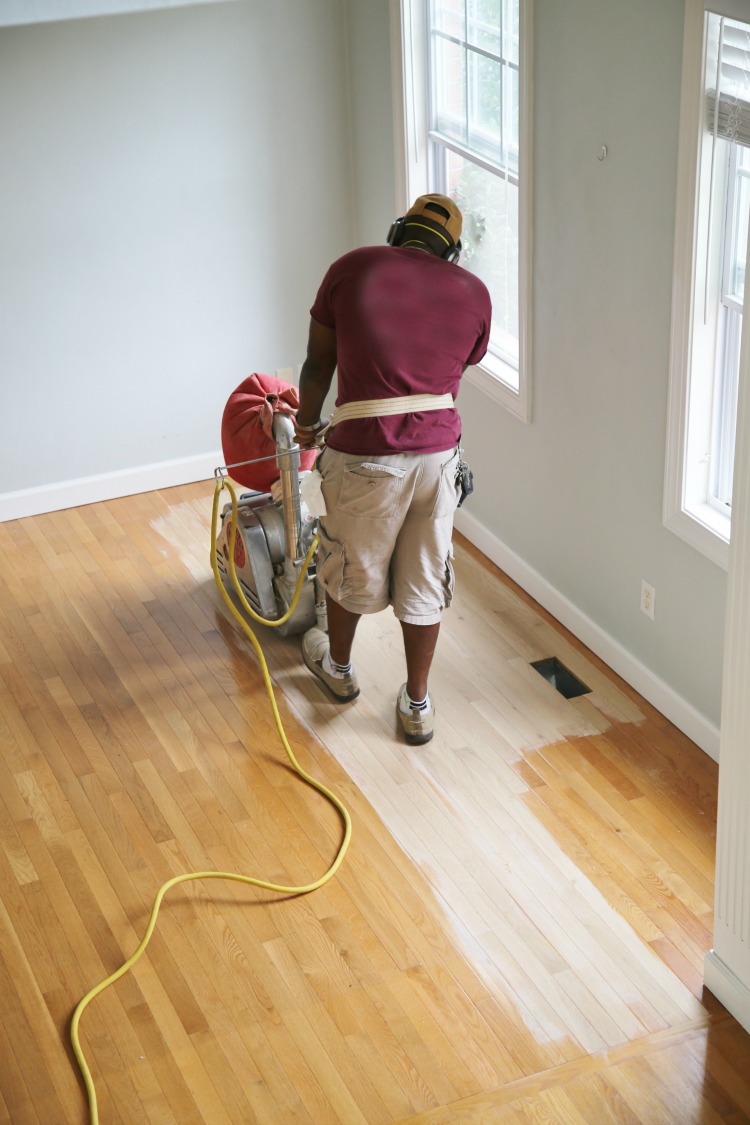
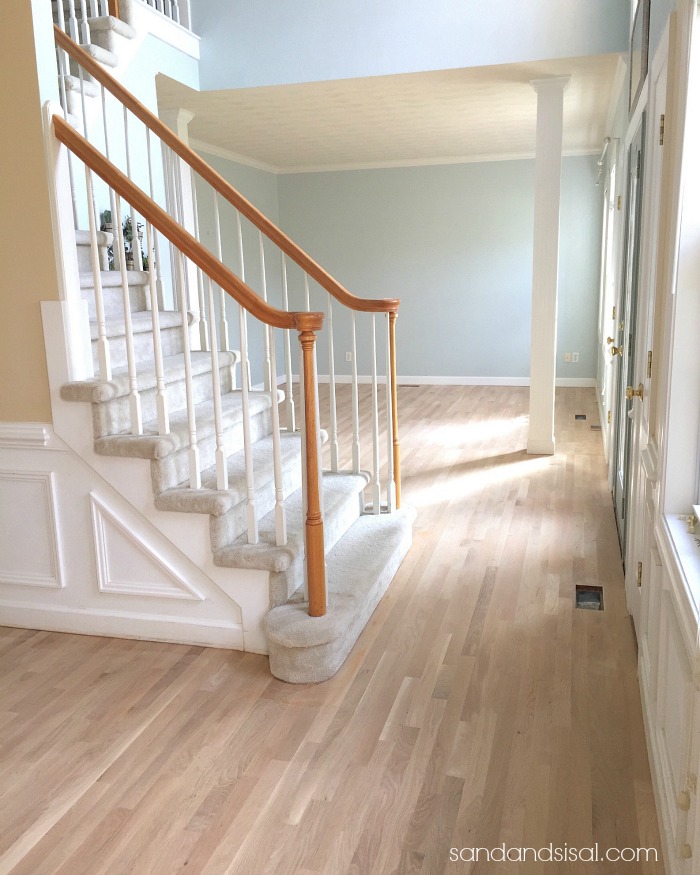
In our home we had a mix of original solid hardwood oak flooring and one room that was prefinished oak hardwood flooring. After the flood damage we chose to have professionals take over the job because of the square footage, but a smaller space could be manageable if the homeowner is detail oriented and has ample DIY skills. Sanding is the largest and most important factor when it comes to refinishing flooring. Industrial sanders can be rented from big box stores. Whether you decide to hire the job out or do it yourselves, invest in the “dust-free” sanders. This is a must. They minimize the amount of dust but will not eliminate it. A separate smaller sander will be required for the areas along the walls. Be prepared to turn off your AC/Heat units while sanding, otherwise the units will disperse wood dust throughout your home. Put up plastic tarps and tape off any areas of the home that you don’t want effected by the dust. Proper sanding needs a series of passes over the flooring with different sand paper grits. Nationwide has a great article that walks you through the order of sand papers to use. Click HERE for instructions.
After sanding, the floors need to free and clear of all dust particles before staining. Try not to walk on the floors with bare feet. The bare wood floors are sensitive and will absorb your skin’s oils and sweat which then will effect how the stain absorbs into the wood.
Staining and Sealing
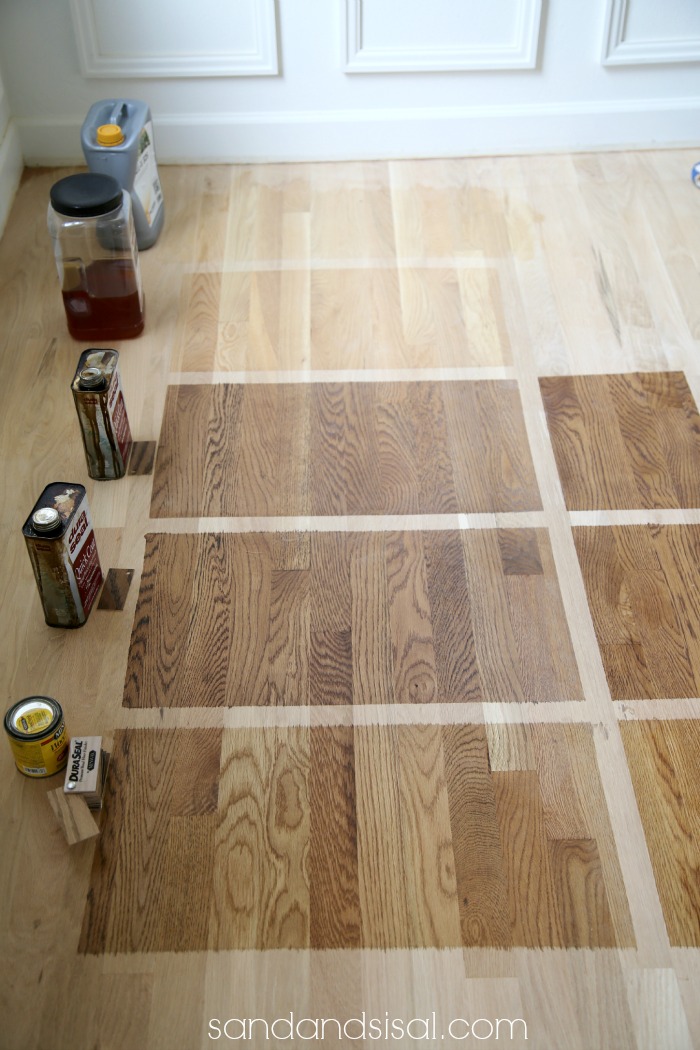
Choosing a stain is the fun part! Stains will appear differently depending on the species of wood flooring you have. It is always wise to choose a few stain colors and sample them on the floor. Apply the sampled swatches near a window where you have good lighting. Two coats of stain will give you the best results. Once the stain color has been chosen, you can simply sand off all the stain swatches, eliminate dust and prepare for the first coat of stain. Use a high quality stain, applying the stain with the grain. Apply two coats and allowing 3-8 hours of drying time after each coat.
The final step is a sealant. Depending upon the type of sealant you choose, make arrangements to sleep elsewhere for a period of time ranging from a few days to a week. Polyurethane sealers are oil based and have a much longer dying time. They also give off strong odors while drying. They also have an amber tint which can yellow over time. For our floors we chose a water based sealant because it is crystal clear, is stronger than polyurethane and dries very quickly, allowing us to return to the house after just 2 days. Two coats of sealant are standard but for our home we decided on a 3rd application. Be aware that the new water based sealants are more expensive but have low to no volatile organic compounds (VOCs) and come in an array of finishes (matte, satin, semi-gloss, and high gloss).
The entire appearance of a home can be changed with refinishing. Whether the choice is to hire a professional or take on the job yourself, make sure to do proper research and get recommendations from trusted friends and neighbors. Refinishing your hardwood floors is a worthwhile investment giving years of beauty and enjoyment. Click here to discover The Art and Craft of Refinishing a Wood Floors and wonderful tips for your home.

Thanks so much for this post. Our home was built in 1968 and has had many owners until us (23 years). We had our living room and dining room refinished as they were hardwood by a professional. We did it this way simply because we went on a summer holiday and the cat was kept upstairs and the boys (big dogs) went to the kennel so virtually no hair. The floors are done in a matte finish and he did a really good job.
However your comment about hardwood being the top seller may be true in the US but here and especially in Manitoba we went for a tile (15.5×15.5). We needed something durable and pretty much maintenance free or easy. Since we love stone we bought a product called Duratile and we swear by it. The colour we picked was Tiger Eye which had browns and a cream swirl very much like an Indian Slate from India. Rough surfaced and grouted it looks like we went for the real stone. Our two blonde dogs’ hair disappears until almost puppy size. Just joking, I am a clean freak. So now the question we face is how to do the upstairs hall and 4 bedrooms as the floors are in really rough shape and some of the varnish has disappeared because of the tape that was laid down to keep carpet in place from all the other owners. Moving bedroom furniture out etc. is a big job and I would prefer to do each room individually but that isn’t cost effective so we just put it off 🙂
Love your posts KIm happy New Year!
Hi Nancy! Your 15×15 tiles sound gorgeous! Tile is such a smart option and durable option for people with pets, I agree. I’m in the same situation as you are, I want to redo the upstairs which is currently carpet and add hardwood, and I know that doing a few rooms at a time is all we will be able to manage. Thanks so much for following along with the blog! I appreciate it! ~ KIM
Great tips! So helpful. I love your flooring and advice on staining and sealing!
Thank you Heather!
Hello! We are in the same perdicament as you. I am glad I found your blog. We really want light oak flooring but don’t want it to “amber” (not a fan of the orangy look). I have read mixed reviews on water based finishes and most professionals recommend oil based. Have you been pleased with your decision? How are they holding up to the everyday wear and tear? Thank you!
Hi Erin! We are so thrilled with the floors. The finish is very durable. Our flooring guy is very reputable and highly recommends the Waterborne over poly because of its strength and durablility. We had him apply 3 coats. If you want light oak flooring then I recommend the Waterborne even more because it is crystal clear and will not yellow over time. Polyurethane is amber by nature and will deepen over the years. We noticed how much our original flooring had ambered in just 8 years. The one downfall is that Waterborne is about 2-3 times more expensive, but it great thing is that if you for some reason were to have a scratch, then the waterborne can be applied again, filling in and disguising the scrath and you would never know it! That can not be done with poly. Hope that helps! ~KIM
It does. Thank you!
Good Morning, Kim! I am so happy to read this blog! We are two weeks out from having our hardwood floors sanded and restained. I hate the orangey color they have taken on over the years and would like to avoid that happening again. Could you tell me the brand of the sealant you used? When I googled “Waterborne Sealant”, many options popped up. I’d feel better using the same brand you did as I can see how beautiful it turned out! Thanks for your response. I LOVE following your blog and have copied MANY of the DIY projects you have shared! — Linda
Hi Linda! We used Waterborne by Bona. They are the top company who created the sealant. Thank you so much for following along with the blog! Hearing how you have enjoyed the tutorials and tried them for yourself has totally MADE MY DAY! Best ~ KIM
Hey Kim! One more question, how often do you need to reapply the waterborne sealant? Thank you!! — Linda
Hi Linda! The Waterborne should never have to be reapplied until the day you plan on refinishing your floors. It’s a permanent sealer like polyurathane but stronger. Hope that helps! ~ KIM
Hi Kim,
Please forgive me if this is obvious but what color stain did you use? I see that you applied Bona waterborne but missed the stain color.
Thanks
Pat
Hi Pat,
We used Weathered Oak by Duraseal (the professional line from Minwax) and had two coats of stain applied. Our floors are solid white oak.
Lovely refinishing of hardwood flooring.Thank you for sharing your pics with us.
If you want a surefire way to improve the look, durability and value of your home or apartment, hardwood floors are the way to go. Besides being beautiful and hard-wearing, hardwood floors are environmentally friendly as well. Most hardwood floors almost never need to be replaced and can add thousands of dollars to the value of a home. Hardwood floors offer an incredible array of aesthetic options, too. Wood is a natural resource that is both renewable and recyclable. They are also generally easy to clean and maintain and come in finished planks that are available in a wide array of woods, colors, textures, and patterns.
Hi! Love the end and coffee table. Where are they from?
What is the color of the wall around the fireplace? It’s perfect!
Thank you so much Farley! The wall color around the fireplace is SeaSalt by Sherwin Williams.