It’s early I know, but now is the time to go out and buy those Christmas craft supplies! I’m always surprised how many people get a jump start on the holidays, but when I headed over to Hobby Lobby and saw the amazing sales and all the gorgeous decorations, I knew why! Things sell out fast and last year I waited too long and missed out. I told myself not this year! Today I want to share how to make this charming DIY Ski Lodge Christmas Wreath made with supplies from Hobby Lobby and at the end of the post I have a fabulous coupon for you. 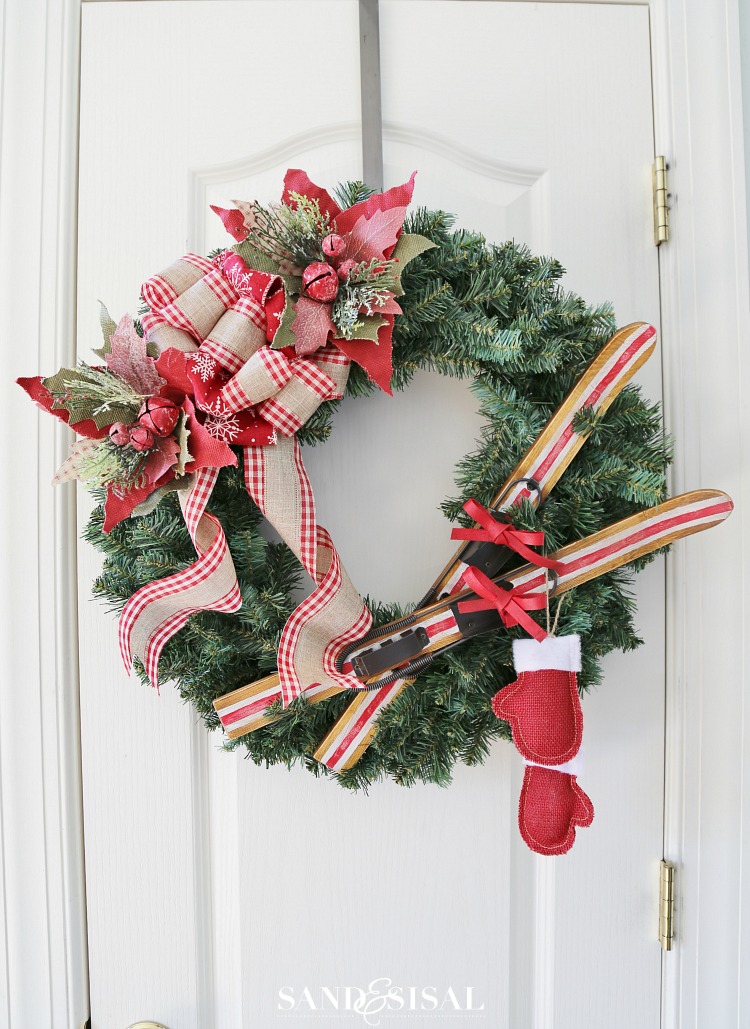
How to Make a DIY Ski Lodge Christmas Wreath
You will need the following items:
- 20″ faux pine wreath
- 2 jingle bell/poinsettia floral picks
- 2 burlap mitten ornaments
- 1 pair wood skis wall hanging
- 2 rolls wired ribbon
- red & white craft paint (optional)
- floral wire
- hot glue
- fishing line
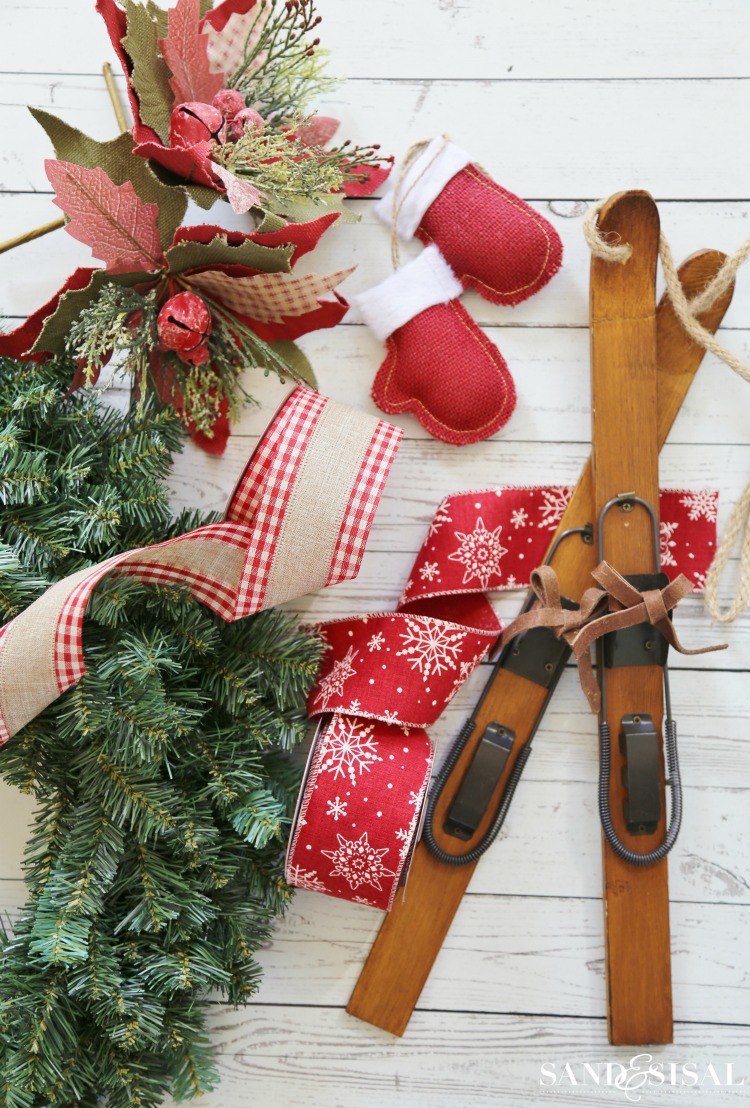 Before you start, gather all your supplies. Fluff and shape the pine wreath to ensure a full appearance.
How to Make a Wreath Bow
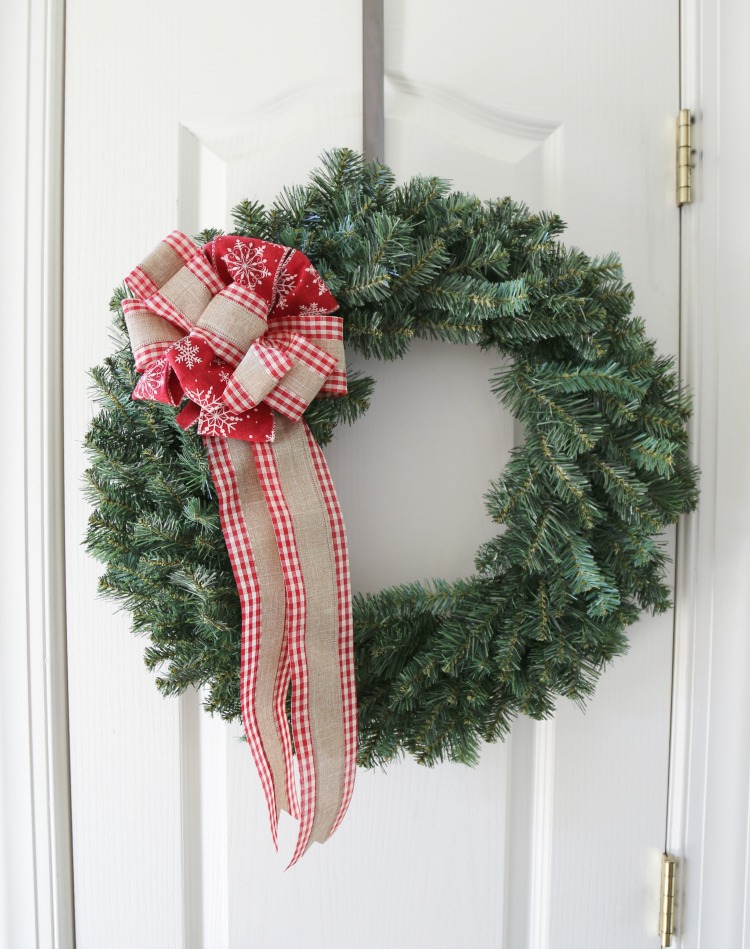
Step 1: Making a wreath bow is easy with wired ribbon. I will show you how to make a double bow. This used 2 coordinating ribbons. Start my making a round loop. This will be the center of the bow. Holding the loop in the center, start folding the ribbon in an accordion manner, back and forth until you have 3 loops on each side. Make each loop a little longer than the previous. 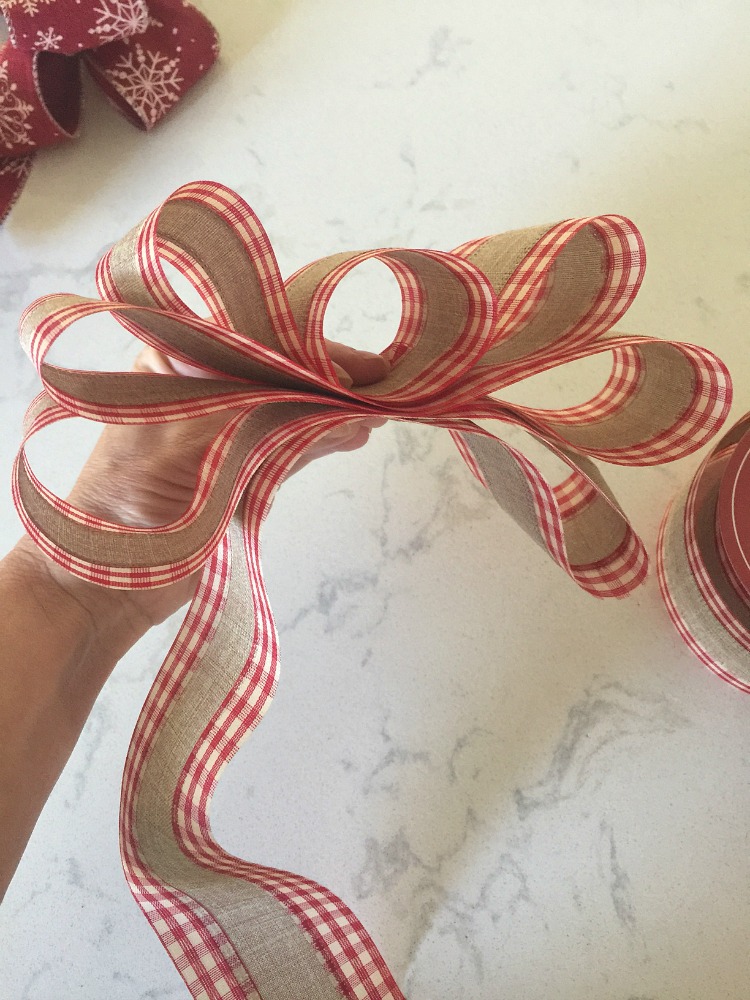 Take a long piece of floral wire and thread it through the center loop and twist to pinch the bow together.
 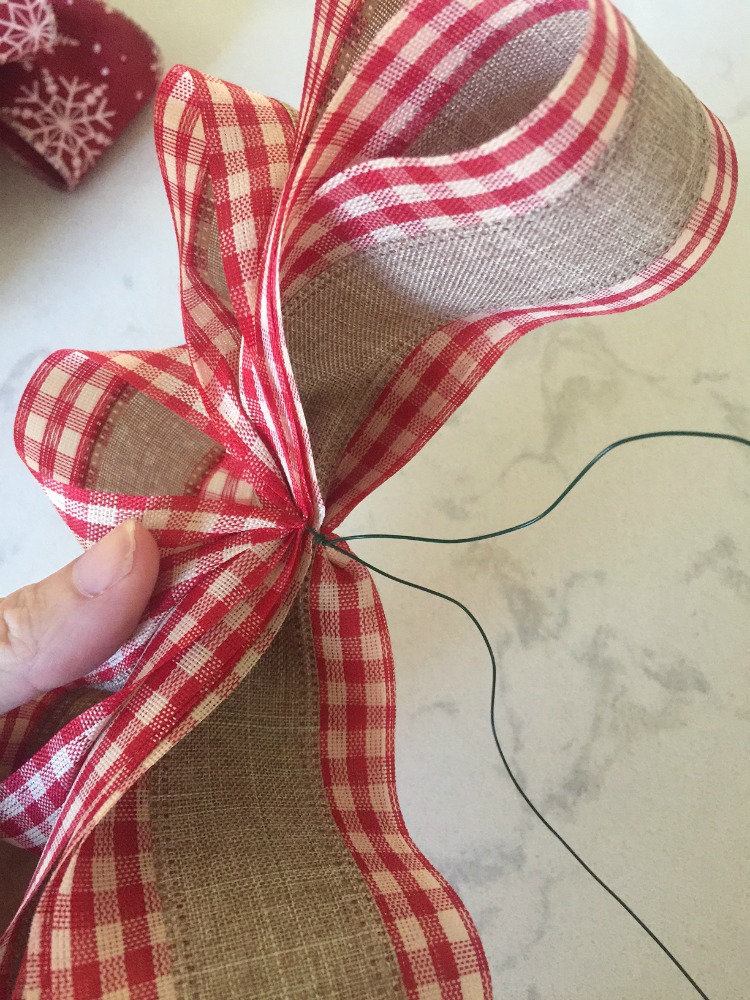 Cut the ribbon at this step. Repeat the process with the second roll of ribbon, except skip the center loop.
 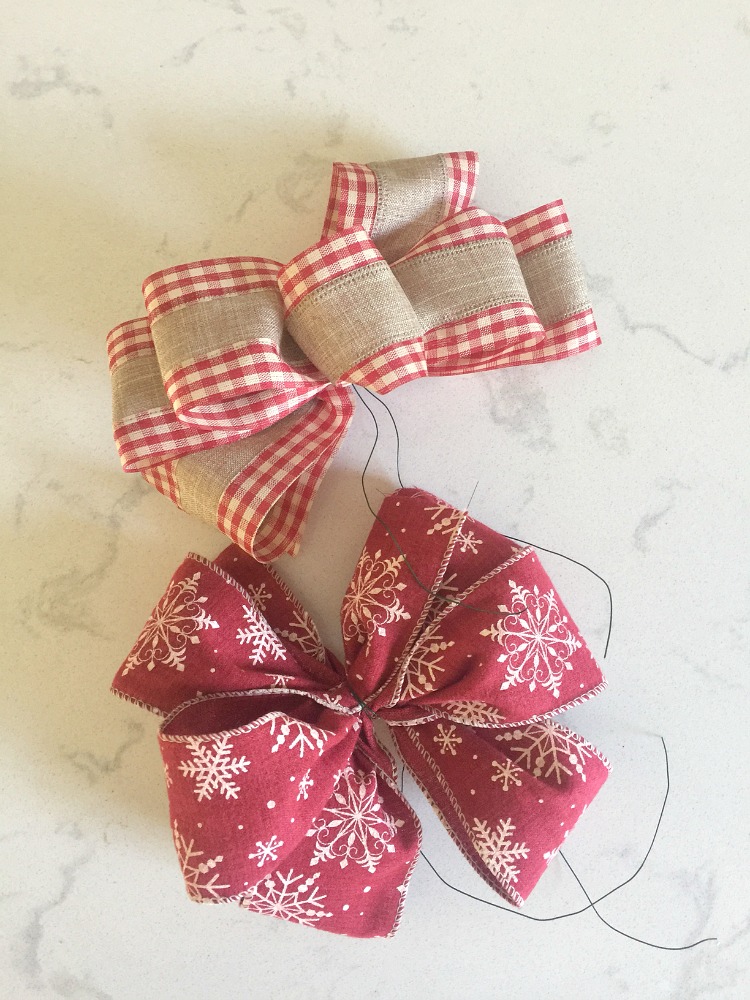 Cut a long length of ribbon and fold in half. This will be your ribbon tails. Lay the bows on top of each other and then on top of the tail and twist all their wires together, combining all the ribbons into one large bow. Shape and spread the wired loops of the bow until you have a look that you like.
 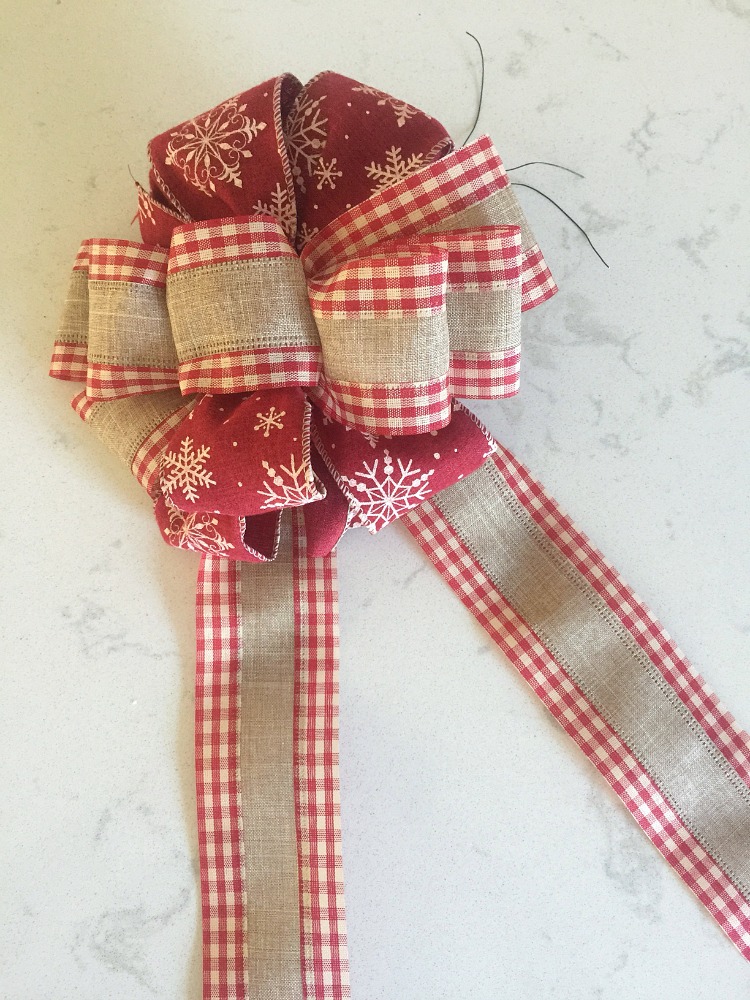 Step 2: Using the wires already on the bow, secure the bow to the wreath. I chose to put the bow at the 10 o’clock position. With all my wreaths, I find that styling them while hanging from a door hanger is helpful.
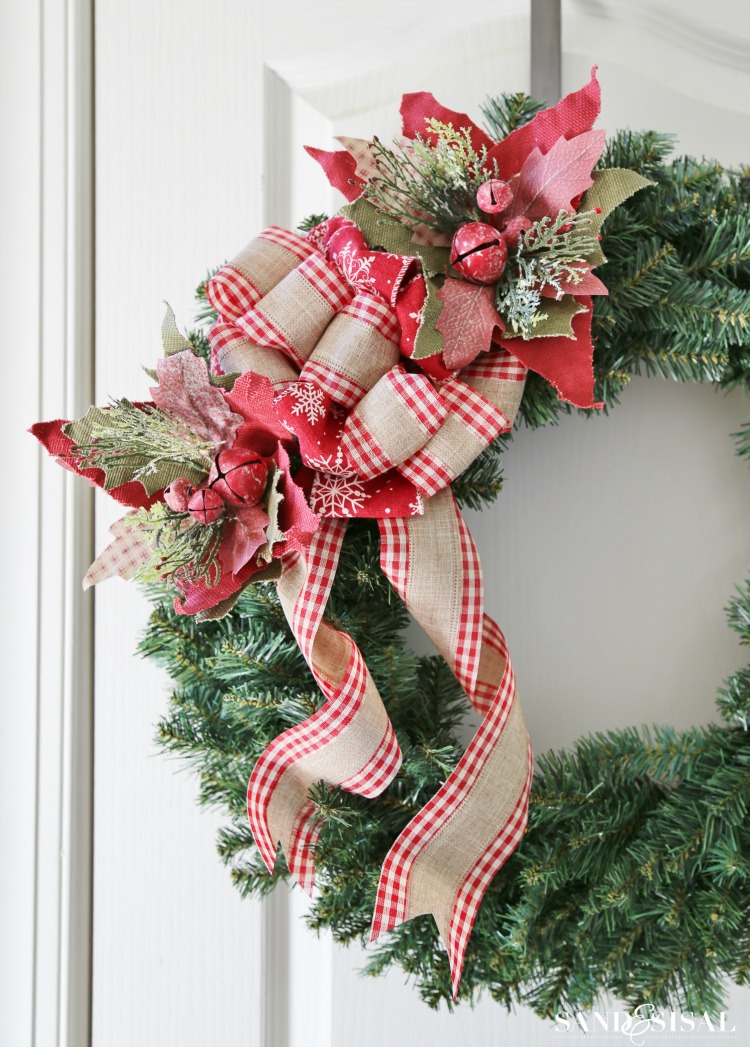
  Step 3: Insert the poinsettia floral picks on either side of the bow. Secure with floral wire if needed.
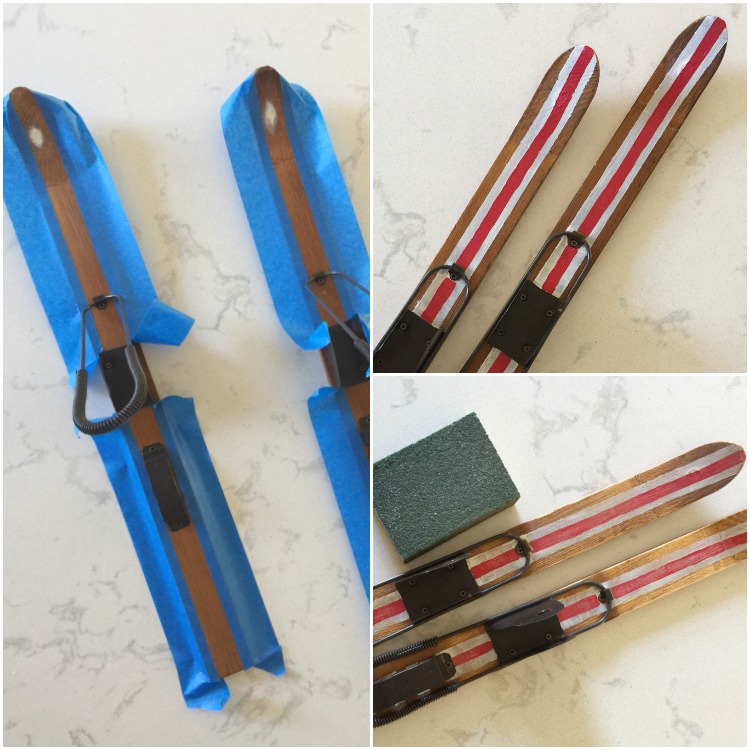
  Step 4: Painting the skis is totally optional. These would look adorable just the way they came but I wanted to make them extra special. I cut the rope off that held the skis together and filled the holes with a little bit of wood filler and removed the brown leather bows. Next I used painter’s tape to create straight lines down the side of each ski. The exposed wood was painted with white and allowed to dry. I free handed the red stripe. After the skis were dry, I removed the tape and used a sanding sponge to sand the surface of the skis to give them a faded, distressed look. Lastly I decided to paint both sides of the brown leather ribbons red.
  Step 4: Position the skis the way you want them and hot glue the bottom ski in place. Make sure the hot glue makes good contact with the pine wreath. Allow to cool completely before glueing the second ski. To secure the skis even more, I tied a few strings of fishing line, which is totally clear, around the skis and wreath. Step 5: Drape the 2 little mitten ornaments over the bottom ski.
 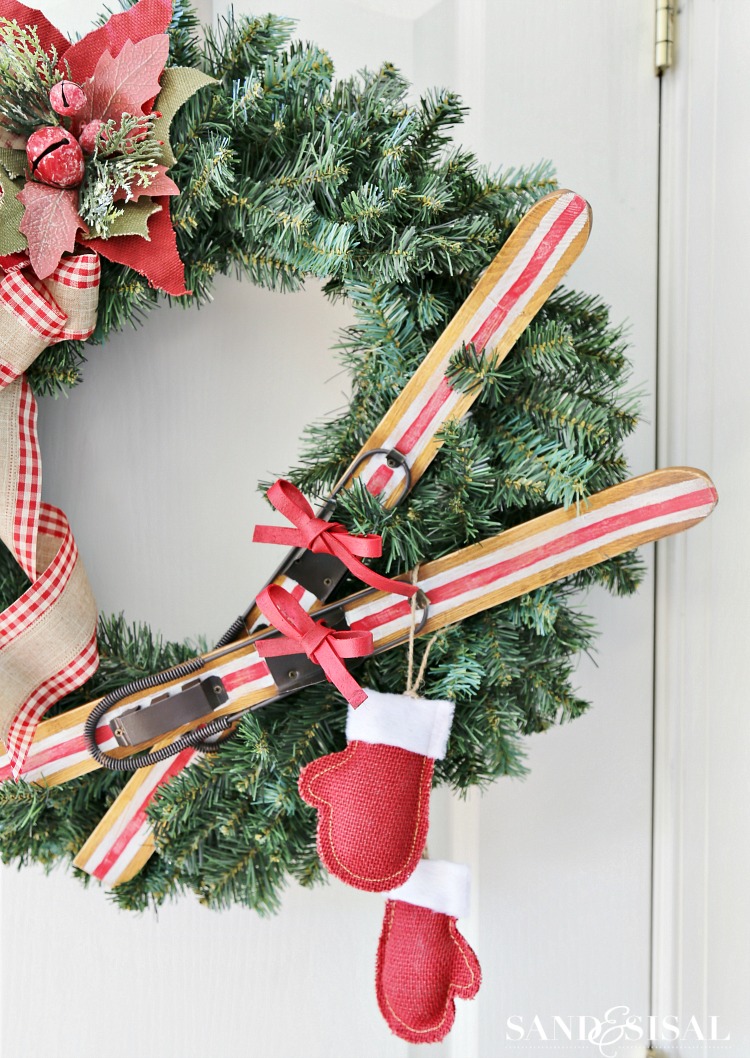 I absolutely love how the DIY Ski Lodge Christmas Wreath turned out! I might try to match my Christmas tree to it and do a whole ski lodge theme this year! This would be such a great wreath to make if your family are ski enthusiasts like mine!
Love it? Pin it!

Happy Crafting!
KIM
You might also like these posts:
