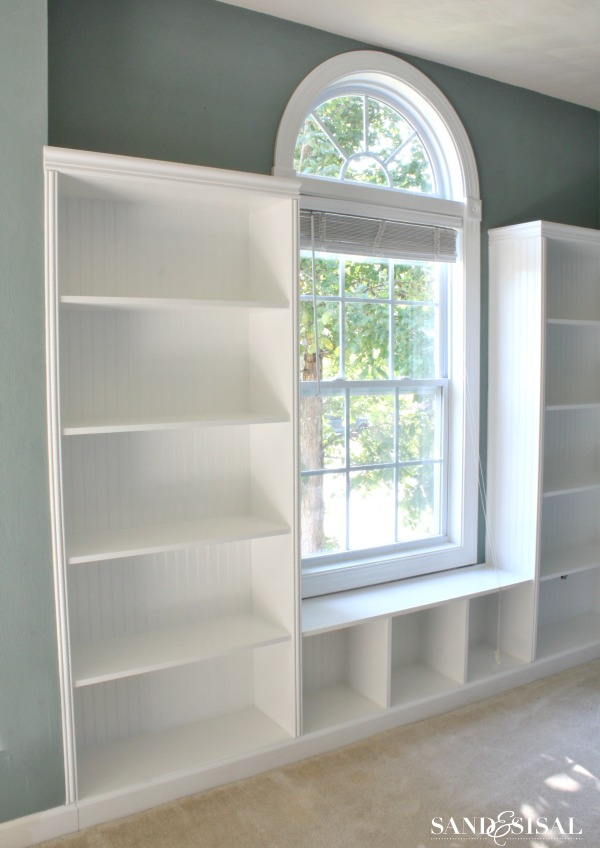
When we moved into our dream home 6 years ago, I saw this odd 11 foot wide bump out in our kids’ playroom and instantly knew what it needed… built-in bookcases! But we can’t afford to pay someone to build those, hubs would say. Grrrr… isn’t that always the case? Well I’m a determined woman and when I want something and can’t afford it, then I will try to do it myself (hence, how this blog started). I finally put my vision into reality and I couldn’t be happier to share with you my tutorial for DIY Built-in Bookshelves + Window Seat with beadboard and rope trim molding!
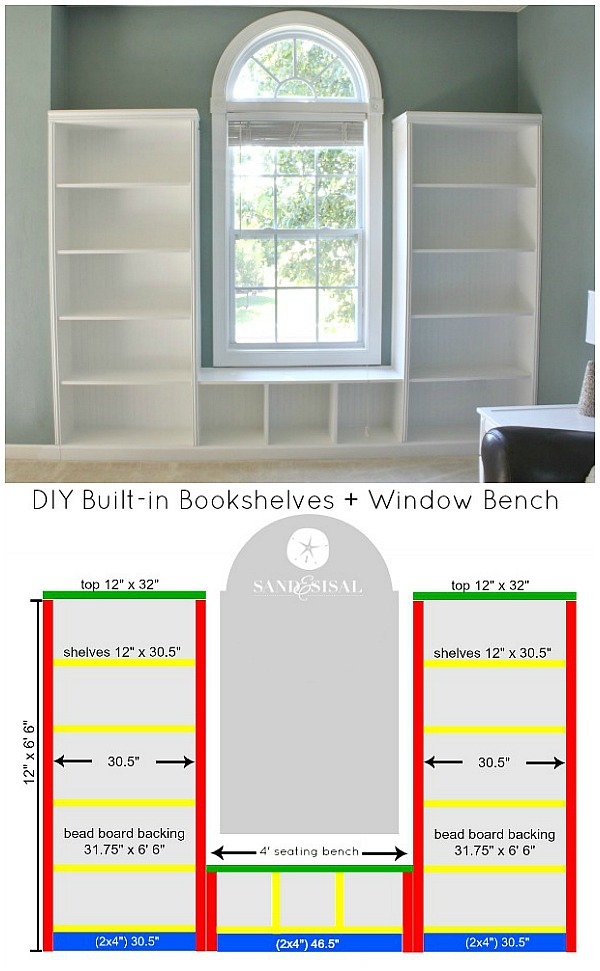
I’m going to let you know right now. I wish I had the courage to try to build these years ago! They were easier to construct than I thought! I’ve provided you will my exact plans and measurements but you will need to adapt these measurements for your space, because every room dimension is different. Consider these plans as a guideline.
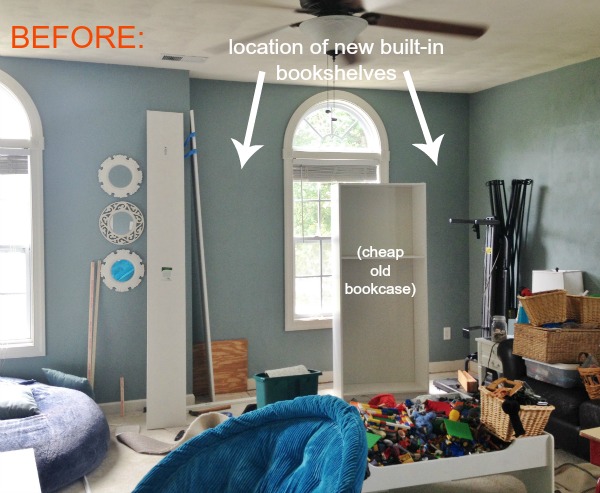
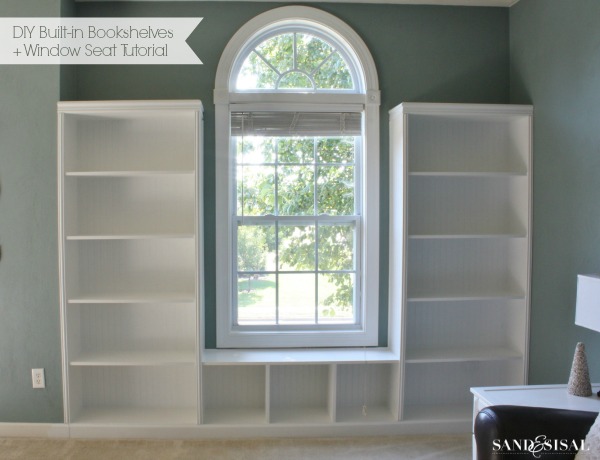
Here’s a peek at the “before pic” of the space where the bookshelves would go (my trashed -messy playroom). We had been using 15 year old, cheap particle board bookcases. They were sagging and chipping and in bad shape.
The first thing we are going to talk about is building the two towers (plans pictured below). Because our room is carpeted, we cut out the carpet where the bookcases would go and carefully removed the existing baseboards. We wanted to take extra care not to damage them since we planned on using the again.
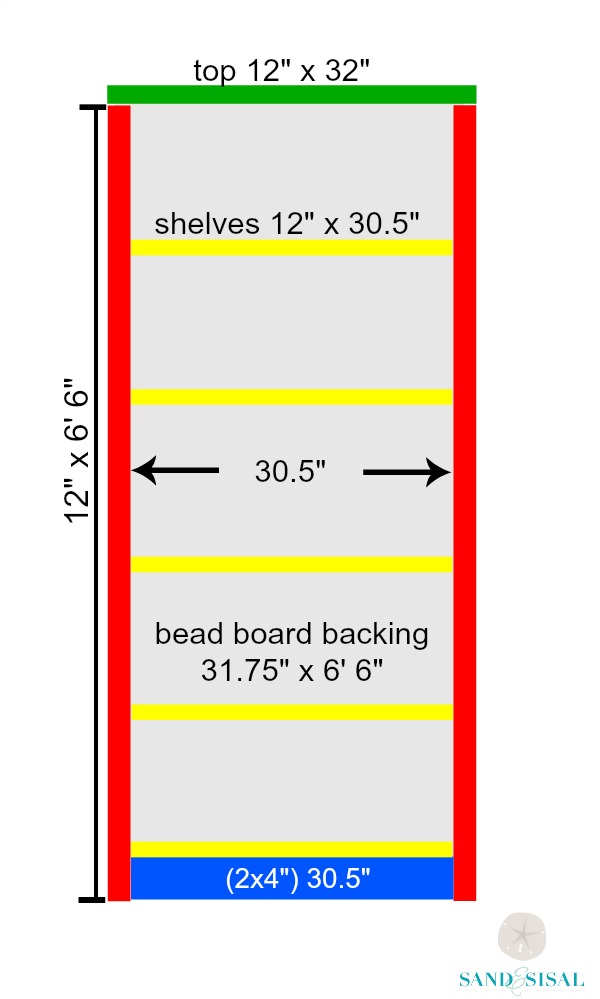
You first need to gather all of your tools and supplies. Having the correct tools will make construction of these built-in bookcases fast and simple.
You will need the following supplies to make DIY Built-in Bookshelves + Window Seat:
- (10 quantity) 12″ x 8 ft. Primed Pine Boards
- (2 quantity) 4 ft x 8 ft beadboard panel board
- (2 quantity) 6 ft long 2 x 4″ lumber
- (2 quantity) 2-3/4″ x 8 ft. rope chair rail moulding
- (4 quantity) 1/2″ x 1-3/8″ x 8 ft. rope edge moulding
- wood shims
- 3M™ Advanced Abrasives– Ultra Flexible Sanding Sheets
- Paintable caulk
- Primer & Latex Paint
You will need the following Tools and Protective Gear:
- 3M™ Safety Products-Ear Protection (I love their Digital WorkTunes™ Hearing Protector & Disposable Ear Plugs)
- 3M™ Safety Products– Safety Eyewear
- measuring tape + pencil
- a Rafter Square
- Skil® Circular Saw
- Circular Miter Saw or miter box & hand saw
- Nail guns with compressor (a finish nailer & brad nailer)
- 2 inch 16 gauge finish nails & 1- 1/4″ 18 gauge brad nails (for nail guns)
Ready to get your DIY on? Let’s go!
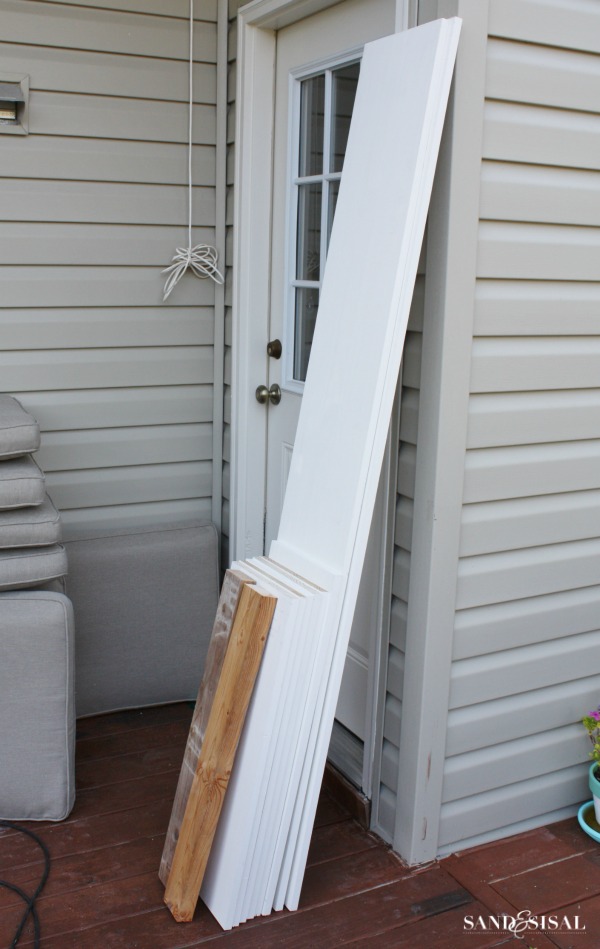
This little lumber stack pictured below is all the lumber you need for one bookcase with out the optional decorative trim (not shown- the bead board backing).
***SAND & SISAL TIP: Before you begin: Place your protective ear wear and safety eyewear on before you start and be sure you are familiar with all the power tools’ manufacturer’s guidelines and safety precautions. Safety is paramount.***
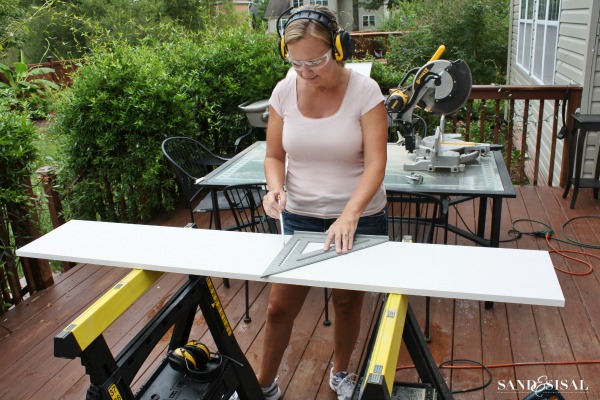
Step 1) Measure. Lay an 8 ft. board on 2 saw horses. Measure the width of the shelves and use a rafter square to mark it with a pencil. Do this for the bookshelf sides also.
SAND & SISAL TIP: Measure, mark and cut only one board at a time. Why? This helps ensure accuracy in measurements.
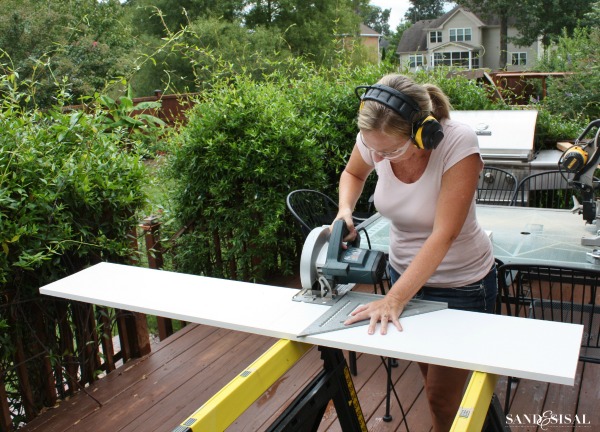
Step 2) CUT. We are in luck people! We are making all straight cuts with a circular hand saw! Use the rafter square to help keep your saw true and straight. Cut each of your shelves, sides, and 2×4″ bases, and beadboard backings.
SAND & SISAL TIP: Be sure to always place the blade of your saw on the outside edge of your pencil line and have a helper hold the other end of your board. Why? Because the saw blade is about 1/16″ thick and if you cut on the inside of your pencil line then your shelf will be now be 1/16″ short (at least). Trying to achieve accurate cuts is important for easy installation. I marked an “x” with a marker on the outside edge of my Skil® Saw guide plate so I wouldn’t have to always guess. Marking an “x” on the part of board you do not want is helpful too.
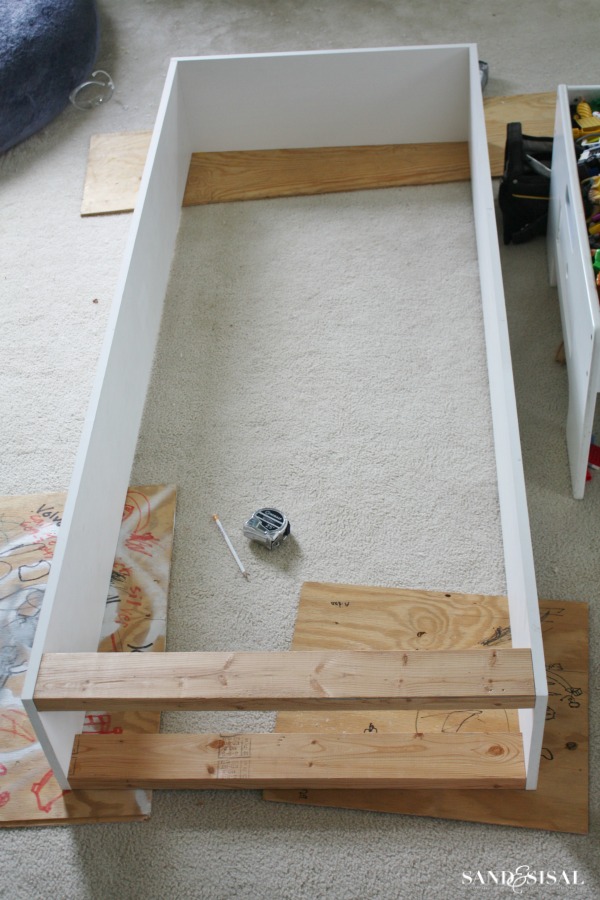
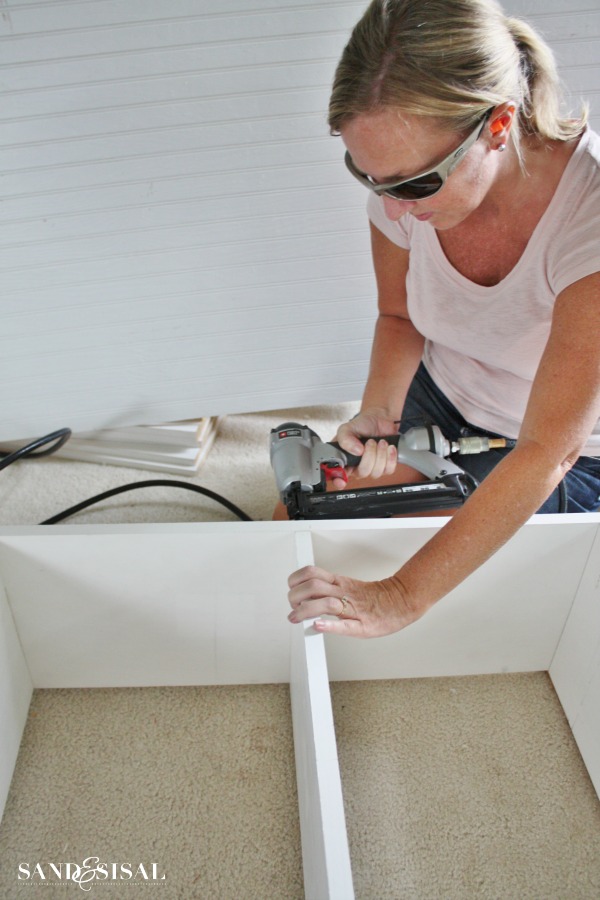
Step 3) Construct the bookshelf. Grab a partner to help you with this part. Now I will admit that building this in the middle of my playroom was convenient, but probably not exactly ideal. You need a large area with a flat surface. I used scrap paneling boards to set my boards on. Prop up the side boards of your bookshelf and place a your cut 2×4″ in between and totally flush on the bottom.
Nail the 2×4 to the side boards with a 2 in. finish nail gun. This is your base, so give be sure to make it secure and sturdy with 2 nails in each end of the 2×4’s. Now nail in the front 2×4. After that, place the top cover to the book shelves over the top of the two side boards. Ensure it is flush with the sides and nail it in from the top with the 1-1/4″ brad nailer. Congrats! You just built a box! 😉
Step 4) Install the shelves. You need to decide for yourself how many shelves you want and how you would like them spaced apart. I chose to space mine approximately 19 inches + apart. Start from the bottom and mark your 1st shelf, repeat with that measurement until you reach the top.
SAND & SISAL TIP: To make sure that your shelves are totally level, use a rafter square to draw a line on BOTH sides (inside and out) of the board where you want the top of the shelf to go.
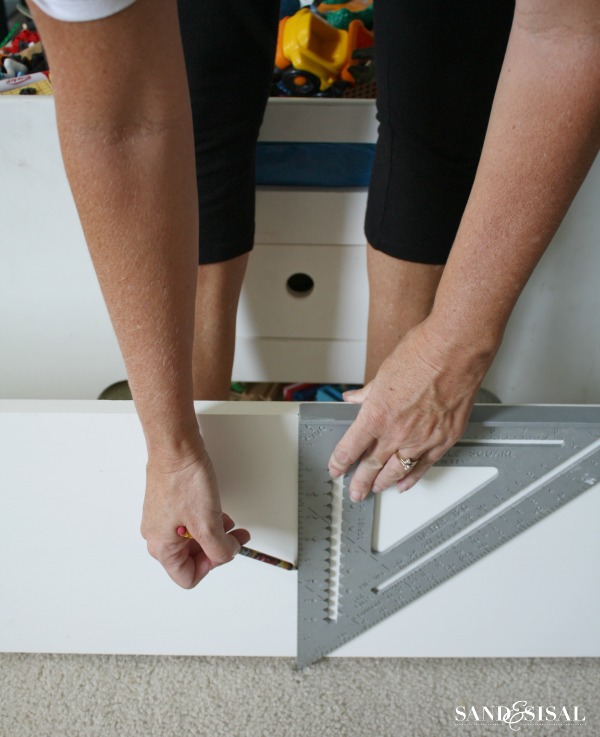
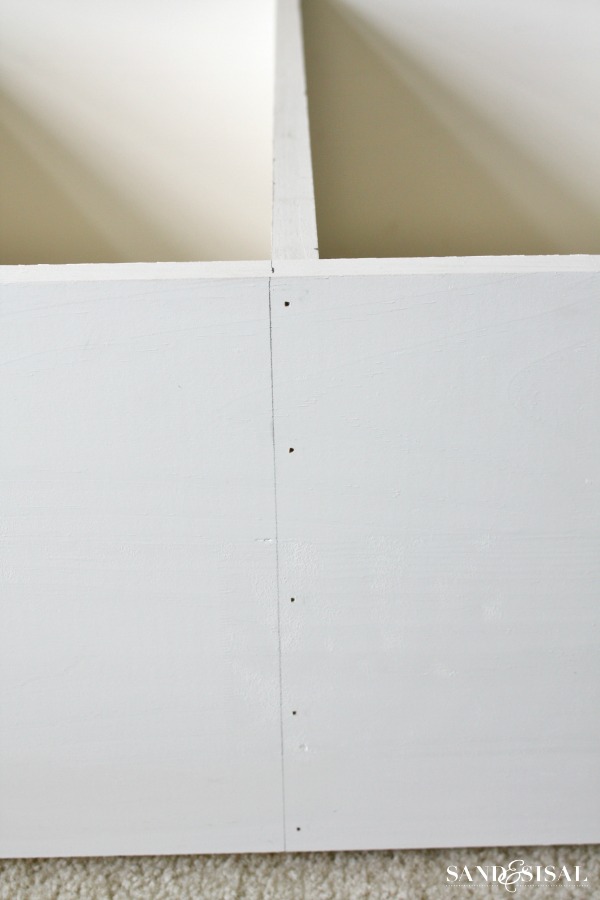
Step 5) Nail in shelves. Slide in your shelves directly under your pencil marks. It might be tight so use a rubber mallet or hubby’s hand to bang them in place. Once in place then nail the shelves from outside with your brad nailer at least 5 times.
SAND & SISAL TIP: Install all shelves except the bottom shelf. Why? You will want access to the base to anchor it to the wall for safety.
Step 6) Check for square (each corner is a 90 degree angle) first then attach beadboard backing with nail brads.
SAND & SISAL TIP: To “check for square” have your partner hold the bottom of the bookcase securely. Stretch a measuring tape from each bottom corner to the opposite top corner and record the measurements. From the longer measurement top corner, tap it with a rubber mallet or hand towards the shorter measurement corner. Tap and adjust until both corners are equal measurements. Then you can nail in the beadboard backing.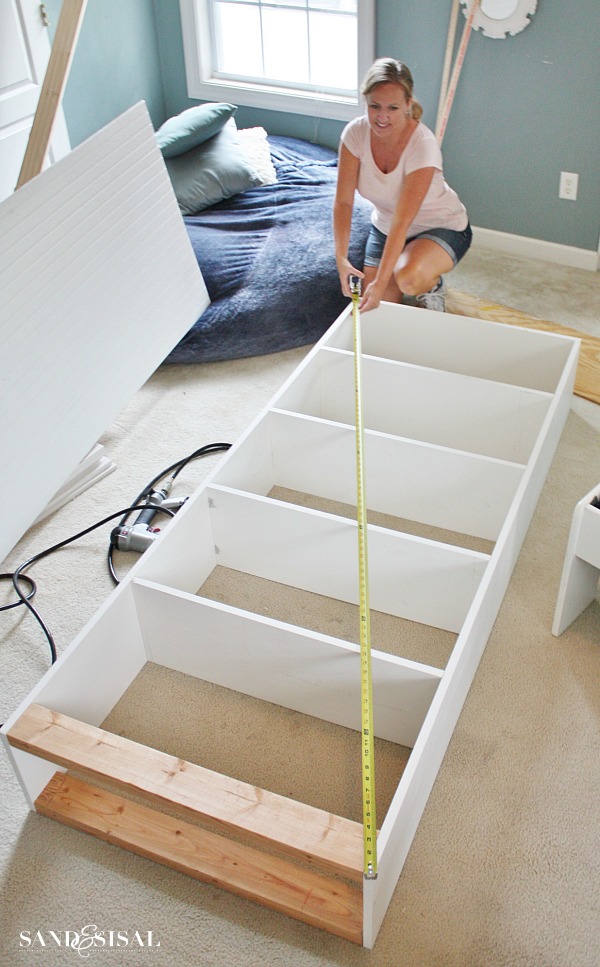
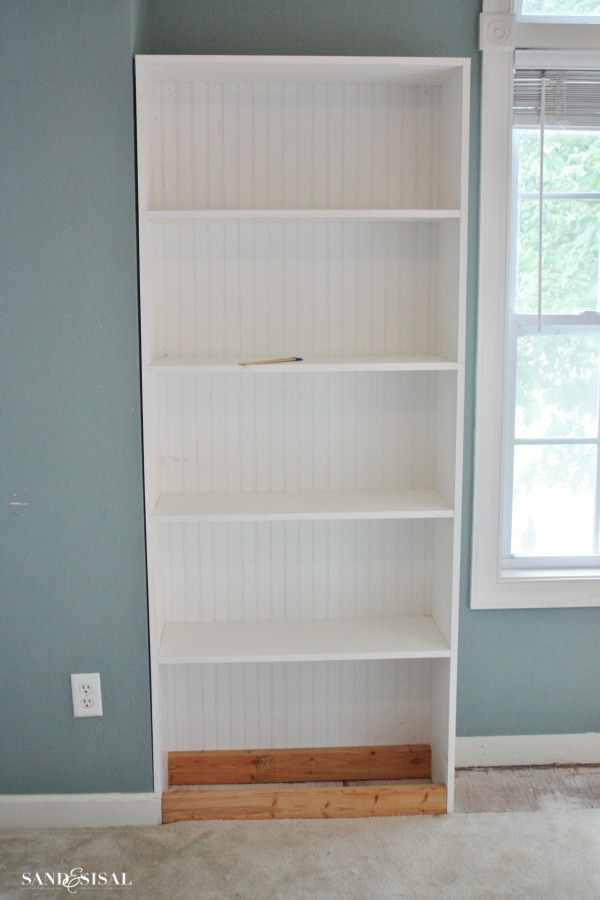
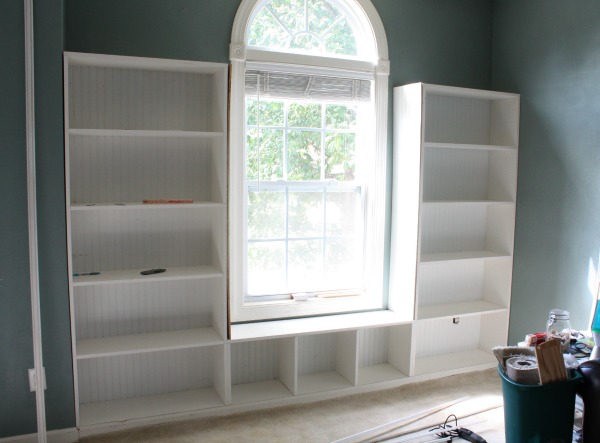
Step 7) Place in desired location. Use a level to make sure the bookcase is standing level horizontally and perpendicular. Use wood shims if necessary to prop up the bookcase to make level (our walls were whack!). Secure the bookcase into wall studs with your 2 in finish nailer. We secured the base in a few areas and the top and upper side panel. After you secure it to the wall then you can place the bottom shelf on the base and nail it in.
Now that sounds like a lot of information and tips doesn’t it? But I’m telling you, the bookshelves literally took us only 1 hour to make each (without trim)! You repeat the same box creating technique with the window bench (see plan diagram above). Cut and replace the baseboard to the bottom of the bookcase. Voila! You can stop at this point if you want… but a little bit of decorative trim really gives it the total custom, built-in look!
Step 8) Optional- Add more beadboard and decorative trim. We had left over beadboard paneling and decided to add that to the outside panels of the book cases, securing with brad nails.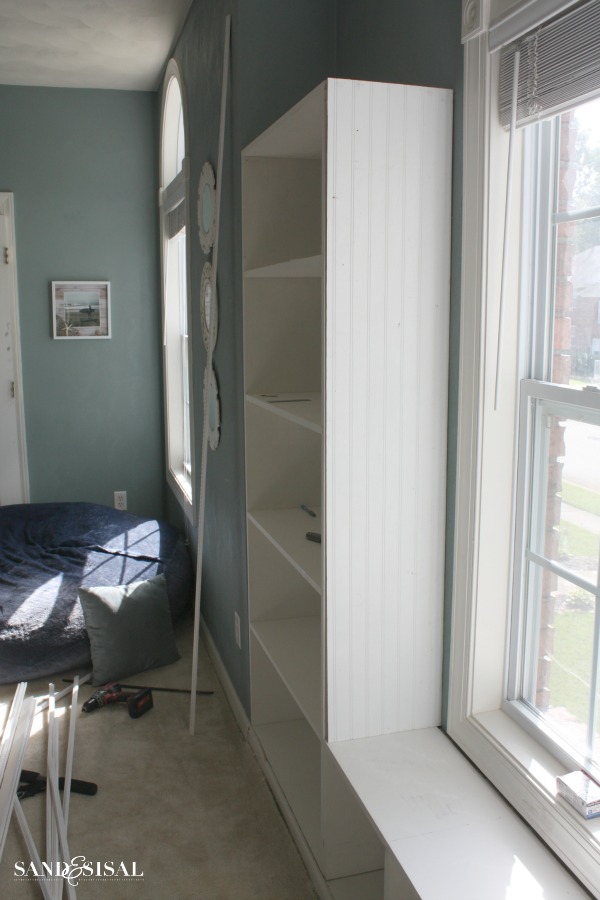
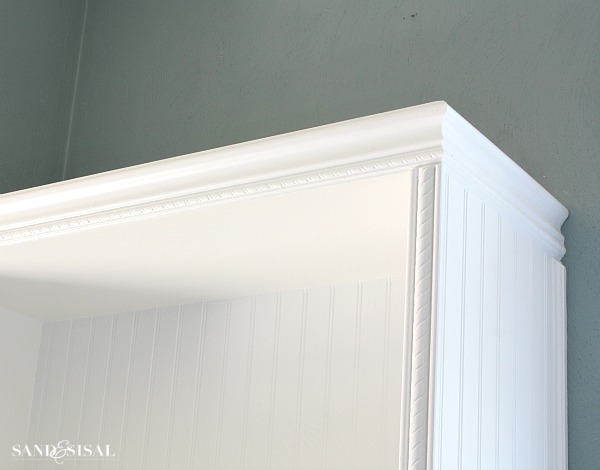
We gave the top of the bookcases a finished appearance with a crown of rope chair rail moulding.
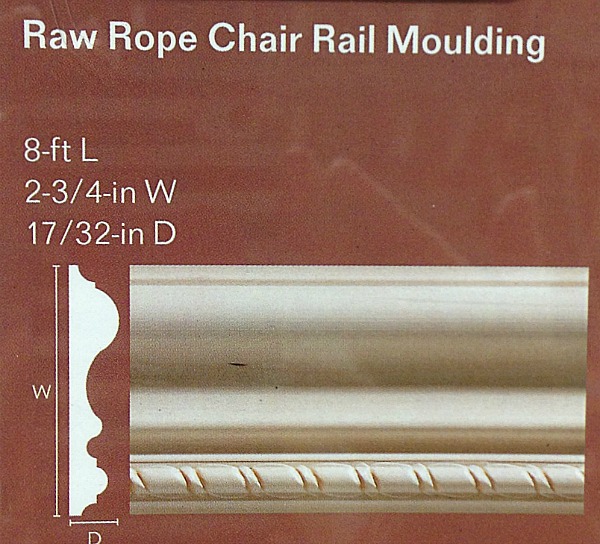
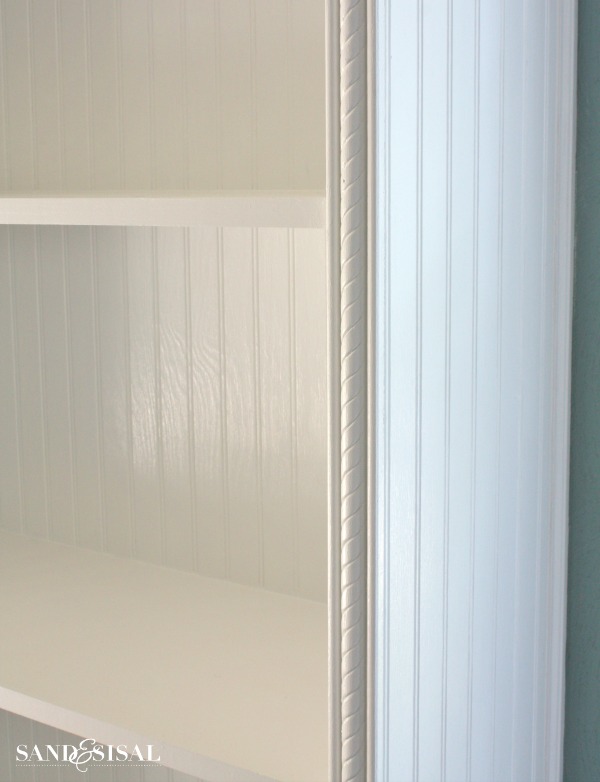
To cover up any gaps between the wall and the bookcase and the front side edges we added rope edge molding. We secured it to the bookcase with the 1-1/4″ brad nails.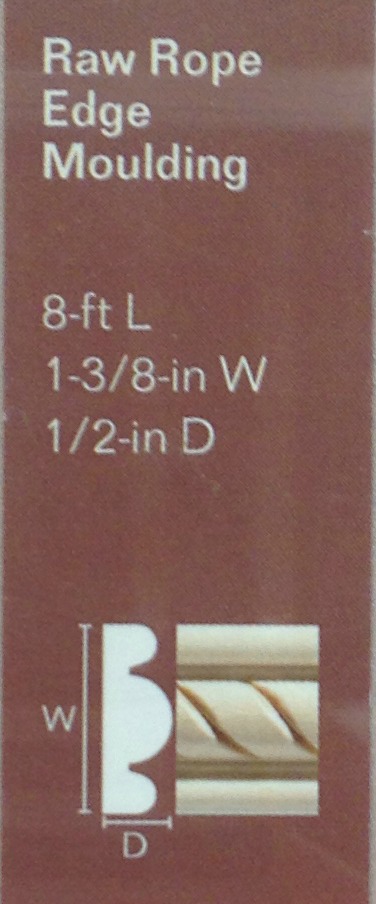
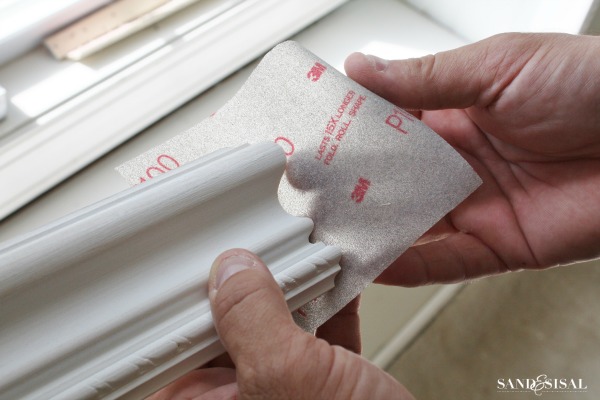
Sand off any rough edges with 3M™ Advanced Abrasives new Ultra-Flexible Sandpaper. This sand paper is seriously cool stuff. It folds, rolls, and bends into any shape you might need for sanding.
Caulk all seams with paintable caulk, allow the caulk to dry then give the entire bookcase unit 2 coats of semi-gloss latex paint. The decorative trim molding completely finishes the looks and gives the bookshelves a professional appearance.
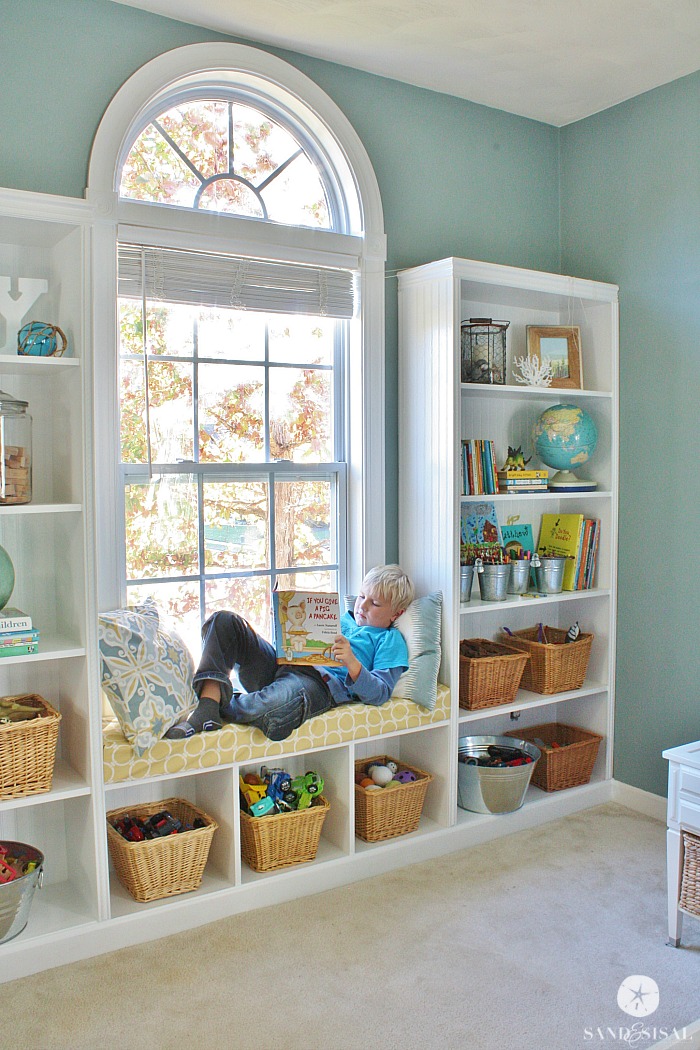
I am so thrilled with how it all came together and can’t wait to show you how I’m going to style the playroom bookshelves and window seat! Stay tuned for that post!
UPDATE: Here is the space all decorated! Click HERE to see all the details!
Happy building!
KIM
For more amazing DIY projects and plans check out:
3M DIY Website
3M DIY
3M DIY Instagram
3M DIY Twitter
3M DIY Facebook
3M DIY Pinterest
I am proud to be a 3M- sponsored blogger, and, as part of my responsibilities, I get the opportunity to evaluate products from 3M DIY. Opinions are my own and additional product used in the project were selected by me.

Great post, Kim! We have a small room that was our office before we built the new office that is empty and waiting for us to turn it into a small den. We plan to build shelves just like yours. I have been waiting for my hubby to find the time to do it but with your tutorial I am sure I can do it.
I love the extra trim you used, it really helps make them look built in.
Thank you Leen! I’m really thrilled with how they look and was very surprised how easy it was. I wish I had done this years ago. 😉
LOVE the way they turned out Kim!!!
Thank you Martina!
looks freaking awesome and oh what storage great job xx
Thank you Chris!
Kim, is there nothing you can’t do? What a beautiful job you have done.!Can’t wait to see it completely finished. Do you sew or can you have one made or buy already made? Boy, beadboard has sure come a long way over the last few years. This really came out great. The power nailer is one thing my DH never bought and it sure speeds things up. How did you learn to use all those power tools? I’m so proud of all your accomplishments. “Never underestimate the power of a woman!”
Thank you Betty!
I’m hoping to have it all styled by next week. It’s the kids’ playroom, so I’m sorting through toy cars and legos and an overload of trinkets that just might nee to suspiciously disappear… 😉
I’m sewing some pillows and a cushion for the window seat today. I seriously would never even attempt this project without a power nailer. It is the best tool ever!
Such a clever use of space! I passed this along to my son and daughter-in-law who have a window they’ve been wanting to build storage around. My son really likes it. It helps seeing an idea that suits your own situation so perfectly. Thanks.
Oh wonderful Dianne! Thank you for sharing it with your son! 😉
You did an amazing job! The bookcases look so great! I have wanted to build a wall of built-ins in my living room. This just might be the inspiration to get me going to actually do it.
KC
Thank you KC!
Great job! I am sure the extra storage will come in handy 😉
Love the look. You’ll get loads of use for years from this project.
But did you ever think that your husband may say no too expensive knowing you can make it anyway?.. looks great can hardly wait to see it styled.
Barbara Ann
etsy.com /shop/barbaraannscreations
Fantastic job!! 🙂
Awesome girl!!! LOVE that molding trim!
Thank you so much Maryann!
Great project…I’m planning one of these myself for my lakehouse…pinning it for then.
Thank you Debbie!
These are so amazing, Kim! You’re my hero! lol Pinned!
This is so awesome and what a great tutorial!
Thank you Michelle!
Very impressive! They looks great 🙂 I would love to do something similar in my dining room.
Thank you Melanie! I’m am so happy with them! I smile every time I walk past the room 😉
I can’t wait to attempt these in my basement! I’m sure you’ll never get tired of them! Sooo fabulous! I’d love you to share them at my link party http://www.carissamiss.com/2014/10/outside-box-no-8.html
LOVE what you did to this bedroom. What color are the walls?
Thank you Sandy! The wall color is “Atmospheric” by Benjamin Moore. It used to be one of Pottery Barn’s official recommend colors years ago. I love it because it takes on a different appearance in different shades of light. 😉
You did a great job! They are beautiful. Now for the fun part!
Thank you Debbie!
I am going to tackle some built-ins, now that I have your excellent tutorial, but the thing that is making me the most nervous is cutting out the carpet. Do you cut out the exact footprint? A little bit less? How do you get the neat finished edge at the baseboard moulding that the carpet installer does?
I’m curious to know what you did about the electrical outlets that were in the walls where you installed your custom built in bookcases and windowseat. Are they still accessible? I have a wall that would be perfect for this type of project but don’t want to move electrical and still need to access it.
Great question! There was only one outlet and we cut out a rectangle in the bead board backing where the outlet is located.
Thank you! It is a fabulous project! I’m inspired. Still impaired, but inspired!
I may ask my carpenter to help, but now I have fabulous photos to explain what I’m envisioning!
I really love the wall color as we are looking to paint or family room. What color is yours? Thanks!
Thank you Jennifer. It is Atmospheric by Benjamin Moore. Sherwin Williams makes a color called atmospheric too but it is totally different.
Hi Kim- First, great job! I’m curious to know about your trim choice. With an 1 3/8″ rope trim for the ends of the shelves, and the width of those 12″ boards being 3/4″, how much of the stock of the trim hangs over into the shelves, or did you rip to size?
Thanks in advance for your response.
Thanks so much Todd! The rope trim is flush with the inside of the side panels but over hangs the outside edges by 1/4″. In our case, that overhang covers the gap between the book cases and the walls on either side. Of course the trim could be ripped too.
Thanks,
KIM
Thanks, Kim. One more question. Is there enough support on the window seat part to hold a good amount of weight (150lbs)?
Worst idea, ever, wasted so much precious time and money on this and the Chaulk paint has left streaks and marks everywhere as it was too thick to use a roller…looks like a dodgy job, thanks so much, never using Chaulk paint as a primer ever again.
Btw if you are going to make a blog about something you did that apparently was so awesome that everyone should try it too, then at least be specific…such as what colour white you used, what brand, is it semi gloss water or oil based paint and clear photography.
Hi Megan,
I’m sorry you ran into problems. I looked over my instruction in the post you commented on and never recommended using chalk paint as a primer. Chalk paint is not a primer coat for other paints. I did specify that I bought all pre-primed boards, so no priming was needed on my end, and that I finished the bookcases with 2 coats of semi-gloss latex paint, so I’m not sure where the confusion came into place. On a separate note, chalk paint can be sanded to a buttery smooth finish with a fine grit sanding block and it is especially smooth when topped with clear wax. I have a step by step tutorial for using chalk paint on the blog if you are ever interested.
Best,
KIM
Kim,
How much did everything cost?
Thanks!
Jena
Hi Jena! I think when it was all said and done we figured that the wood and trim for each side cost about $120, so with the center bench included I’d round it out to $300 max. We already had a the primer, paint, and beadboard backing left over from a previous project. It was well worth the effort.
Hi! Thanks for the awesome tutorial! I’m going to get this started ASAP. I have a question about the trim on the bottom of the shelves along the floor. I didn’t see anything included in the material list that looked like what you have on the bottom. Did you just re-use the existing baseboard that you took off the wall?
Hi Michelle! Yes we reused the existing baseboard. I was pleased that we were able to remove it from the wall with out completely destroying it! Thanks for stopping by and commenting!
Hi! Thank you so much for this post! My husband and I just made the book case today. However, 23 are stuck with the moulding. What angles do we cut the moulding at for the top so that they meet together nicely on both ends? We can’t seem to figure it out! Thank you so much
Hi Alyssa! I’m so pleased to hear you built your own bookcases! Let’s see… the top trim molding has a straight cut on the ends when they hit the walls but where they come together both of those pieces are cut at a 45 degree angle. You need to turn your saw blade to the 45 degree angle setting and then stand the moulding piece flat against the back guard of the saw and then cut. Turn the saw blade to the opposite 45 degree angle setting to cut the other piece. Hope that helps. Good luck!
Thanks Kim for your detailed posting. My wife has wanted a window seat for years and e-mailed me your web page. There were many things I would not have thought of (pulling the baseboard and putting it on the front of the seat/shelves and using rope moulding (it helps hide many sins and gives an elegant touch)). The brad gun makes putting it together kind of fun. I am just about done with my version. Besides some dimensional differences, I made the area under the seat enclosed (put beadboard along the front too) and the seat hinges up to provide storage (so you can just throw things in there without it being seen). I also put two 45 degree 2″x3″ braces between some of the vertical pieces of wood in the seat to make it rock solid (I am not so light these day:) ) Thanks again.
Matt
Sounds beautiful Matt! I’m so happy to hear you tackled the project! Feel free to email me a photo if you want!