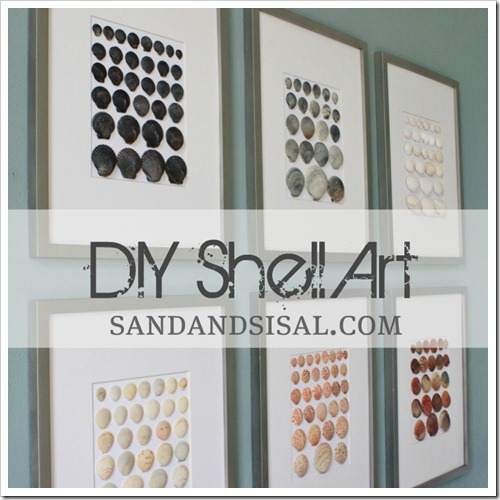
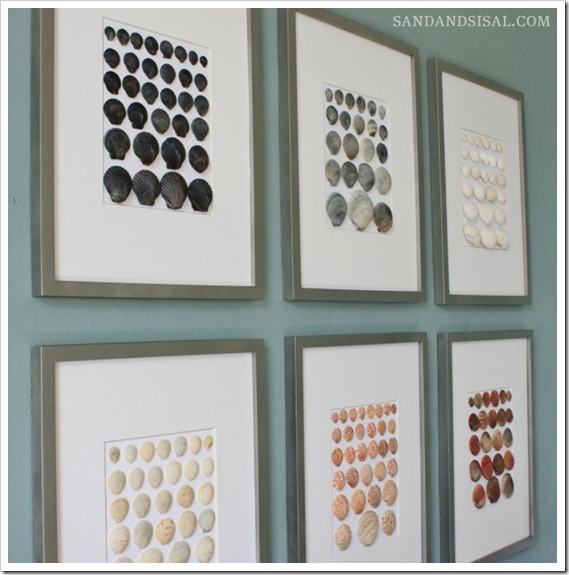
Our favorite family getaway is to a Hatteras Island beach cottage on the Outer Banks of North Carolina (OBX as we call it). Each time we go we collects hundreds of shells and now my home has bags and bags full of shells taking up space! I had to come up with some creative solution to display our treasured shell finds and thought a gallery wall of framed shell art would be perfect!
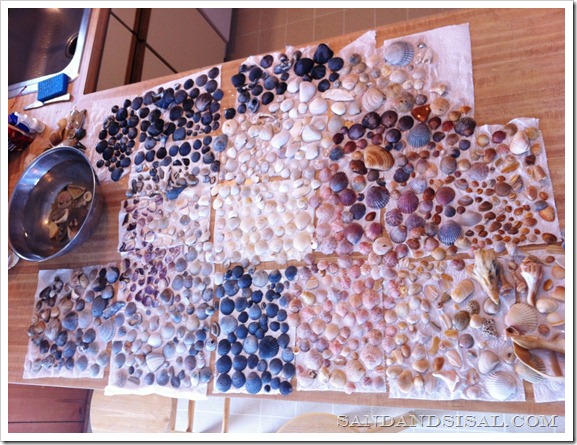
I’m thinking we might have gotten a bit carried away with the shell collecting this last trip. We also spent the evenings sorting the shells into separate color piles. (Yes, I’ve passed down some horrid OCD tendencies to my kids… sorry kiddos.)
How to Make Framed Shell Art
To make shell art you will need:
frames with mats, shells, card stock, tape, scissors, hot glue.
Optional items: spray paint and high gloss spray polyurethane.
Pick up some inexpensive frames with mats. I chose 6 frames from Target. They were 15 x 19 inches with an 8 x 10 inch opening inside the mat and ran around $15 each. They came in black and white but I wanted a brushed nickel color so I disassembled the frames and spray painted them! You will not be using the glass in your frames, so save it for another project. While the frames were drying, I decided to spray the shells with a light coat of high gloss spray polyurethane. The gloss brings out all the gorgeous color and shine of wet shells.
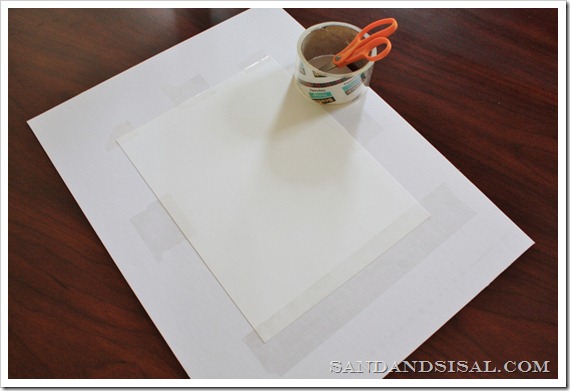
Tape a piece of white cardstock to the backside of the mat on all four sides. I used strong packing tape.
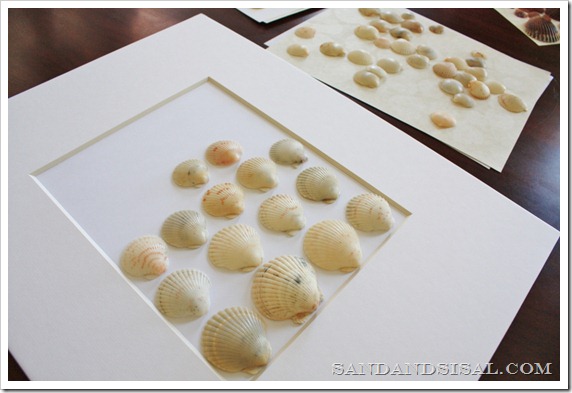
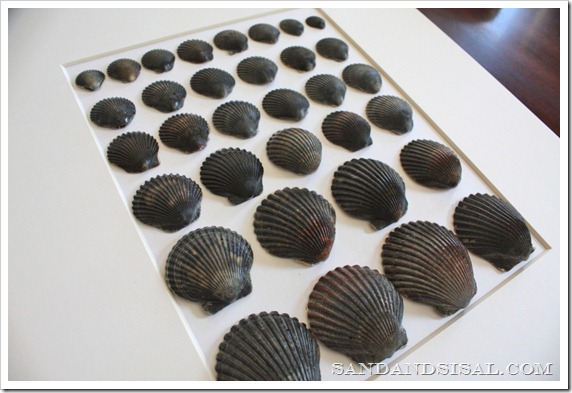
Flip the mat and cardstock back over to the front side and start placing and arranging your shells onto the card stock. I chose to place the largest shells at the bottom and worked my way up to the smaller shells at the top.
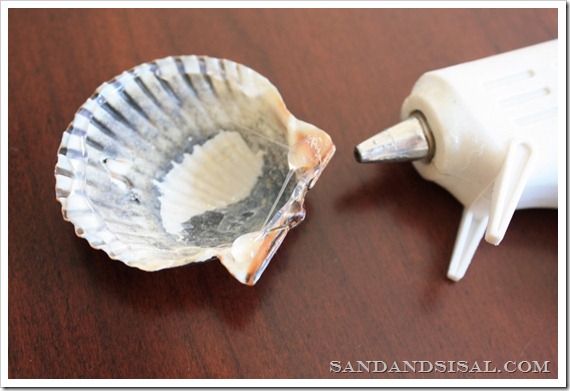
Once you have all the shells arranged exactly how you like them, then carefully pick up one shell at a time and apply the hot glue to the shell.
Apply the hot glue just inside the edges and foot of your shell. Carefully place the shell back onto the cardstock. You get ONE chance at this, because once it is down on the paper you can not move it. You also don’t want to apply too much glue or it will ooze out from behind the shells.
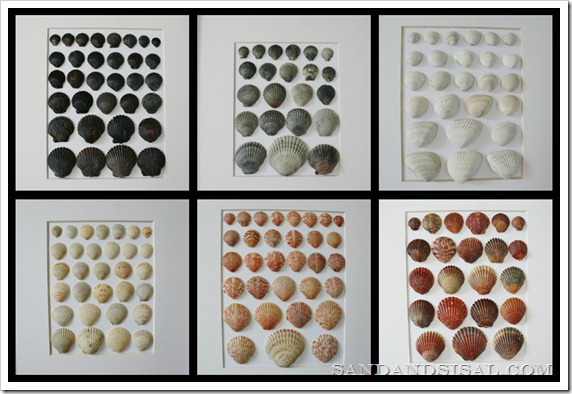
After gluing your shells, reassemble your mat into your frame and you are ready to hang it on your wall! These shells that we collected come in so many different colors. We found black, gray, white, cream, pink, yellow and red shells. Yellow was not shown here because I didn’t have enough shells to fill the space. I’ll have to look out for those on our next trip!
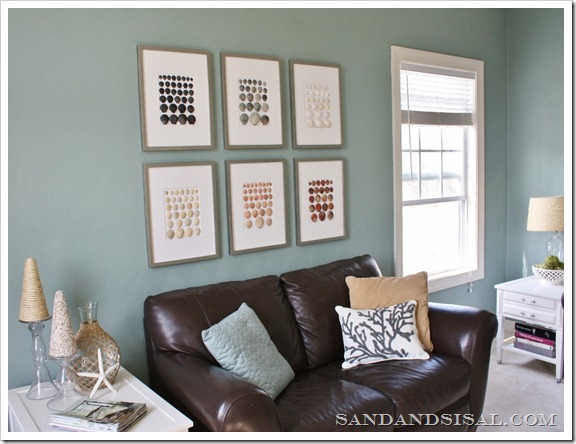
Display your framed shell art as a single piece of art or as an entire gallery wall! I did a post on Tips & Tricks for Making a Gallery Wall which will save you a ton of time and frustration and give you professional results!
If you like decorating with shells you might like these posts too:
Kim
Join me on FACEBOOK, TWITTER, PINTEREST, G+ or SUBSCRIBE.
linking up to:
 |
 |
 |
 |
What a wonderful idea! They look perfect in that spot! My kids are always collecting shells so this would be great for them to help with!
-Shelley
Great TUT! My children and I have collected shells from so many states and countries. This gives me a new way to showcase them!
Beautiful Kim! I love it!
Kim,
Thanks for the inspiration. I love your gallery wall. Living near the beach, I too have hundreds of shells and love to display them. I’m definitely going to copy this tutorial!
I love this idea. I think I will dig out my shell collection and start working on it this weekend. Thank you so much for sharing!
We just did a shell project too, except we were on a beach in Lake Tahoe where there was a ton of snow, so the kids were digging the shells out of snow and ice. I think they had more fun collecting than anything else. I love how yours turned out.
What a great way to display shells so that they can be enjoyed. My mom has a small OBX cottage and this would make a perfect display for above her sofa.
We vacationed at Avon in the 80’s. Boy has it changed since then!
LOVE IT. Seriously amazing! Such a great idea!!!! 🙂
Gorgeous!!! I totally want to do this for my bathroom 🙂
I never know what to do with shells from the beach, this is a wonderful idea!
Kim, this looks fabulous. I didn’t know the shells would fit under a regular frame. Nice to know. Thanks for sharing at Wow.
That’s the nicest shell art I’ve ever seen! Great idea and execution.
WoW!! Am having a little shell envy going on here! Our beaches have NO where near as many shells as yours in NC!! Plus, they’re mostly white, not all colorful like yours 🙂 Sooo beautiful & LOVED that you framed & displayed them as a fun reminder of your trips!
Love this!! I am going to have to pass it along to my mom. She has a beach themed guest bedroom that is adorable…these would look great in there!!
looks wonderful in your lovely room!
Kim, this really is a beautifully done and elegant project!
Sophisticated and heirloom-worthy.
Ooh! Love this! It would go great with the shell art I made for our bathroom–now, I just need that many different shells! 🙂
Kim… I’ve just got to create a couple of these… so very pretty! Thanks for sharing.
I absolutely love this artistic use of seashells..I have a bit of a collecting issue myself and I love OBX to!
Love this! What a great way to commemorate trip memories! Silly question, but is it hard to re-mat it with the glass, given the depth of the shells? Love the look though – makes for an eye catching gallery wall.
I have actually done this with shark’s teeth. Just used a collage frame. There use to be THOUSANDS of them! But alas, no more. But I still have the river rocks and oyster shells! Topsail Beach is my stomping ground. Love the blog
simple but beautiful…i have a collection of shells when we went to Pangasinan but i don’t have an idea of making this… thanks for sharing…
Hi, LOVE these ideas! Also love the paint color in your room above where the framed slell art hangs. Would you please share what color it is?
Hi! The wall color is Atmospheric by Benjamin Moore. It used to be a popular Pottery Barn color also. I love it. Thanks for stopping by! ~ KIM
I noticed that you mentioned removing the glass in order to paint the frames. You do not return the glass to the frame? If not, how are the white mats holding up? Have they discolored when you dust them? This is a terrific project that will allow us to display our shell collection!
Hi Martha!
Thank you for the kind comment. You are correct, they do not have glass over them. They still look great today. 😉
~KIM
What a cool and fresh idea! Especially for client’s beach homes, they’ll love this! Made so much better when it’s been collected over the years, such treasures!
Thank you for visiting my blog doll, would love to get your thoughts on my latest design!
xo-Julie
Peace. Love. LOL!
Haute Khuuture Blog
I love this idea. Certainly, copy your idea. Because I also have a large collection of sea shells 🙂