• Home
  • Meet Kim
  • Blog
    • Facebook
    • Instagram
    • Pinterest
    • Twitter
    • YouTube

Sand and Sisal

  • DIY
  • Home Tour
  • Decorating
  • Gardening
  • Recipes
  • Thanksgiving
  • Decor Crafts
  • Seasonal
  • Christmas/New Years
  • Winter/Valentines
  • Spring/Easter
  • Summer Holidays
  • Fall
  • Halloween

January 4, 2011 ·

Thrift Store Solution to my Staircase Tsunami

Before/After· DIY· organization· paint techniques· Thrifty finds· Tutorial

Prev postNext post
Use your ← → (arrow) keys to browse

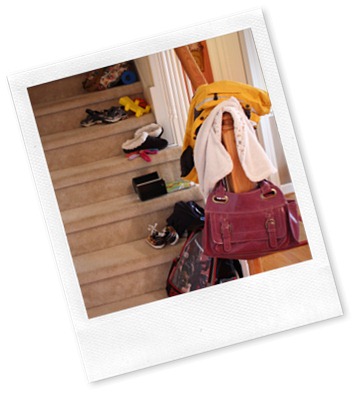
I needed a solution to my junked up disaster of a staircase.

staircase tsunami

Items are placed on the steps in hope that the clutter will delightfully make it’s way back upstairs to it’s proper home.

Yah, right.

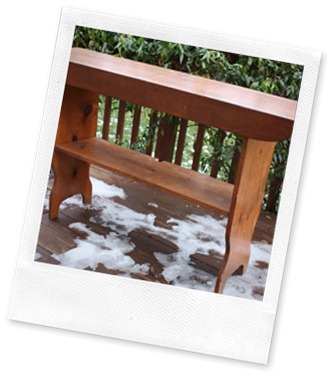
Now, remember this side table I found on my virgin venture into a thrift store?

          Thrift store side table

You all had some great ideas, so I took your advice and…

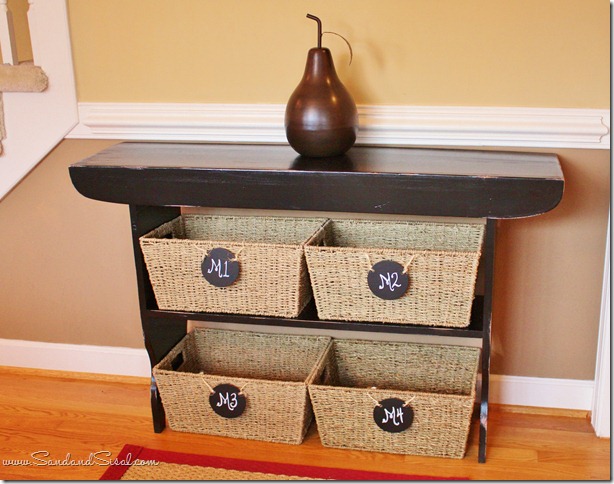
Check out his transformation!

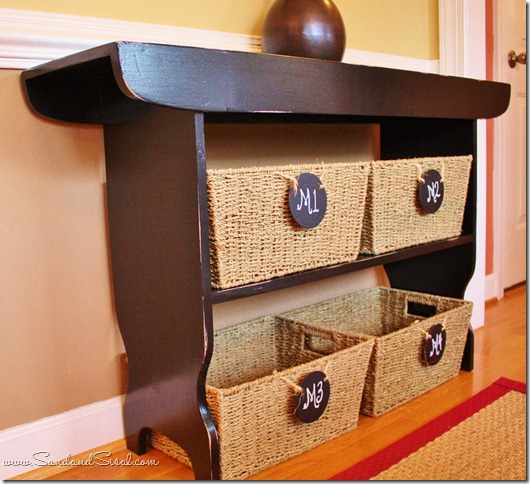
Storage sidetable

Now each child has their own basket where mom will JOYFULLY toss their clutter laying around!

Doin’ a happy dance! …uh huh, uh huh….dance with me….

Ok, well then walk with me, I’ll show you each step of it’s transformation.

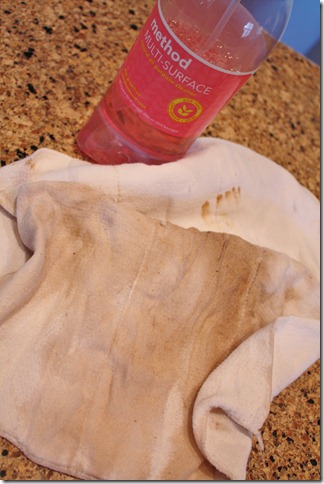
Start with a good scrub down…..ewwww, gross.

dirty rag

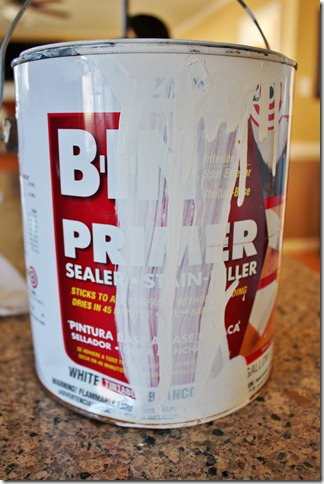
I hate sanding so I love to use this water based primer from Kilz.

No sanding required.

Bin Primer

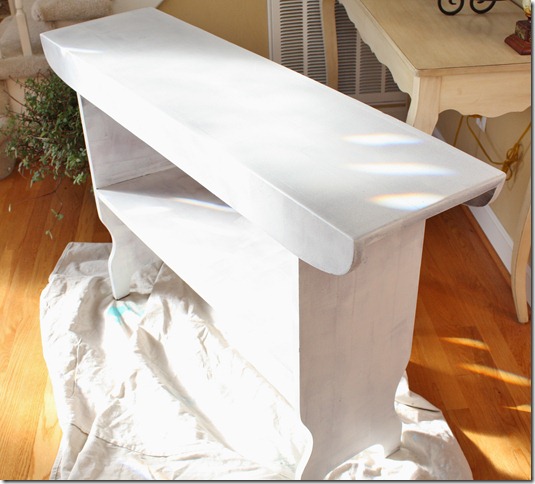
Yes, I’m painting this in my foyer…..it’s cold in the garage!!!!

IMG_2072

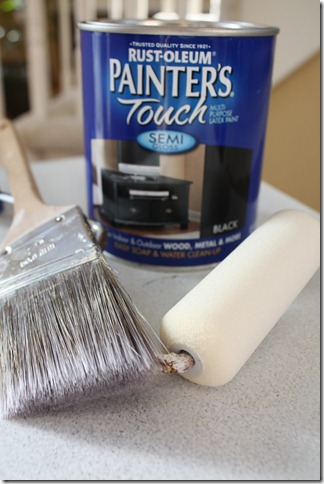
I used the roller for the priming and the brush for the paint.

IMG_2078

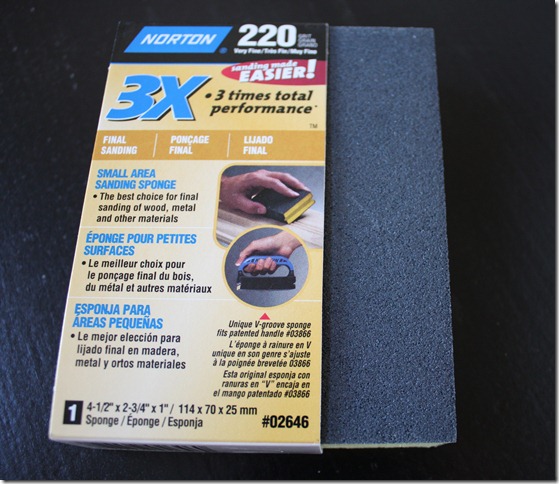
Lightly sand between coats with a 220 grit sanding block.

sanding block

The table received 3 coats of paint,

then the edges were distressed with with 100 grit sandpaper (my 1st attempt at distressing…ever!)

A topcoat of Polycrylic for protection finished the table.

sidetable baskets

Once their baskets are filled each child can carry their basket upstairs to put away,

with smiling faces of course…

Yah, right.

Hey, a mom can dream!

Click on this link to learn how to make the Chalk board Tags for the baskets.

Kim

Linking up to:

furniture-feature-fridays-copy

Shabby Chic Cottage’s Transformation Thursdays
Kim’s @ Savvy Southern Style’s- Boring to Better Party

 Linda’s Nifty Thrifty Tuesday’s @ Coastal Charm

« Women That Wow!
Chalk Board Tagged Basket Tutorial »

Comments

  1. Kristyn @ Good Gravy Crafts says

    January 4, 2011 at 2:45 pm

    Great idea! My stairs often look like that from the hubster! I am aiming to be more organized this year….you just gave me some ideas!!

    Thanks for sharing! Oh and fab job on distressing!! 😉

    xx-Kristyn

  2. Powers Fam says

    January 4, 2011 at 4:09 pm

    My staircase looks just like that! Thanks for the fab idea. Off to hunt for the perfect little table. Happy New Year!

  3. Laurel @ Ducks in a Row says

    January 4, 2011 at 5:36 pm

    It looks great – hope it works!

  4. Shirley says

    January 4, 2011 at 6:07 pm

    Very good idea!!!

  5. Shannon says

    January 4, 2011 at 6:34 pm

    Kim, this looks great! What color is it that you used? Also, what kind of Polycrylic did you use? You sure got right on this project! I have several that I need to do! Thanks for sharing!

  6. Shannon says

    January 4, 2011 at 6:35 pm

    Oops! I see that it is black!

  7. Leslie Cole says

    January 4, 2011 at 7:12 pm

    LIKE!!!! You did a great job on this transformation. Will you come clean my house?

  8. Blondie's Journal says

    January 4, 2011 at 8:10 pm

    I like this idea…so much better than the stair step baskets that you can trip on. Great instructions on finishing the shelves.

    XO,
    Jane

  9. Donnie says

    January 4, 2011 at 9:18 pm

    I love what you did there. Looks like fine furniture.

  10. Michael - Innkeeper says

    January 5, 2011 at 12:33 am

    um! ah-mazing! this looks great.

    i love painted things. and i love organizational things. this takes the cake! love it!

  11. Amy Kinser says

    January 5, 2011 at 1:10 am

    Great transformation. Love the baskets and the tags. Let me know if this works…my stairs always stay cluttered through the day until I MAKE my kids take stuff up at night.

  12. Chris says

    January 5, 2011 at 1:16 am

    It looks so great, Kim! Be careful, though. These furniture transformations can be addictive. You’ll be doing more soon!

  13. House Revivals says

    January 5, 2011 at 1:16 am

    This is such a darling solution! Don’t you love finding these “diamonds in the rough” at thrift stores?
    ~Amanda

  14. The Cottage Chick says

    January 5, 2011 at 1:17 am

    Kim,

    That looks familiar! Our problem is in our entryway. Same situation. I have been trying to come up with a solution. Your project looks great. I am inspired to go try mine now.
    Denise

  15. Jensamom23 says

    January 5, 2011 at 2:12 pm

    What a great job, Kim.

  16. Kim @ Savvy Southern Style says

    January 5, 2011 at 2:27 pm

    Thanks for sharing this great idea for moms to do something with those little messes. That turned out so good. I featured your bathroom from last week in the post before this one. Can’t remember if I told you or not. Bout brain fried here!

  17. Sherrie says

    January 5, 2011 at 8:33 pm

    Great job! Gets me inspired to paint. Thank you for sharing.

  18. Kim @ Sand and Sisal says

    January 5, 2011 at 10:04 pm

    Thanks everyone! To answer Shannon’s question: The Polycrylic is by Minwax. It is water based, so clean up is easy-peasy, and they have several different sheens. I chose Clear Semi-Gloss.

  19. classic • casual • home says

    January 7, 2011 at 6:01 am

    Brillant! Is it working?
    Mary Ann

  20. stair step basket says

    December 6, 2012 at 1:50 am

    This is such a darling idea! I love it!

  21. Diana W. says

    September 2, 2013 at 8:48 pm

    Just so smart! If I had kids they would pick up the basket and take it upstairs while dancing and singing….. then leave the basket up there. As it stands now, the dogs would never consent to carry anything upstairs. Lazy pups!
    I applaud your distressing job, the entire set up looks wonderful. Great job!

  22. Debbie says

    November 13, 2013 at 2:48 pm

    I love the color. What color did you use please
    thank you

Trackbacks

  1. Decorative organization boxes + baskets - Four Generations One Roof says:
    September 3, 2013 at 8:01 am

    […] at Sand and Sisal refinished this side table and added inexpensive baskets for storage. Loving the DIY […]

  2. Christmas Home Tour says:
    December 12, 2013 at 8:40 am

    […] thrift store, painted it and added a basket for each kiddo. It’s been the best solution to my staircase tsunami ever! […]

Welcome

Kim WilsonWelcome to Sand & Sisal: where love of home and sea meet! I share tutorials in DIY, decorating, crafts, gardening, & recipes.  [READ MORE]

Let’s Connect

  • Facebook
  • Instagram
  • Pinterest
  • Twitter
  • YouTube

Keep in Touch!

Love this post? Let's keep in touch!

Subscribe for free to have Sand and Sisal delivered straight to your inbox.

Search

Categories

Archives

Copyrighted Content Permission

All images and tutorials on this blog are copyrighted material. Please contact me if you would like to use any media (photos, video or audio files), tutorials, or ideas from this blog. 99% of the time I would be happy to allow you to use ONE photo with appropriate credit and link back to Sandandsisal.com (preferably to the same post it was borrowed from.) Absolutely no text or tutorials can be replicated. Contact Kim via email: sandandsisal (@) gmail (dot) com

Amazon Associates Disclosure

Kim Wilson is a participant in the Amazon Services LLC Associates Program, an affiliate advertising program designed to provide a means for sites to earn advertising fees by advertising and linking to amazon.com.

Privacy Policy

Click HERE to review our Privacy Policy

Copyright © 2025 · captivating theme by Restored 316