This summer we have been crazy busy working on so many new outdoor (and indoor) projects like the brick patio makeover with an outdoor lighting and mosquito repellent system, sprucing up the yard, and adding curb appeal with a front door makeover. The house flood that we experienced last summer put starting any outdoor projects on the back burner. Sadly our deck didn’t get much use and fell into a sorry state of neglect. Now that the house is back together and our new coastal kitchen and family room are looking fabulous, the view through the kitchen window needed improvement asap! I am so excited to show you our total deck makeover!
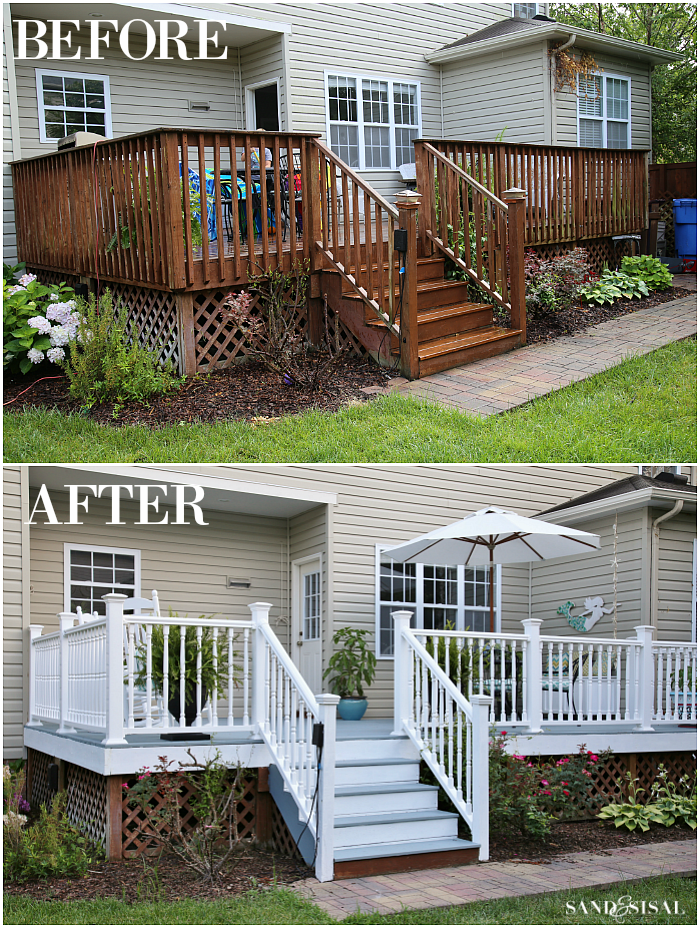
Ready for the scary before pics? The deck was an absolute mess. The Carolina Jessamine vines were out of control and inhibiting the view of the patio.
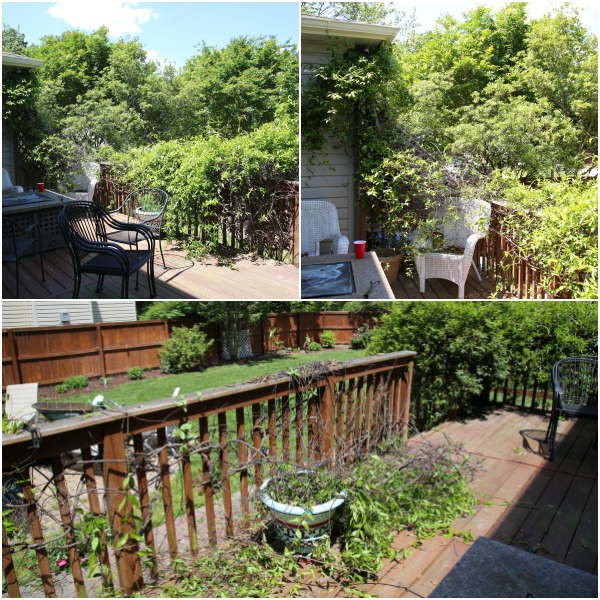
Once the vines were removed we were able to see how badly our deck railings had deteriorated. We knew we had wood bees, you know, those HUGE fat bumble bees and have been battling them for the past 2 years. They are funny little bugs. They will get right in your face and like to see what you’re doing but they won’t harm you. They do however harm your deck, fence, house, etc. They had a an absolute hayday eating our railings, boring out apartment homes inside them and making a bazillion baby bees. Hubs was irate! Once the vines were gone and all the bee holes exposed, the neighborhood wood peckers swooped in and decided to feast on a bee buffet! Wood railing chips were everywhere. The railings were a lost cause. Time to demo.
Deck Railing Demolition
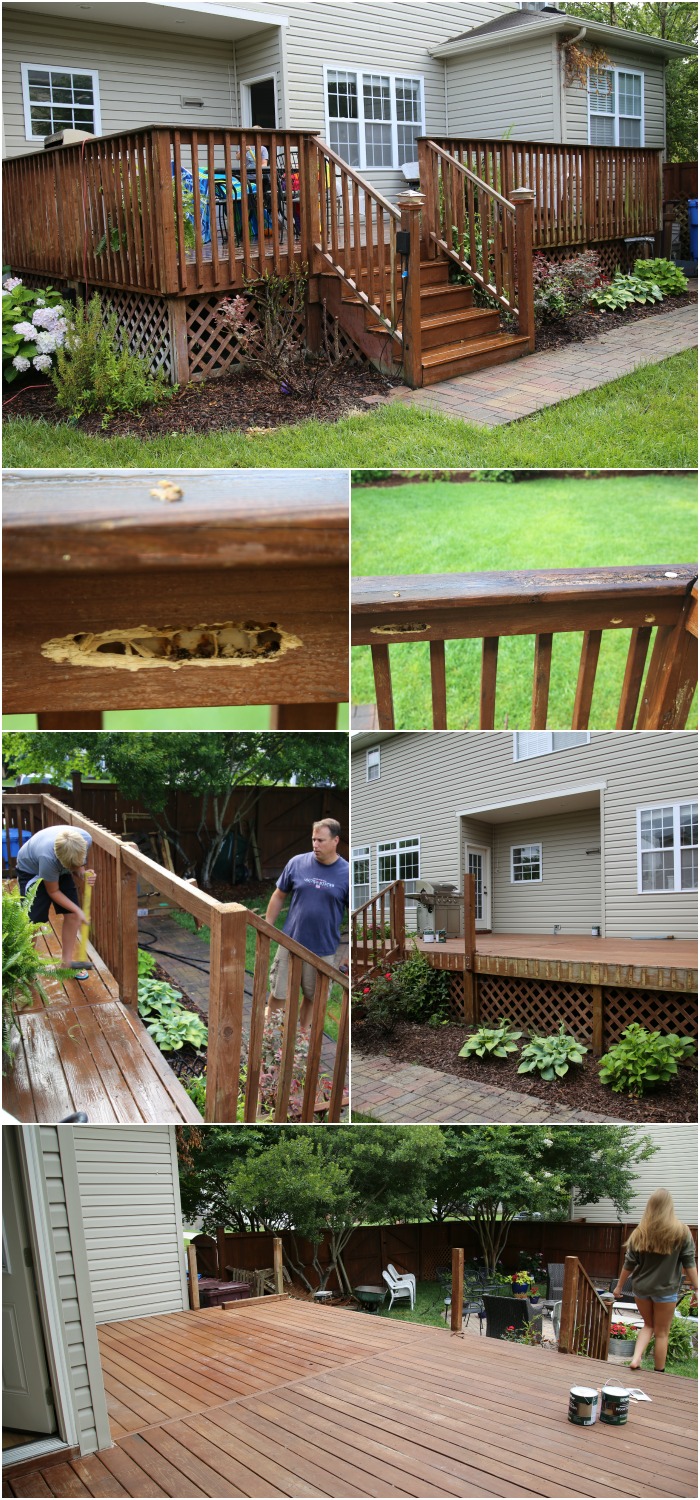
After the railings and posts were removed we needed to decide what to do with the deck. Do we just powerwash it and stain it again with natural cedartone stain? Or maybe we should go in a whole new direction. We went for a total change. I wanted the deck color and design to feel like it was an extension of the inside of our house, so when you looked out the windows, everything coordinated.
Preparing and Staining the Deck
Once the demo was done it was time to prepare the deck for staining. Before staining any deck make sure the deck is clean and free from mildew and dirt. If you do not remove it then the stain will not adhere to the wood. We sprayed our deck with a solution of bleach and cleaner, allowed it to sit for awhile, sprayed again and scrubbed the wood with stiff bristled brooms. Then the entire deck received a rinse with clean water and was allowed to dry completely before staining.
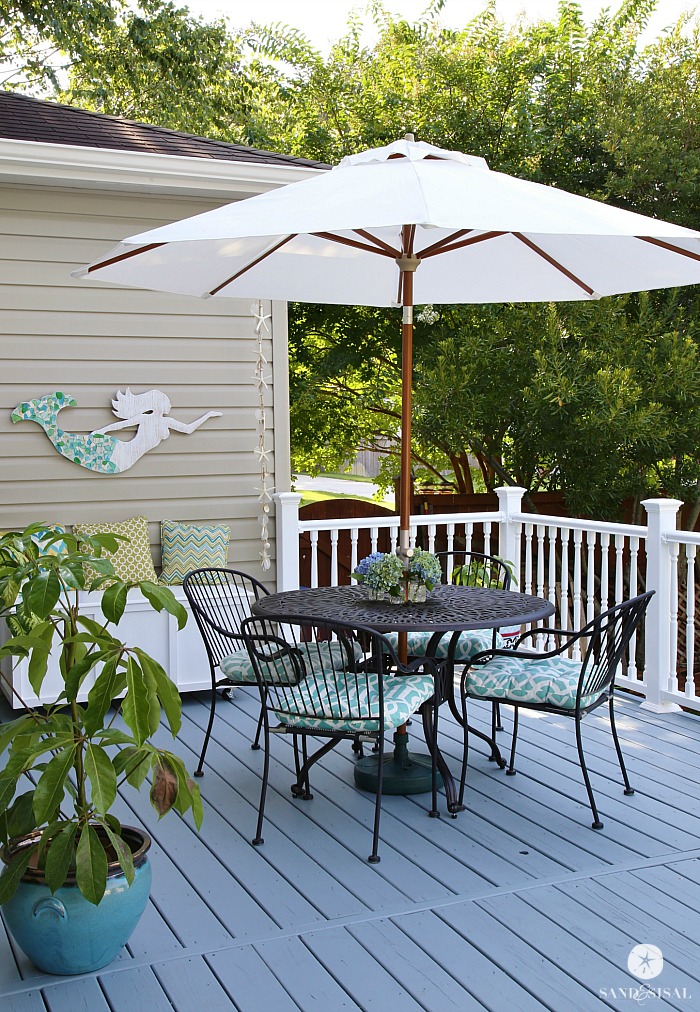
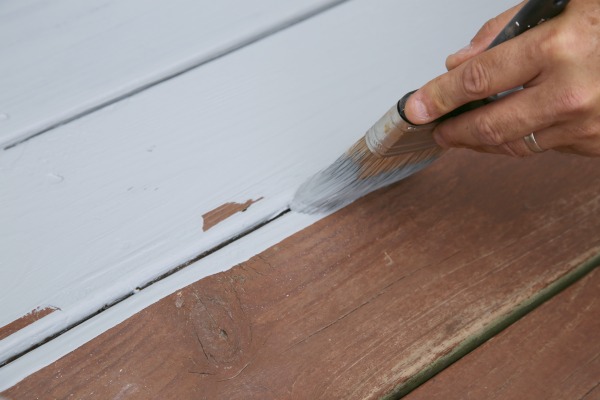
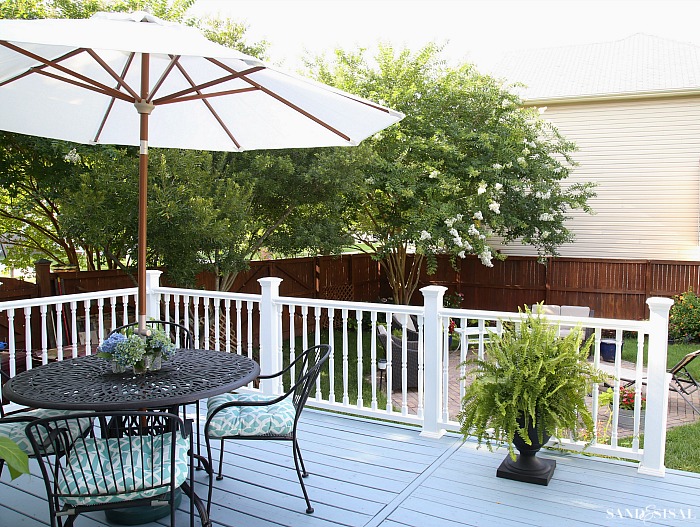
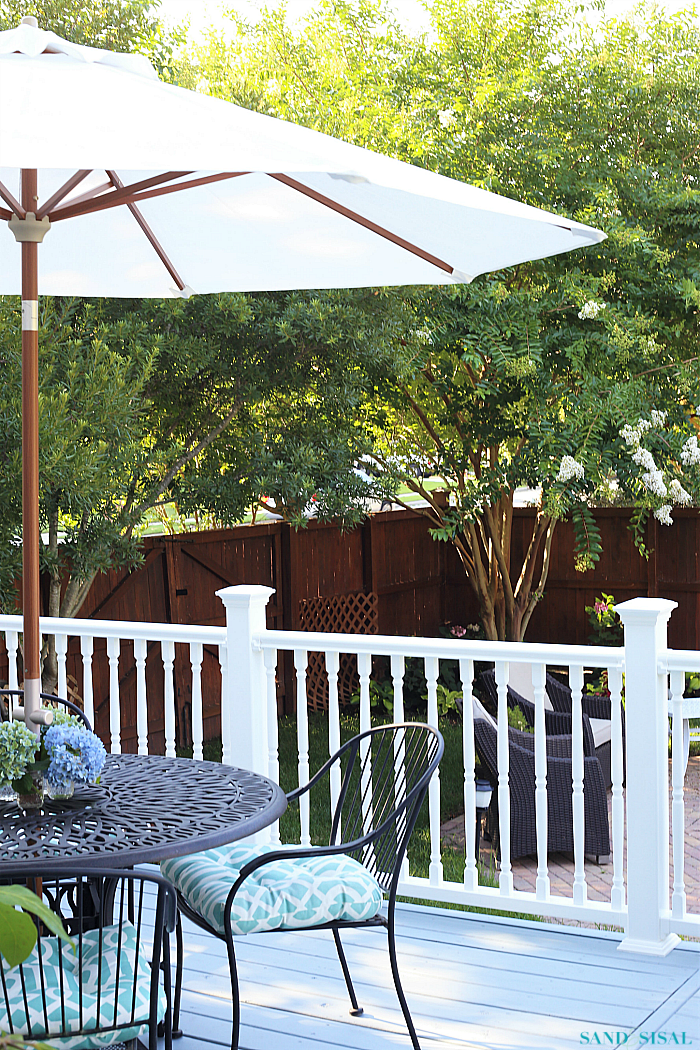
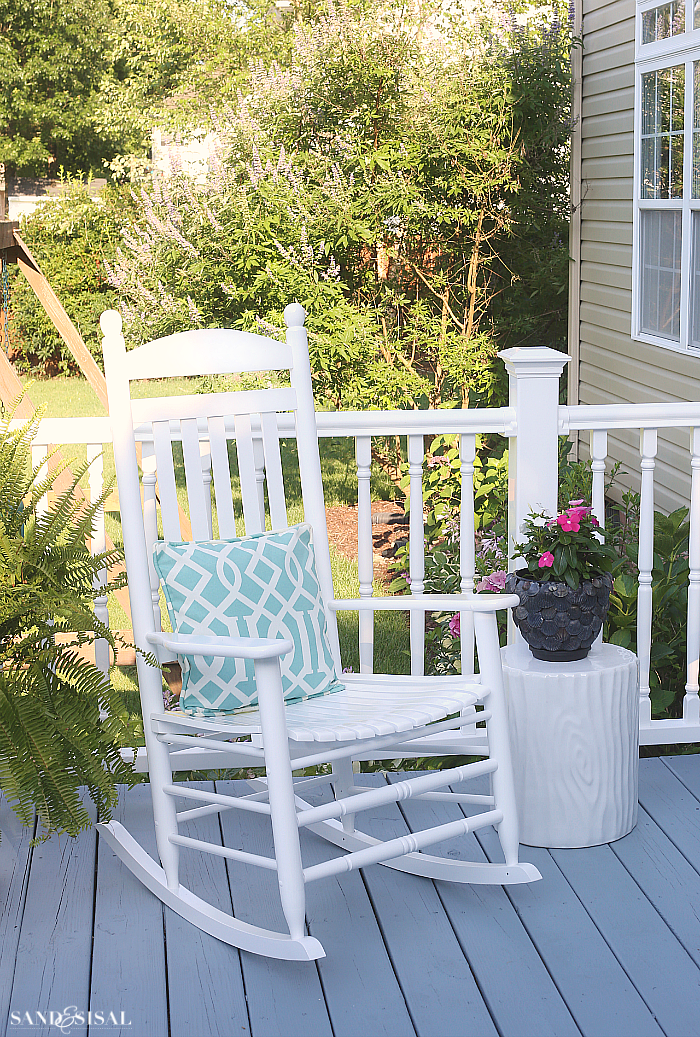
We chose Solid Color Waterproofing Deck Stain by Behr in Colonial Blue and Bright White. I am so pleased with the color. It is a beautiful blue gray. In bright sunlight the color appears gray and in the shade and on cloudy days the blue tones are more apparent.
Most of the 1st coat of stain was applied with a roller but we noticed that the roller wouldn’t coat the wood between the boards so we switched over to using a 4 inch wide paint brush to finish the rest and for the 2nd coat of stain. It didn’t take very long with 2 people painting.
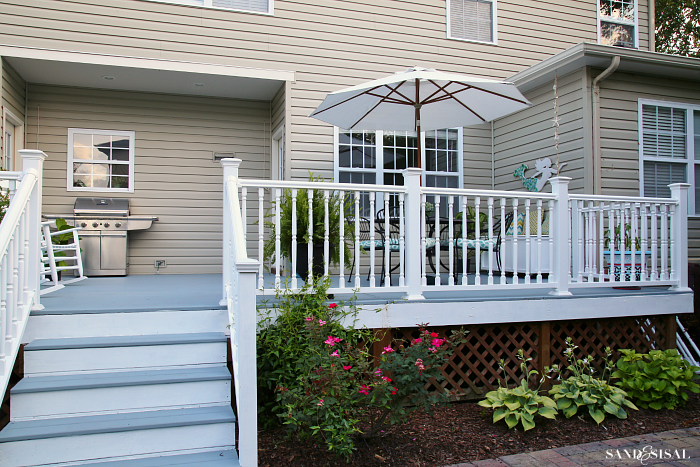
The white vinyl composite deck post and railing system is by Veranda and is available at Home Depot. It was easy for us to install and the sturdiness and strength is impressive. Our bees won’t be munching on these railings!
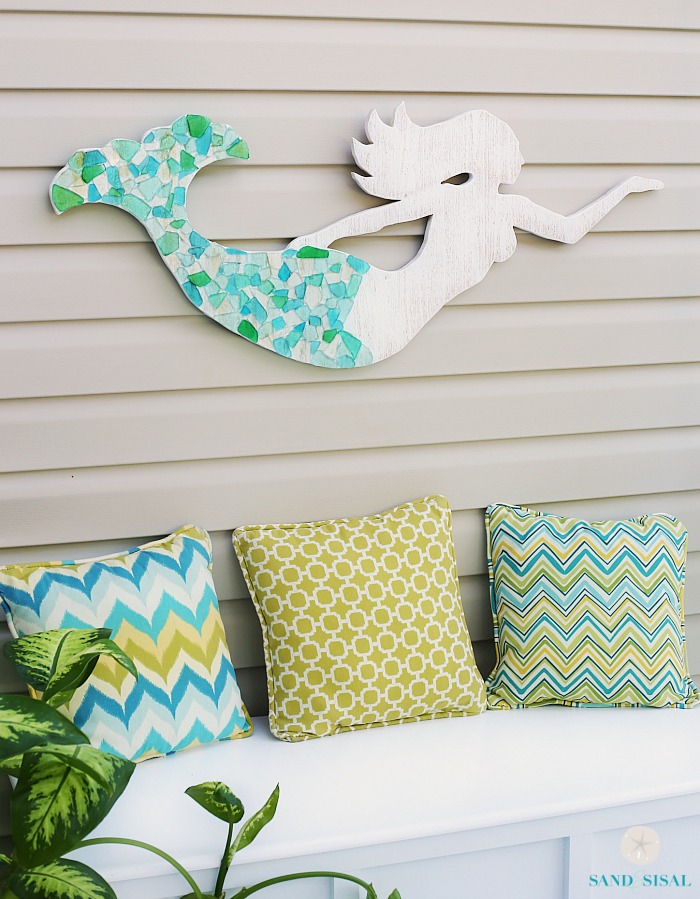
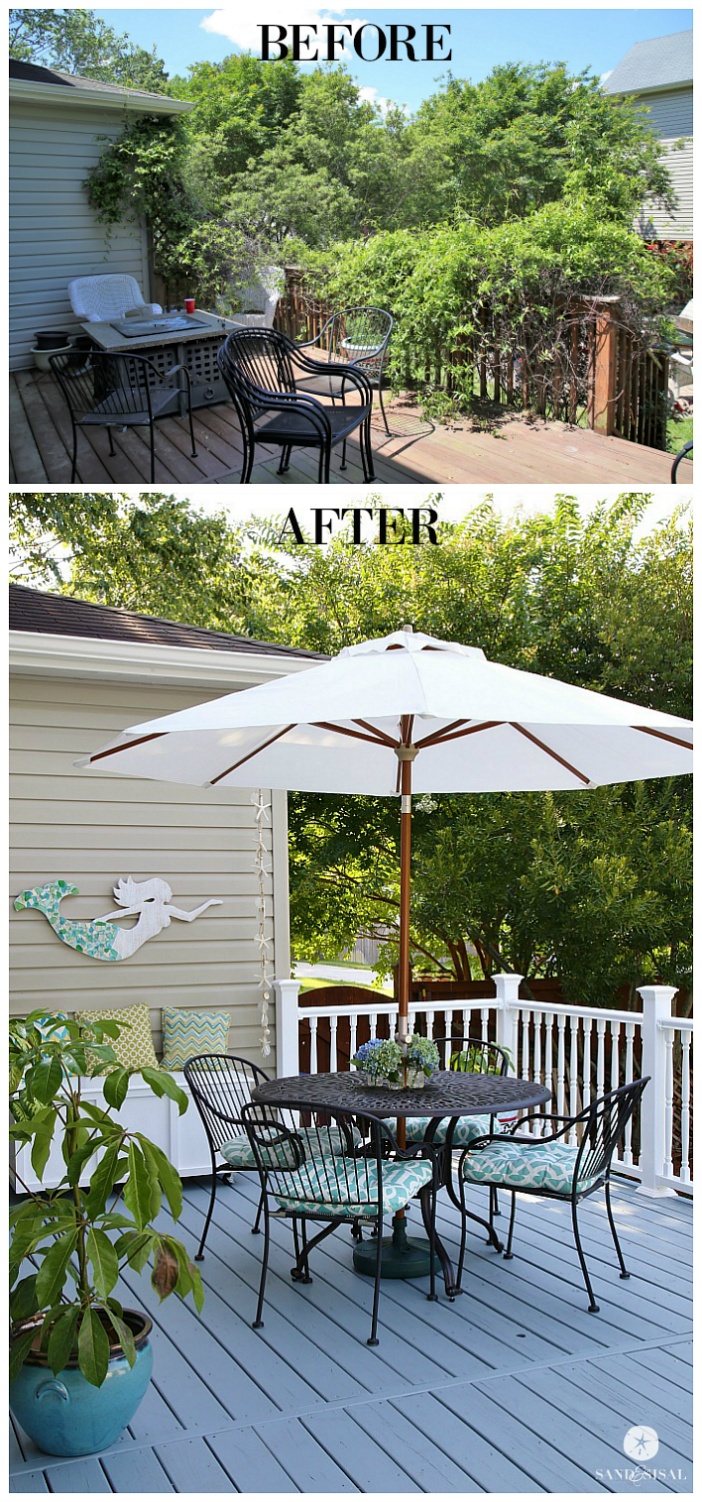
I brought my sea glass and cedar wood mermaid outside. She’s smiling upons us all now! The DIY Shell Wind Chimes made with capiz shells, starfish and crystals, sparkle and clink in the breeze.
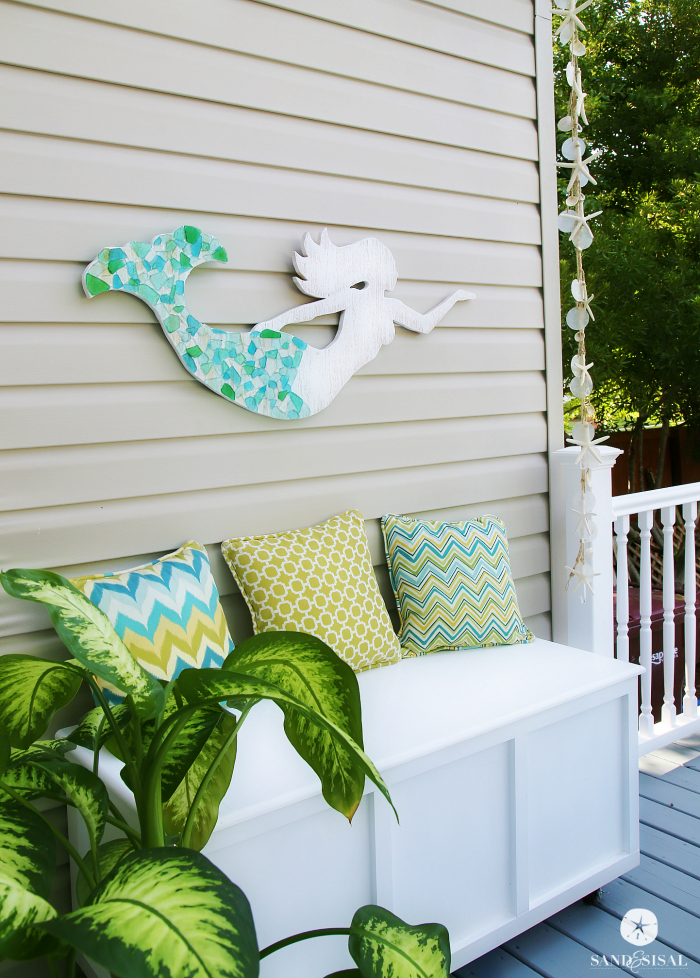
And for all who might have been wondering, my DIY Outdoor Storage Bench is holding up great!
I picked up a new patio umbrella from Target and the aluminum round patio table is from Amazon (affliate link).

Two new white rocking chairs add to the southern coastal vibe. 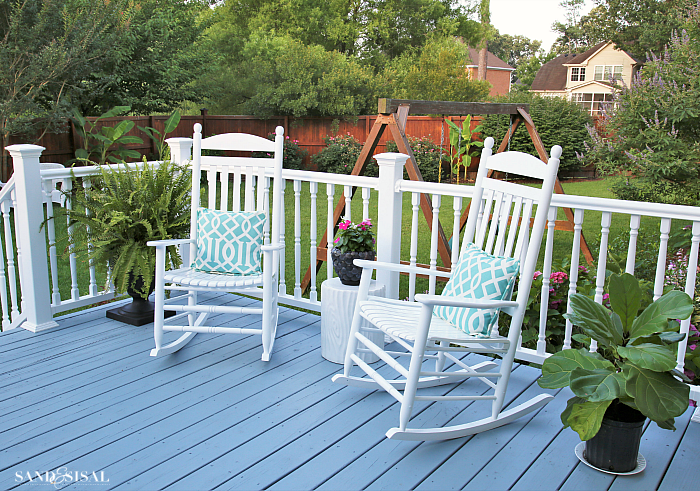
I am in love with the white log garden stool. It was on clearance at Target.
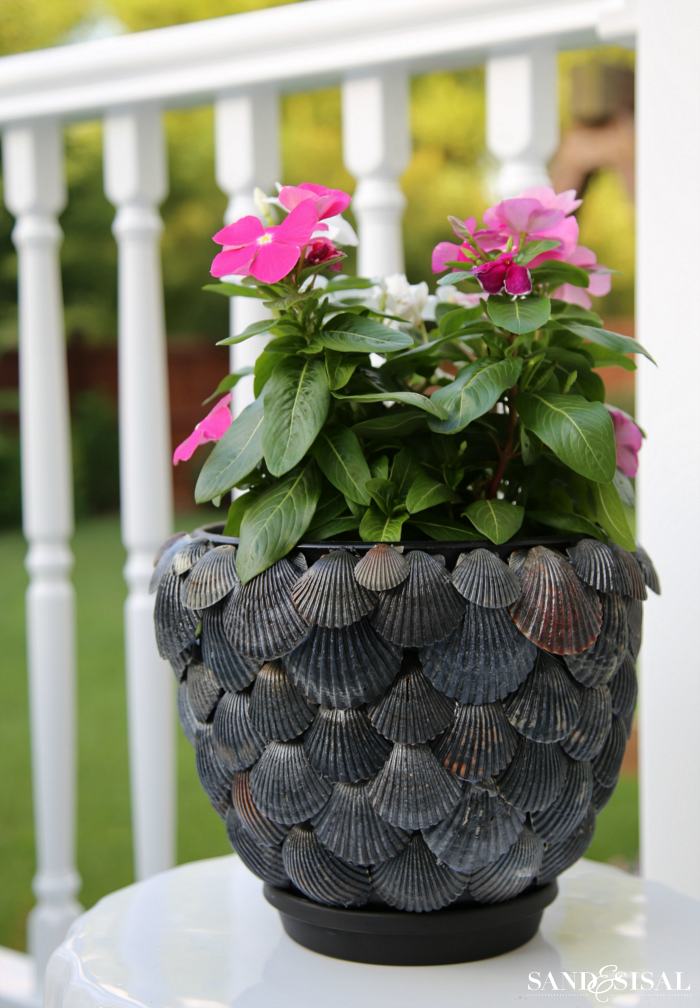
Hold tight! Later this week I’ll share a tutorial on how to make some beautiful and unique shell planters!

Just one little reminder of what it looked like before….
Thanks for checking out our new deck makeover! Now I’m off to pour and enjoy a glass of iced tea on the deck!
KIM
Very nice! That’s quite a before an after!
Thank you Erin!
Absolutely gorgeous, Kim! Love the mermaid! I’m going to try and make me one for outdoors. Your coastal decor is awesome! I’m Hoping you are going to paint the lattice underneath to coincide with the white railing? Love the shell planter. Can’t wait for the tutorial!
Thank you so much Nancie! I originally thought about staining the lattice white but it will be such a pain to do it. Maybe this fall, once it’s cooler. We are hitting over 100 degrees today.
Beautiful deck. Love that fern in the urn in the corner. Great space to spend some summer days. FYI those are carpenter bees and they tunnel into wood to raise their young, they don’t eat it. And they do resemble Bumblebees, who do no harm and make their nests underground. And they all pollinate our plants.
Thank you Dee! They raised a bazillion babies over the past 10 years in our railings unfortunately. They will most likely move on to my fence now. I purposely choose many flowers and trees that attract bees and butterflies so it’s no wonder they love my home. 😉
LOVE! Great job! Do you actually grill that close to the house though?
Thank you Lee! Ha!, no, I pull the grill out a few feet before we start up the grill. After our house flood, the last thing I need is a house fire! 😉 Have a great week!
Wowza! what an amazing transformation.
Thank you Mercy!!
Fantastic job you both did. How nice you finished so you can enjoy it this summer.
You have a lovely deck & yard. Enjoy!
Thank you Janet!
You win! Best before and after ever! Seriously, great job!!
Ha!!! The before was awful for sure. Thank YOU!
Wow what a difference, beautiful. I too love that mermaid, and the shell chimes.
Thank you Kate!
Love the new deck! Just beautiful! I hope you all are getting to enjoy it often this summer.
Thank you Robyn! We are excited to use the deck once again!
Wowee!! What a transformation! Your deck is now a beautiful, inviting sanctuary with lots of “eye candy” everywhere. The mermaid is perfect out there, as are the capiz & shell windchime. You completely nailed it, Kim! ★★★★★
Thanks so much Amber! Such a nice comment!!! 😉
What a transformation! It looks sooo inviting, Enjoy!
Thanks Lee!
Woohoo such a transformation! I love the bright colors and your decorating touches, so pretty!
Thank you Cristina!
Wow, I love this Before & After! It looks fantastic! Awesome job.
Thanks Denise!
Beautiful, was looking for some thing like this for my deck, just love the white/gray
Thank you Linda! I’m really pleased with the color choice.
Love the after ….especially the mermaid ?
Hi Kim, what a fantastic job you have done on your deck, your hard work sure paid off and the outcome looks stunning. I love the choice of colors and that table is so charming! Perfect coastal look. All My Best Maria
Thank you Maria!