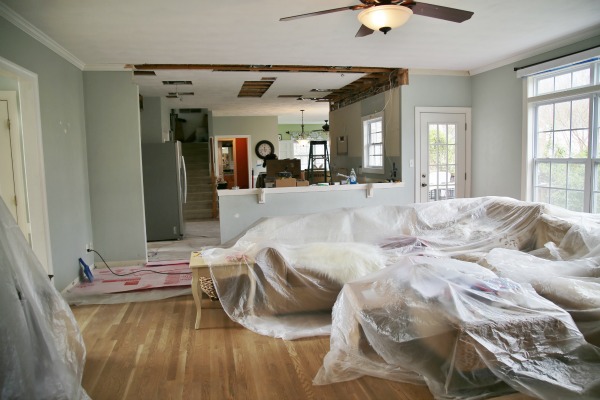
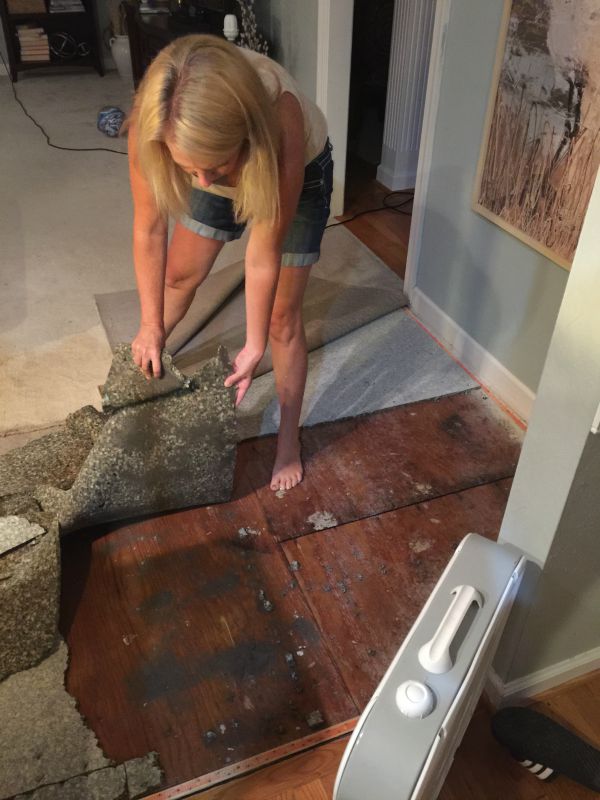
I feel like someone has pressed the pause button on my house. We have been in a state of constant chaos and disarray since our house flood back in August. The family managed to get through the holidays even with all the dry wall dust and contractors in and out all day long. This kitchen and family room renovation has taken on a life of its own. You all know the children’s book, If You Give a Mouse a Cookie, right? Well if you give a mouse (design blogger) a cookie (insurance money and a chance at a new kitchen) she will want a glass of milk (Mama has opened up a whole slew of new renovations!). But before I get to all those, I realized that I never revealed the color of the hardwood floors. So today is the day! Take a gander at the new Weathered Oak floors!
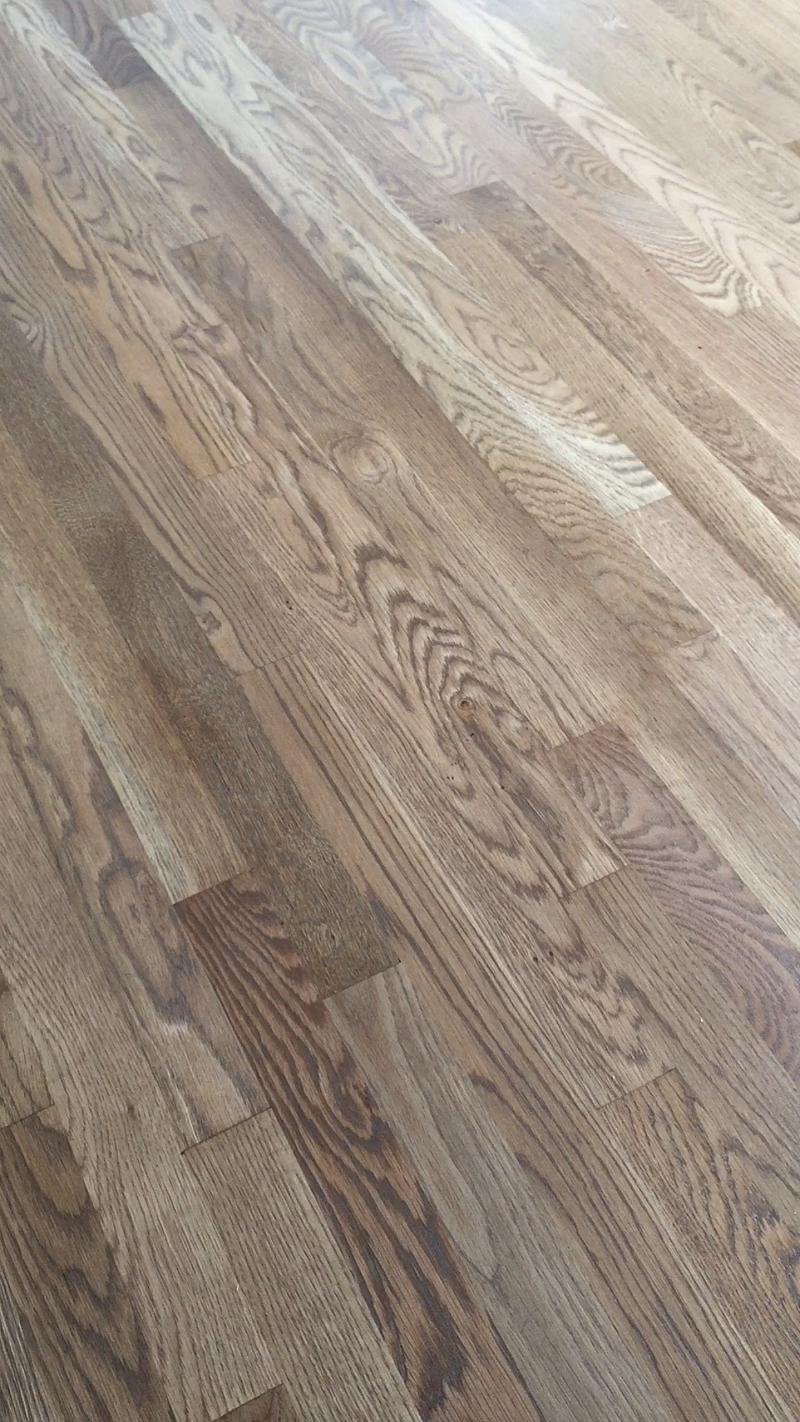
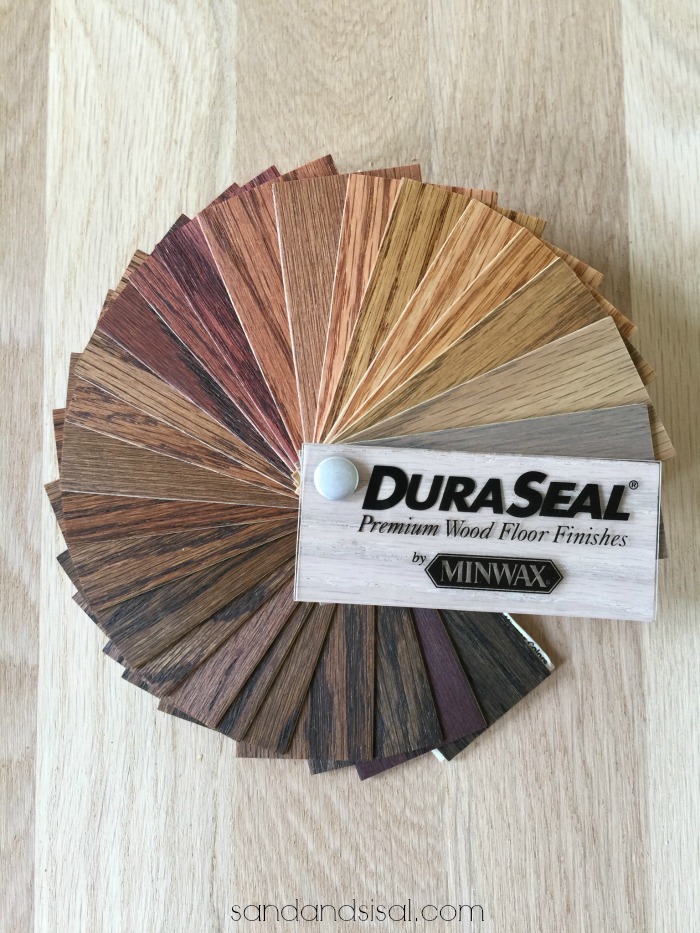
I absolutely love the variation of color and the contrast of light and dark wood grain. Weathered Oak has been a huge favorite stain to work with. I refinished our kitchen table with it and love the subtle gray tone that it has. The stain looks very different on other types of wood. On both red and white oak it carries slightly tones, whereas on rosewood (like my table) or pine, it allows a slightly grayer, driftwood tone.
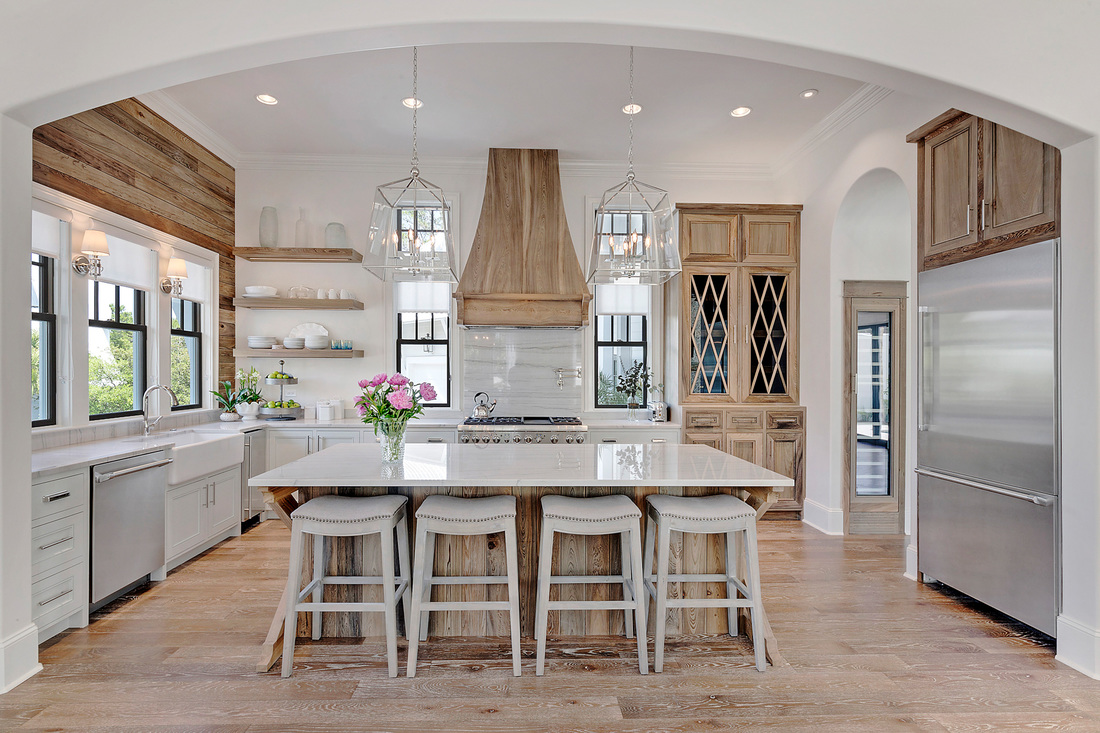
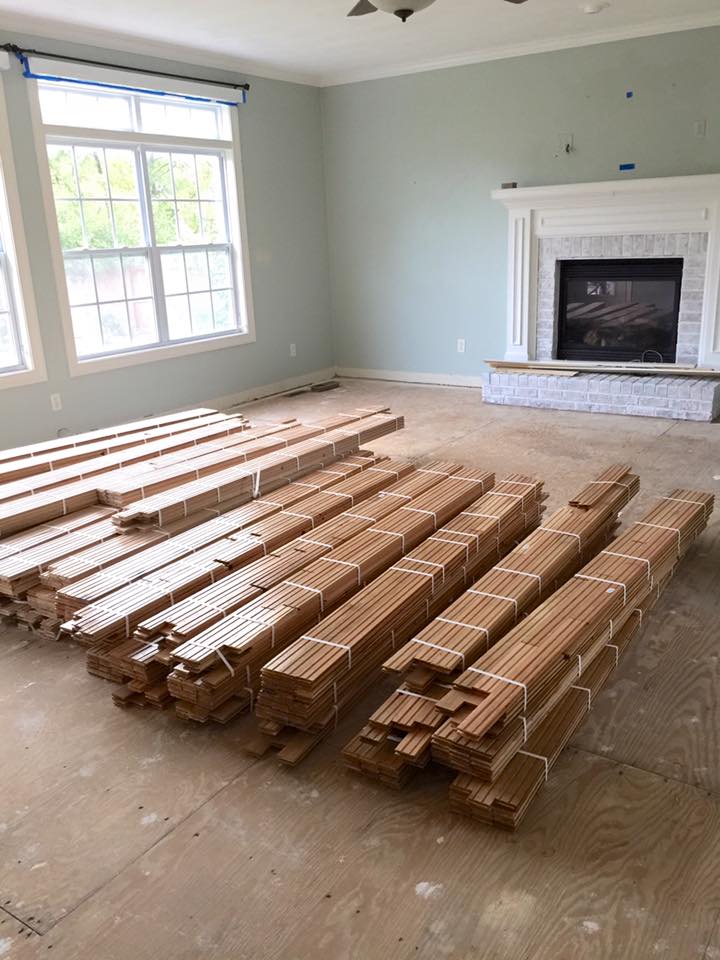
The floors in our home are all white oak and we replaced the carpet in the family room with the white oak hardwood. If you recall, these beautiful floors and coastal kitchen were the inspiration for our new refinished white oak floors. Stunning isn’t it?
I took a little video tour of the new weathered oak floors on my iPhone. Please forgive my less than impressive video shooting. This video was originally intended to show my mom and sisters the new floors and I didn’t realize until later that I totally shot the video the wrong way. Anyhoo, you get a little tour of the weathered oak floors before all the furniture was moved back in.
If you give the mouse a cookie, he’s going to ask for a glass of milk…
Here is a shot of the fireplace in our family room and the new floors. I’ve never been happy with that fireplace. Last year I whitewashed the brick and it looked much better, but it still bothered me. The hearth is a foot high and the mantel is approximately 5+ feet high. Overall the entire design was too high for our ceilings.
Hence comes in the cookies… and milk… and… well since the kitchen is in disarray, then why don’t we just change the fireplace too?

That darn mouse.
My thoughts were to lower the mantel and cover the brick with tile. The surround needed to be removed first so that we could see what exactly we were dealing with. Of course once we removed the surround we realized that the brick was cracked and about to fall down.
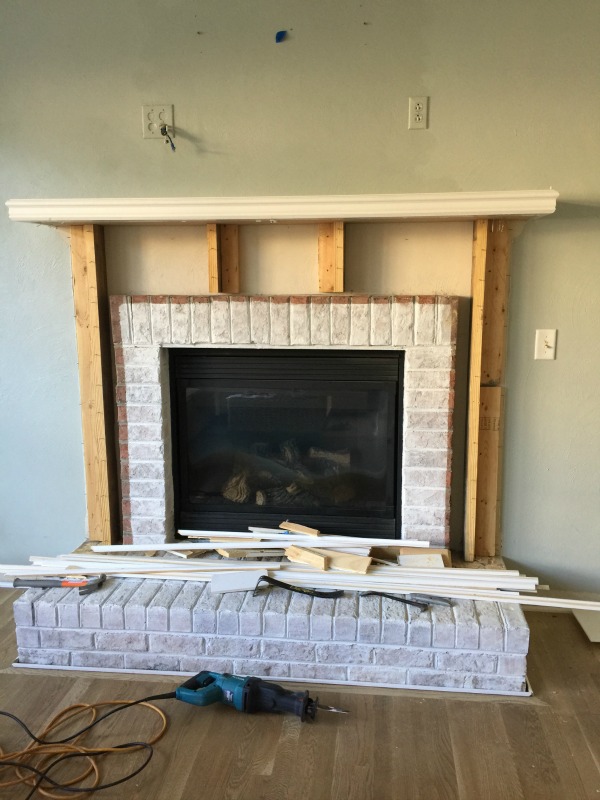
Note ladies: NEVER leave for the grocery store when your husband has a sledge hammer in his hands. Guys LOVE demolitioning things…
Anything.
The next thing I knew, the entire hearth was removed too. Well while we’re at it, why now just lower the entire gas fireplace insert too? That’s easy right? Ummm no. That involves not blowing up your house… so more sub-contractors needed to be hired, like plumbers who can move gas lines (little details like that).

We have changed plans so many times with this kitchen and familyroom it’s crazy! We knew that we have ZERO desire to endure a large renovation ever again!
That darn mouse got his milk but now he wants to look into the mirror to make sure he doesn’t have a milk mustache too…..
The kitchen cabinet designer suggested the idea of removing the soffits in our kitchen and take the cabinets up to the ceiling. Hmmmm…. the wheels were turning! Why not? We needed more storage space so let’s remove the soffits. This meant scratching our entire kitchen cabinet plan and starting over and going a-la-custom-cabinets.
Lord have mercy. What were we getting ourselves into?

All of Christmas break we had contractors and subs at our home 4-5 days a week. There were issues, of course, that they ran into and all my husband can see is the dollar signs adding up.
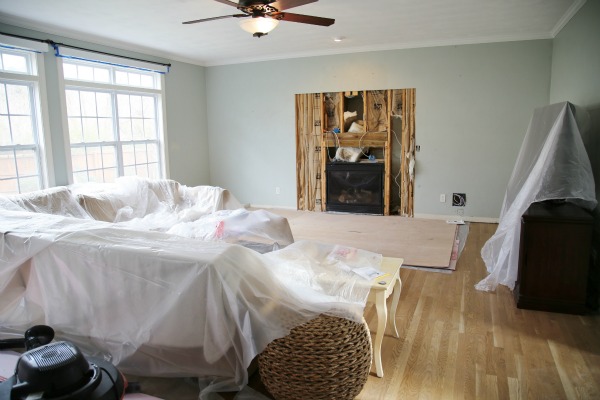
Our first floor is covered in perpetual drywall dust. I’ve lost my temper a few times with the subs and I’m quite sure they don’t like my Type A standards but oh well! 😉
In the end this new kitchen and family room will look fabulous and I can’t wait to show you all! The kitchen cabinets are supposed to be finished by the end of the month (fingers crossed). SIX months without a kitchen is about to put me into the crazy house. (deep breaths… all together now.. inhale… exhale… ) 😉
If you have gone through a large renovation, I would LOVE to hear your stories and advice! Please share with me in the comments below!
KIM
Catch up on all the progress after our home flood!
Choosing Hardwood Floor Stains
After the Flood: Preparing and Installing Hardwood Floors
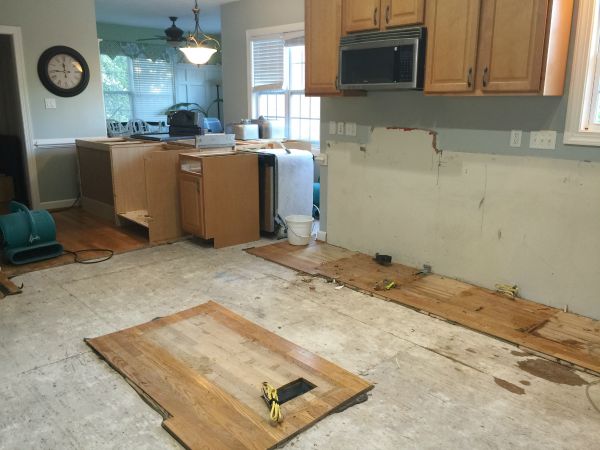
Waking Up to a Flooded Kitchen & Familyroom
Oh Girl, you have been through sooooo much. The end is almost near, fingers crossed.2016 is going to be your year and those floors are just BEAUTIFUL!
xo
Kristin
Thank you my friend! I know you have endured this kitchen renovation (and worse) also. I’m gathering up your strength and gorgeous design inspiration to get me though! XOXO
That is the floor I wanted for my house. The last owner had already put in red oak in the kitchen/foyer area, so I had no choice but to do the rest of the house with red oak. I used a medium dark stain because my contractor said that he would never be able to get the red tones out. So I have dark floors. Sigh.
So beautiful.
Thank you Teri! Our floors used to be a very orange butterscotch color. I hated it. These are so much nicer. The next project (if my husband doesn’t lose his mind) will be to tackle the orange banister stair railings and steps and stain them in weathered oak also. 😉
What kind of finish did you use with the weathered oak? i have to pick a stain soon and love this. my floor guy uses oil based poly which i know has a amber color and i don’t want to have orange/yellow floors again (which is what i have now)
Hi Kristin, We used this: Bona Traffic Waterbone Sealer. It did 3 coats. It dries crystal clear, will not yellow and it’s what the NBA uses on their courts (I did mine in a satin finish though). http://www.amazon.com/gp/product/B0040RXD7Q/ref=as_li_tl?ie=UTF8&camp=1789&creative=9325&creativeASIN=B0040RXD7Q&linkCode=as2&tag=sasi01-20&linkId=DX24AGLMPMSIAYNN
It’s going to look AMAZING Kim! I can’t wait to see it.
Thanks Maryann! I know it will… just seeing the end of tunnel is a step in hopeful fortitude!
He Kim…just think..after this renovation you will be able to survive anything! Love,love love the weathered oak.
Thanks Shirley! I hope so!
A major renovation is like childbirth, after it’s all over and you have something beautiful and perfect, you’ll forget all the pain.
And renovate something else.
Or have another baby. lol 😉
Heeheehee! Exactly! No more babies for this girl! Thanks Shannon!
I think I would have broken down and cried by this point. In the end, it will beautiful, but getting to “the end” may be a challenge.
Ha! I seriously almost have. I keep telling myself it will be all worth it in the end and just take one day at a time. Thanks! 😉
oh my gosh, Kim! The floors look A-mazing!! I remember back when you added hardwood to that front room (I think) and you really did not like it, but wanted it to match, and now you have a gorgeous floor! I love the weathered stain and can’t wait to see the finished rooms! I bet you’ll never be so happy to cook a meal ha ha! XO
Thanks Christy! Because we chose a good quality pre finished floors for that front room, our flooring guys were able to refinish them. YAY! Buh-bye butterscotch! I’m looking forward to the final results. The kitchen can’t come soon enough!
Could you share more about removing the kitchen soffits? Our house has them & our kitchen is SMALL, so I could use that space!
Hi Kathleen!
We had our contractor removed them. There are just some things I don’t DIY 😉 . He made sure that the huge beam that was hidden in the soffit which divided the kitchen from the family room wasn’t load bearing. Thankfully it wasn’t. But once the soffits were removed we saw all the short cuts the previous electricians took. We are having to re-route a ton of wires back into the walls. It has cost us more than we wanted but if we were going to pay for new cabinets then we’d might as well maximize the space and take them all the way to the ceiling. It’s a mess but worth it in the end. 😉
Your floors look amazing Kim. We removed our soffits during our recent kitchen reno, which is still going on, and I’m so glad we did. Can’t wait to see the results.
Thanks Kristi! So many of us are doing kitchen renos right now. Can’t wait to see yours too!
I love how your floor turned out. Can you please share what brand did you use for the weathered oak? Was it Minwax or DuraSeal? Also, what top coat did you use? Was the stain water or oil base? Thank you so much for sharing.
awesome kitchen
Where would one find the bar stools. Exactly what I have been searching for.
The floors are beautiful! Did you use a water or oil based satin poly top coat?
I love your minwax weathered oak color. Do you have any experience in creating a custom color mixing 50% weather oak and Classic gray. And because these are light colors, would you recommend any particular finish that does not Amber much, such as water based minwax ultimate floor finish with polyurethane, or is the usual oil based polyurethane okay? Thank you.
Hi! I haven’t tried mixing the two stains but I imagine that would be a nice color. The Classic gray is quite dark so I suspect that maybe 75% Weathered Oak and 25% Classic Gray would be lighter. Duraseal is the professional line of Minwax and is what the pros use. Most pros can mix any option for sample purposes. To seal our floors we had 3 coats of Bona Waterborne in satin applied. It is crystal clear, will not yellow over time and is significantly stronger than regular poly. The NBA uses it for all their basketball courts (in high gloss of course). It dries so fast you can walk on it the same day. Hope that helps!
Beautiful kitchen! I’m wondering the type of wood you used on your kitchen cabinets and did you use the same stain on the natural wood cabinets as you did the floors?
Hi Laverne! Our kitchen renovation ended up with white cabinets. The photo of the kitchen in the blog post was simply an inspirational pic from Old SeaGrove Homes for the type of flooring we were interested in. The wood they used for their cabinets is cypress and their floors are also cypress and are finished in a very specialized technique with two different stains. Thanks!
KIM
Can you tell me the wall color name and brand you used? I love how the soft blue-green-gray shade looks with the golden floors.
Thanks Jackie! The walls are Sea Salt by Sherwin Williams.
Kim, I’m so thankful to find your blog! You are giving me the inspiration I need. We are in the same boat you were–insurance is replacing our floors and ‘while we’re at it we might as well…’ fix everything else! It’s just like giving that mouse a cookie. This happened in early July and they are sanding the new floors tomorrow, Nov 6. But, I love your weathered oak and I’m excited to see how it looks in my house.
Thanks Kim! I’m sorry you are in the same situation. It’s stressful for sure. Good luck with everything and thank you so much for the sweet comment!
How do you order some of the flooring. My wife really lijes the color.
Love your floors & kitchen layout. So Bright and charming. Can you please tell me the dimensions? Thank you.