I bit the bullet, held my breath and took the plunge! I said buh-bye to the orangey-salmon brick fireplace and gave the it a lighter, brighter, fresher update. Yep, I whitewashed the brick! We have lived in our home for over 6 years and since day one, I’ve never liked it. Yes, I had hopes it would eventually grow on me, but is hasn’t. Today I want to share with you how to whitewash brick.
Here is a before pic of our fireplace. Now don’t get me wrong, I know that painting or whitewashing brick is a very controversial subject and a personal decision. My hubs was dead set against it for years (he’s a purist… no paintin’ nothin’ kinda guy) and this girl wanted to stay married. But he too had grown tired of the salmon pink and finally (thank God!) after showing me several before & after pics of other whitewashed projects, he gave me the thumbs up for approval to go for it! We have plans to eventually resurface it with fancy stone tile, but that will be a ways off. 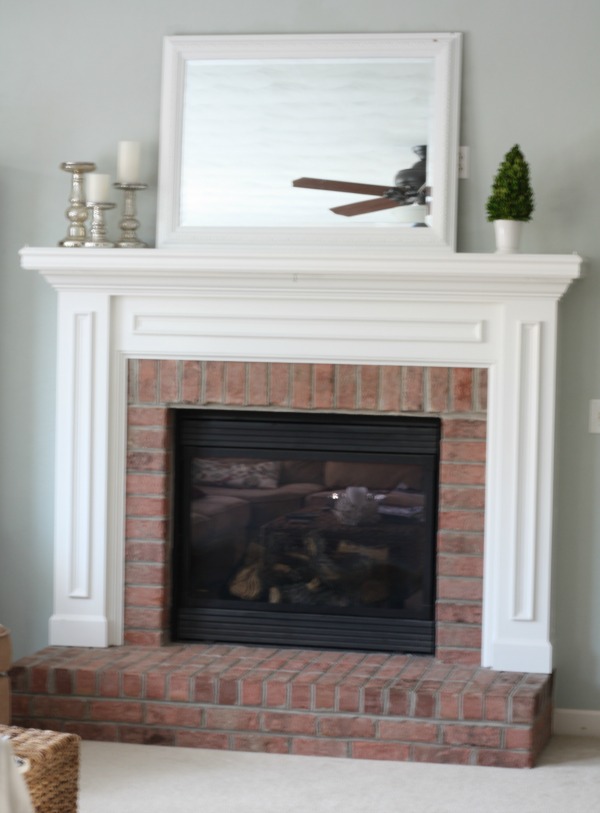
Whitewashing brick is a rather simple project that can be accomplished in a day.
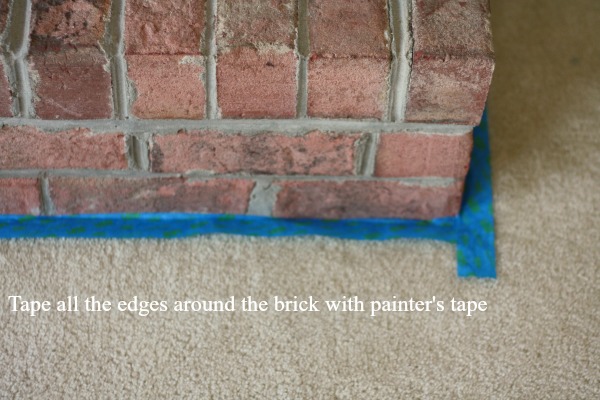
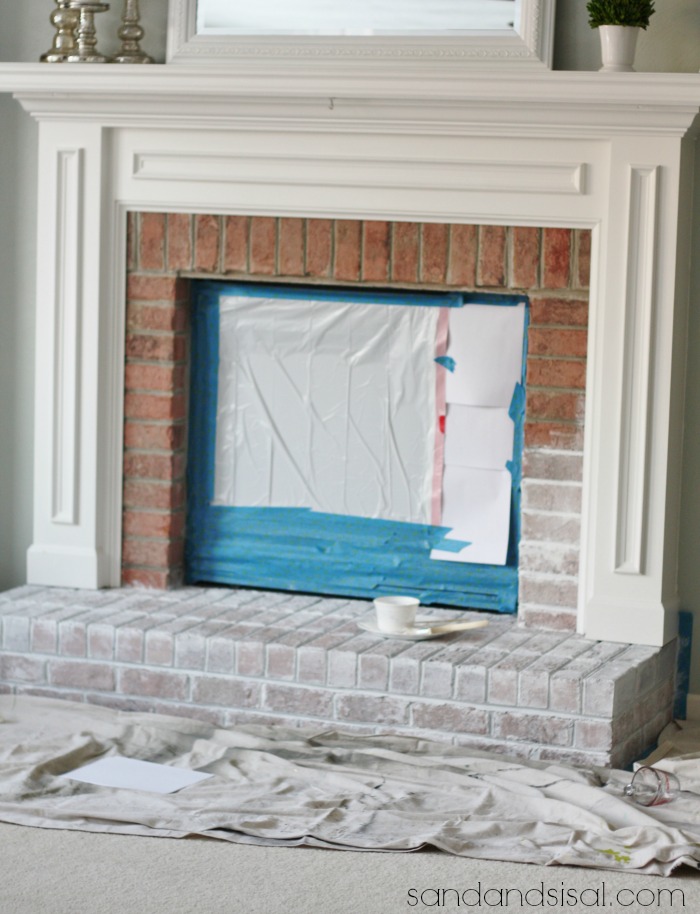
Step 1: The first step is to tape off the carpet or flooring all around the hearth, the walls along the brick and completely mask off the actual fireplace itself, covering all glass & metal. I used a trashbag, printer paper and painter’s tape. Then lay a tarp down to protect the floor. Expect quite a bit of splattering. Wear some gloves if you are worried about your manicure. My nails are pathetic, so if I’m slathered in paint…. so be it. 😉
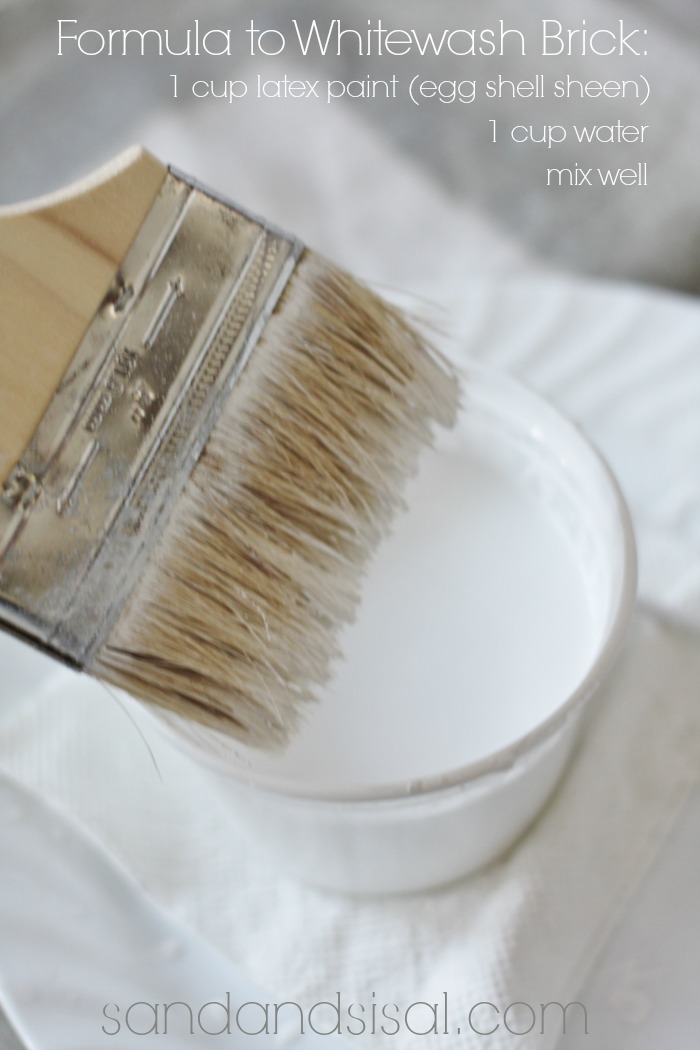
Step 2: Mix up your whitewash. For the first coat you will want to mix together 1 cup of latex paint (egg shell or satin sheen) with 1 cup of water. I mixed my whitewash up in a disposable plastic container.
Step 3: Dip just the tip of your paint brush (1/4-1/2 inch) into the whitewash then stipple and blot the paint all over a brick, then swirl and work it into the nooks and crannies. You will be shocked at first (I was for sure!). This is where you might want to pour a nice glass of wine before you proceed. Take a sip and a deep breath…. and repeat… “It’s all good…(exhale)… It’s all good…” (breath and then sip again).
It looks very bright white. Don’t panic! In a few minutes the whitewash will soak into the brick and will appear more translucent. If you really think you applied too much paint, then feel free to dab the paint with a rag or add a tiny bit more water to the solution.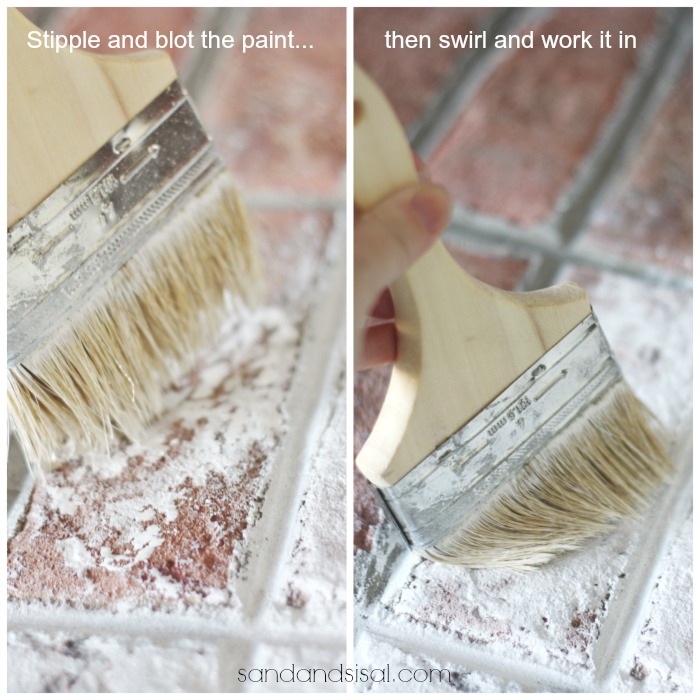
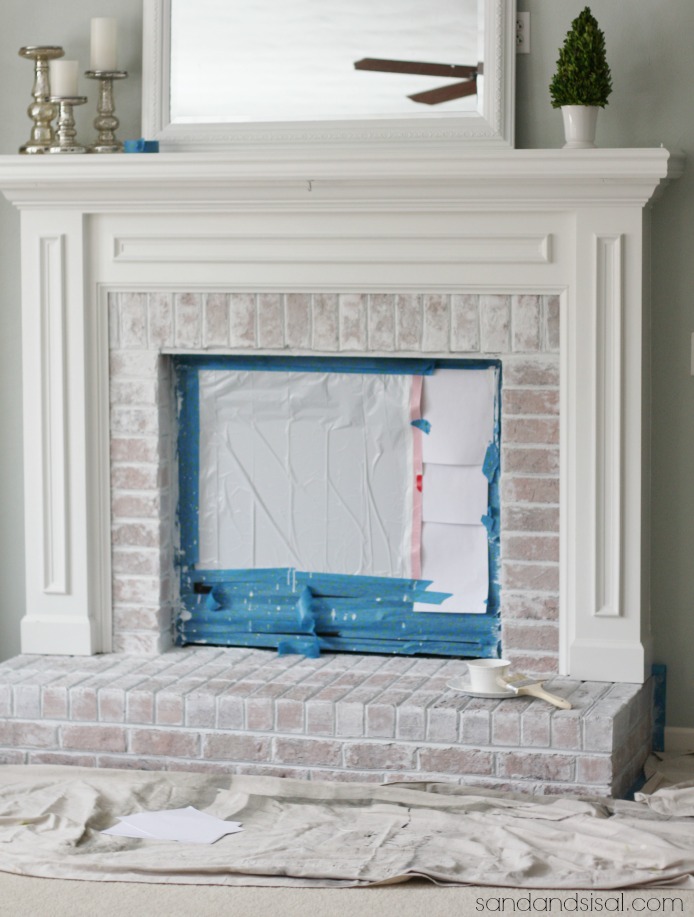
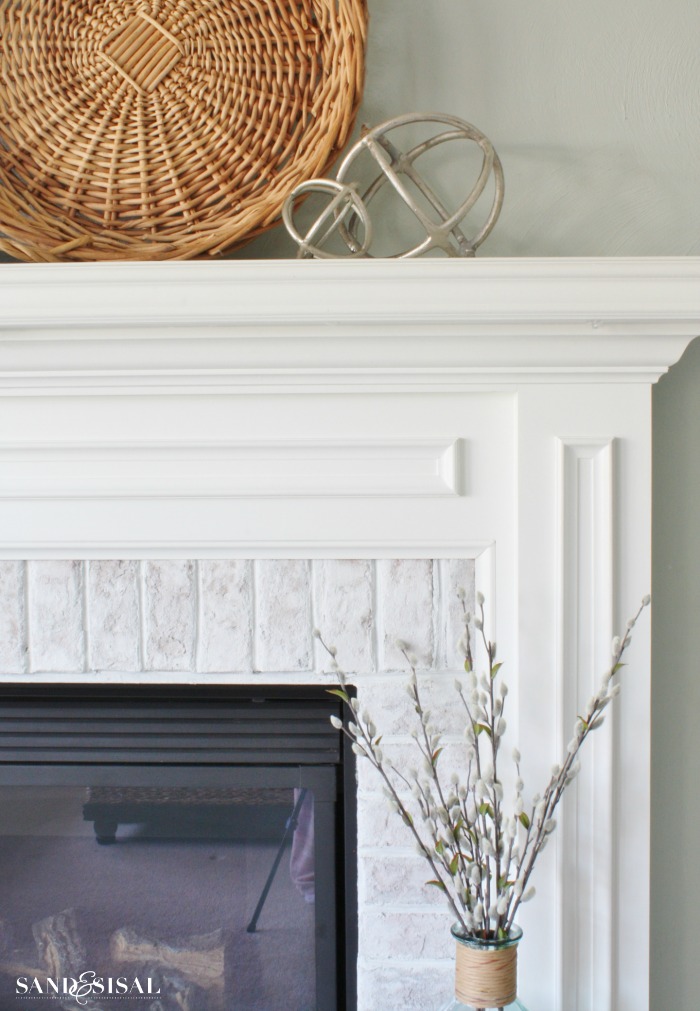
Below is a picture of my progress. Note how the integrity of the brick still shows through and the whitewash is not opaque.
I started this project late in the afternoon and after one coat I decided to walk away from it until the next morning. This is how the brick looked the next day. It was very spotchy and uneven. Different types of brick will absorb the paint in different ways. Our brick had areas that were very smooth and other areas that were very rough. The areas that were smooth were quite white and the rough, porous areas were still salmon.
So what do you do now?
Step 4: Time to mix up another batch of whitewash for a 2nd coat. Only this time your 2nd coat whitewash solution ratio should be 1 cup of paint : 2/3 cup of water. Apply the 2nd coat only to the areas that need it. Some areas on my fireplace took up to 6 coats of whitewash! Be sure to step far back to get a better view of where you need to apply more whitewash. 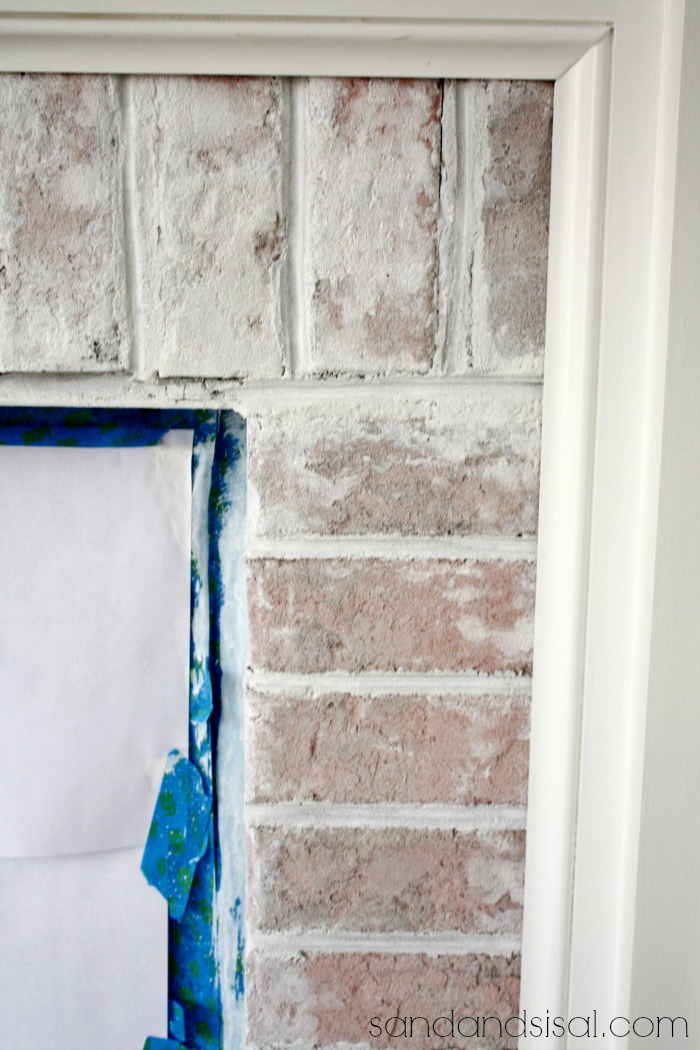
Be patient. Allow the whitewash to dry and soak in before you go too crazy applying coat after coat.
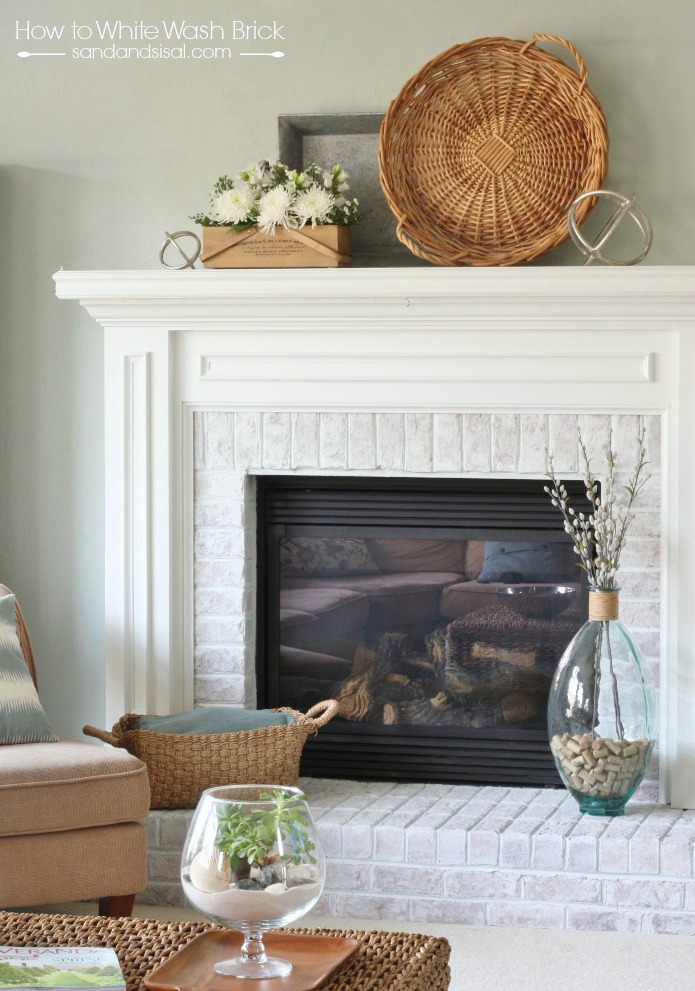
The pictures of the finished results look much whiter than they actually are. For some reason I was having trouble getting my camera’s white balance correct. Trust me when I tell you that the brick color shows through much more than how it appears in these pics.
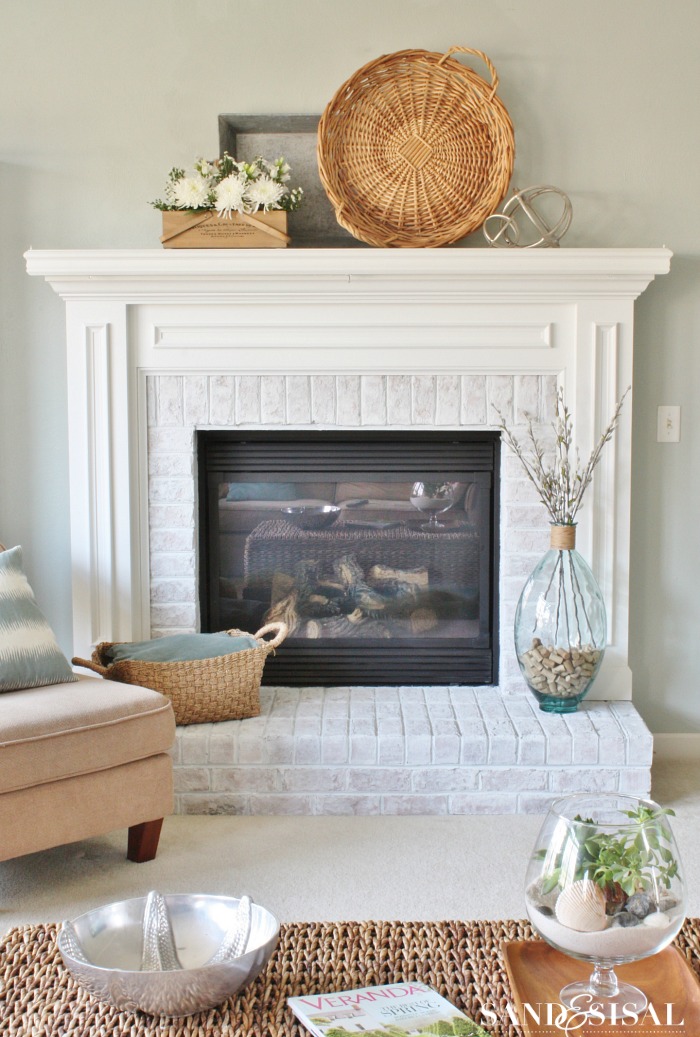
I’m happy with the results and wow, our family room appears so much lighter now!
And because I know someone is going to ask…. the wall color is Comfort Gray by Sherwin Williams (one of my favorite paint colors of all time!) 😉 Check out my DIY Project Gallery for more painting projects!
Happy Painting!
KIM
Looks Wonder!!!
I love it, it’s so fresh. Nice job!
The older I get the more I like white paint and the beauty and elegance it has.
Yes, the color is beautiful on the walls. I will have to write it down just in case a get a painting bug!!
Thank you Janet!
Love it,would love your opinion. I have quite a bit more brick than you plus some stained built ins that are connected and I the natural wood crown molding that is on the ceiling goes over top of brick And all around room. If I white wash the brick, do you think I should paint the built-ins and The crown molding white to match? This is why I haven’t done anything yet…. I hate the brick color and want a new look, thanks for any advice
Hi Amy! If you can send me a pic then I could guide you better. But all that being said, if you are interested in painting your built-ins, that is a big job. You need to know what the built-ins are made of and how they are finished. I love the ease of chalk paint for these types of situaltions, but depending on the the type of wood will determine if the built-ins need to be sanded and primed beforehand. Email me some pics and I’ll be glad to help you out as best I can. 😉
~KIM
It looks great! That must have been a hard decision but made a bit easier since you are considering covering the brick.
It was! Thanks Elizabeth!
Hi Kim,
I love the look of whitewashed bricks. Is there a reason you didn’t just use whitewash instead of paint? I’ve whitewashed entire garages, fences, etc, using builders lime and water, and it goes on really well.
Liz.
Hi Liz,
Nope, to be honest my garage is filled to the brim with left over paint and I figured it was the easiest method for not only me but the average DIY-er. 😉
Thanks!
KIM
I don’t see the need to cover the brick or update it any further……
The character you’ve added is hard to replace
Thank you Lore. That is very kind of you. 😉
Pretty and so much brighter!!!
Kim, it looks fabulous! I love the transformation and the simplicity of the entire mantel. Thanks for sharing.
Nice job! Looks much more beachy and works well with the wall color. Love the mantel display as well.
The whitewashed bricks look beautiful – the old brick just looked off with all that wonderful white trim and mantel! And as always, your mantel arrangement looks beautiful!
THank you Kristin!
So I white washed my fireplace brick and now I noticed that the mantel around it which is “white”, is actually a little creamer than the paint I used on the brick. Do you think I should go ahead and paint the mantel with the same paint I used on the brick?
Hi Cheli! It’s up to you. If you stand back and look at the fireplace and the brick looks whiter and brighter than the mantel then I would recommend painting the mantel.
Thanks! We are now prepping the mantle as we speak. 🙂
Just found your website. I love the built in around the fireplace. Did you do this yourself? I have a very similar fireplace and thinking of doing a built in.
Hi Jenna.
Glad you found my blog! Do you mean the molding surround and the mantel? We did not build it ourselves. It was installed by the builder. Sorry I can help you more.
Have a fabulous week!
KIM
I am considering painting or whitewashing my brick fireplace as well. My brick is brown and tan and we have a TV mounted above it so it just is a big dark mass taking all the light away from the room. My only concern is that the heat from our gas insert will discolor the whitewash as the brick gets pretty hot right above.
Hi Patti! It shouldn’t discolor. Whitewash is quite thin. Ours got very hot also and never discolored. Go for it! You will be amazed at how much brighter your space will be.
Found your post on Pinterest and thank you! Do you think I could “wash” my brick with a color other than white? I can’t find anyone who’s done that but your recipe of paint and water makes me think I might. Again, thanks!!
You are more than welcome to try! I don’t see why not! May I suggest you find a few pieces of brick that match your existing brick, to sample on first before you dive in. Always better to be safe then sorry. Good luck!
I want to whitewash my brick fireplace which has a very rough texture. Should I seal the brick after the whitewash because we do use the fireplace.
Hi Linda! Is your fireplace a wood burning or gas fireplace? If it is wood, then sealing is an option, but I don’t think is necessary. Hope that helps!