Spring has officially arrived and I am so happy to say, “So long!” to old man winter. With Easter sneaking up on the calendar in just a couple weeks, I knew I had to get a move on for Easter decorating! I want this year’s Easter decor to be light and fresh, with soft hues of robin’s egg blues and mossy greens. 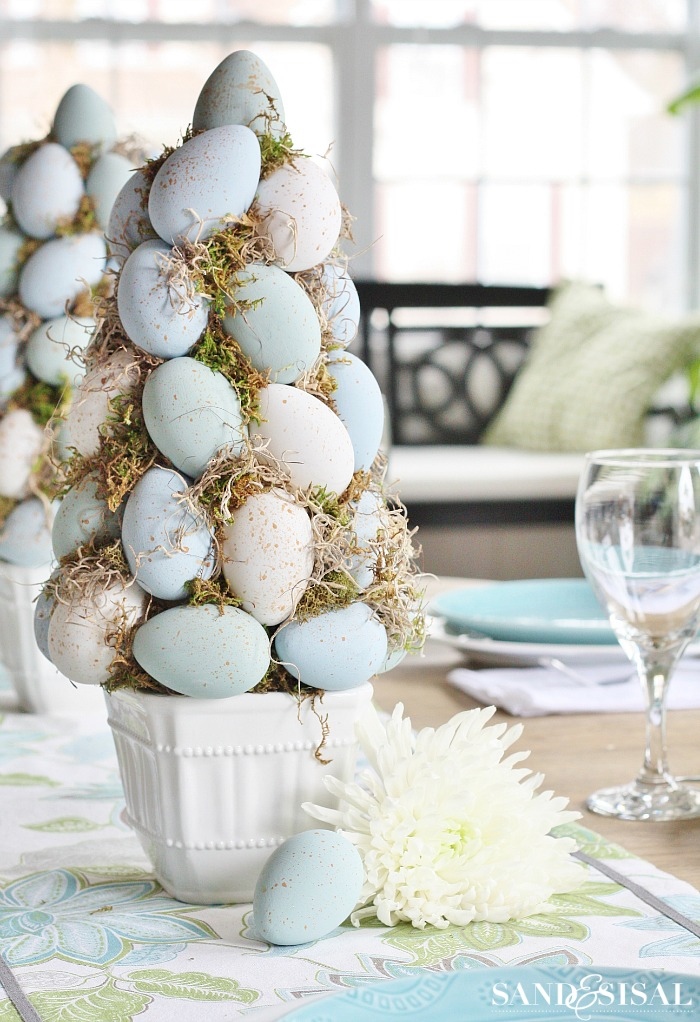
Back in 2011 I was oooing and ahhing over this beautiful egg topiary by Dear Lillie. It had been a gift to her and was very bright multi-colored and she spray painted it cream and added the moss. So lovely! I have been wanting to recreate something inspired by it ever since and finally, 4 years later, this was the week! Mine are much smaller and so I chose to make two Easter Egg Topiary Trees as an Easter Centerpiece on the table.

How To Make an Easter Egg Topiary Tree
These are rather easy to make and I’ve put together a step-by-step tutorial for you. Let’s make some Easter Egg Topiaries!
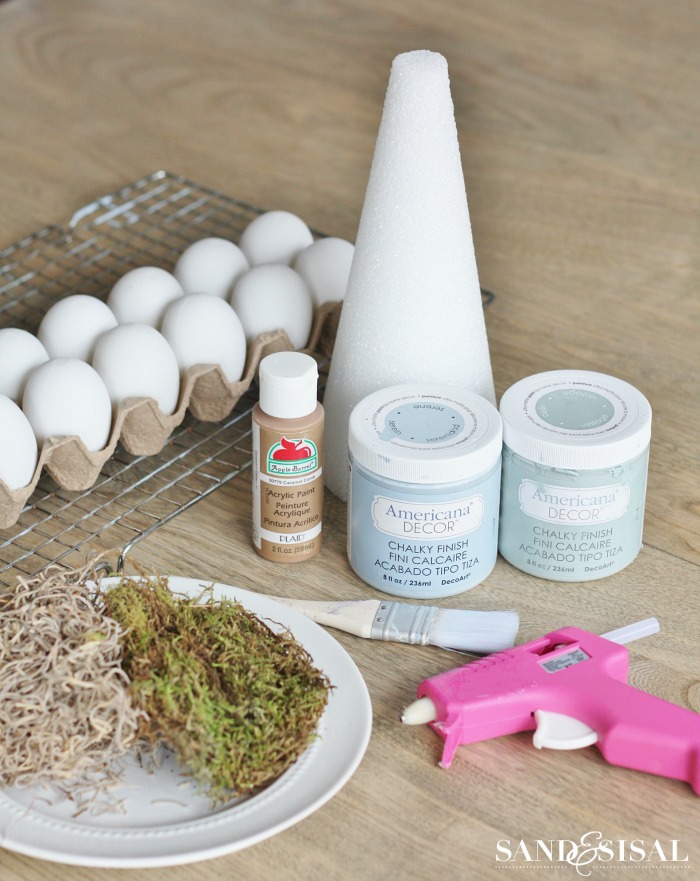
You will need the following items (Amazon affiliate links provided for your shopping convenience):
-
-
- 36 plastic craft eggs or Paper Mache Eggs
- 9 inch Styrofoam Cone
- Mini Glue Gun
- All Temperature Mini Glue Sticks
- Deco Art Americana Chalky Finish Paint, 8-Ounce, Vintage
- Deco Art Americana Chalky Finish Paint, 8-Ounce, Serene
- Brown Acrylic Paint
- Flat Paint Brush & old toothbrush
- Spanish Moss & Preserved Green Moss
-
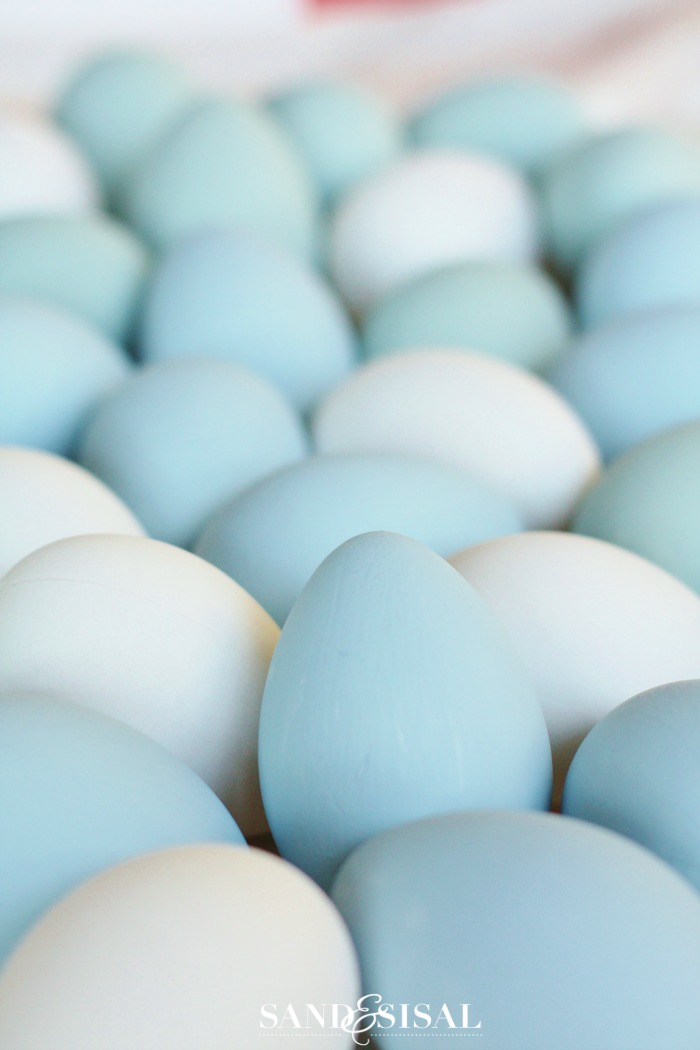
I found white coated plastic craft eggs at Michaels for $2.99/dozen. You will need 3 dozen for each topiary tree if you use a 9 inch tall cone. You could use paper mache eggs or even regular plastic fillable eggs if you want. I prefer the craft eggs because the seams on each egg are very minimal.
Step 1) Paint your eggs with a chalky finish paint (or any craft paint that you desire to use). I used Decor Art Chalky Finish Paint in the colors “Vintage” & “Serene”. They can be found at most craft strores and HD. I painted 1 dozen in Vintage, 1 dozen in Serene and left 1 dozen plain white.
Why did I use the chalky finish paint? Well, for 3 reasons.
- It sticks to anything! So if you are going to use inexpensive plastic, fillable eggs then you will need to use chalk paint on them (or prime them 1st… pain in the rear).
- I love the velvety matte finish of chalk paint.
- I already had both colors on hand! (A little chalk paint goes a very, very long way).

Do you love my manicure? Prepare to get messy. These little suckers are slippery when painted! Rest them on a wire rack to dry. Some eggs might need a 2nd coat of paint.
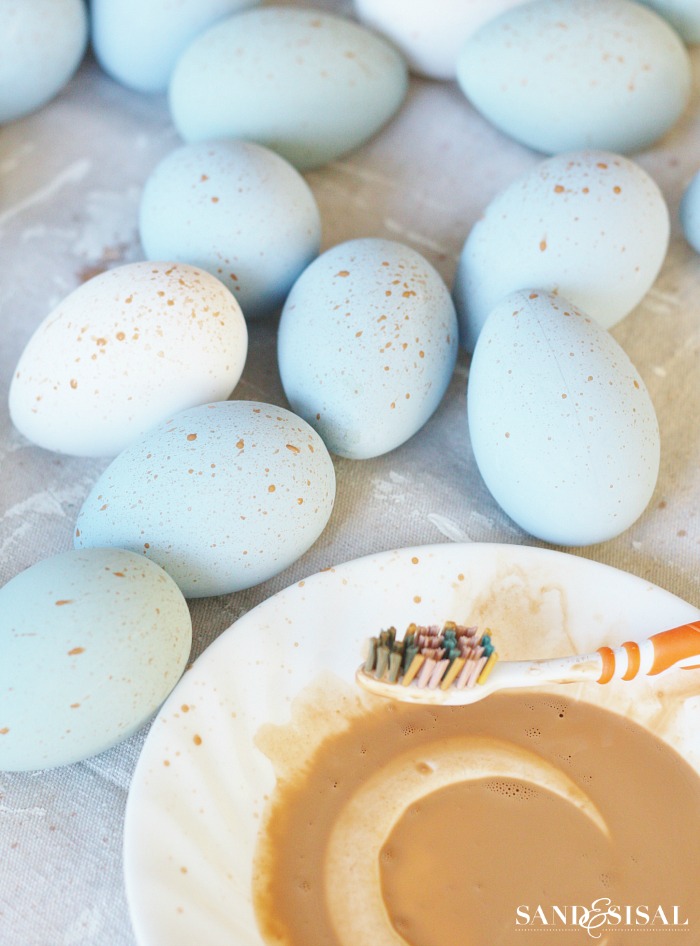
Step 2) Time to add some robin’s egg speckles! Mix up a small amount of brown craft paint with water and dip your husband’s toothbrush (just kidding), an old toothbrush into the paint and splatter the eggs as much as you desire. Allow them to dry.
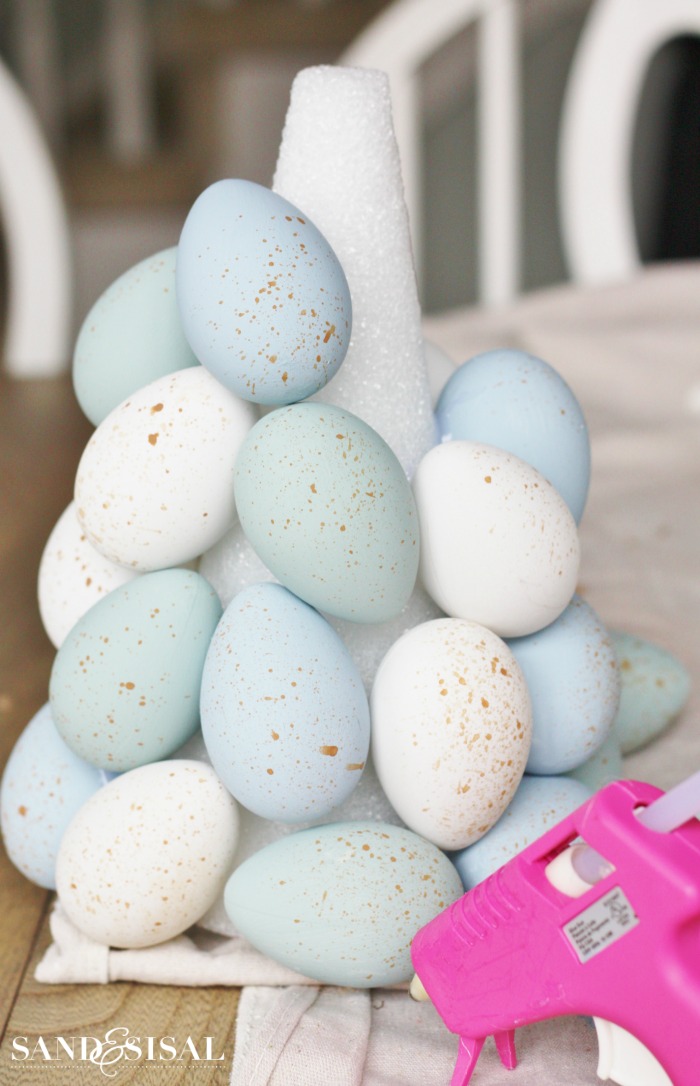
Step 3) Time to assemble the Easter egg topiary tree. Starting at the base of the cone and working your way around the cone and then upward, attaching the eggs to the cone with hot glue. The cones have a flat top, so be sure to glue one egg to the very top of your cone.
Step 4) Rip off small pieces of both Spanish Moss & Green Moss and tuck them into the open spaces on the Easter Egg topiary tree. Use a chopstick or pencil to help push the moss inward. Use hot glue anywhere you feel necessary to secure the moss.
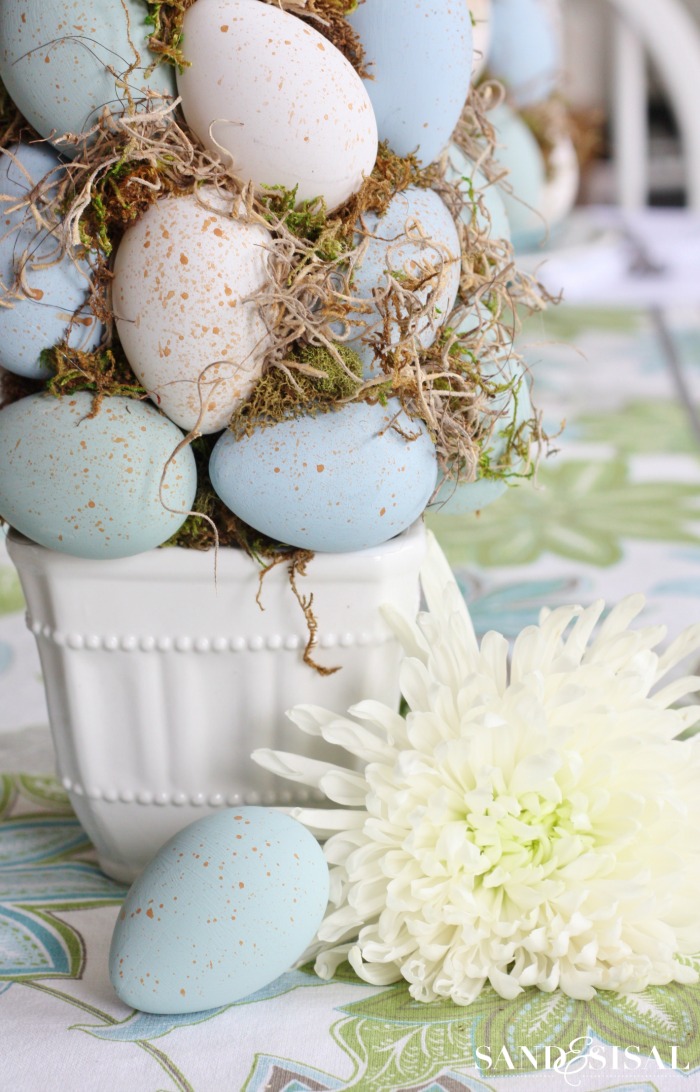
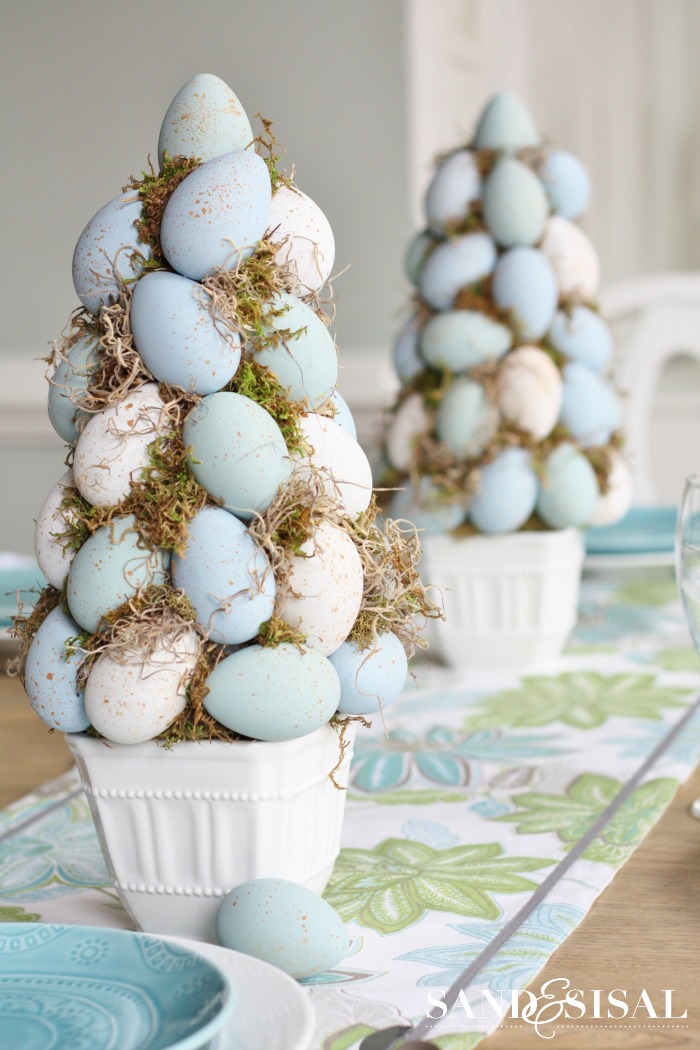
To display my Easter Egg Topiary Trees I just rested them on top of two white planters that I picked up at Michaels for $2.30 each! I am thrilled with how they turned out. They are perfect for my Easter Centerpiece. I hope you give this Easter craft a try!
KIM
LOVE THEM Kim!!
Thanks Martina!
Super cute ideas, great tutorial!
Thank you!!!
Love this project, Kim! Pretty and simple!
xo Heidi
These are so pretty, Kim!
I love these! Gorgeous!
I love your tree! If I can locate the eggs, I’m going to make one for a door prize for our ladies tea at church. Thanks for sharing!
Beautiful, off to the craft store I go!
Thank you Diane!
These are so sweet and fun! And easy enough even I could do them! Pinning!
Your Easter centerpieces are adorable! I love all the shades of blue and speckles you gave them!
These are absolutely beautiful!! I love the colors, and the speckles are just perfect. Such perfect centerpieces! 🙂 Pinned!
Kim, these are lovely!! Are you taking orders? 😉 Love how the chalk-paint looks on the eggs too. xo
Thank you Kelly 😉
What a beautiful idea for an Easter centerpiece!!!
Nature is so beautiful, love this. 🙂
I just finished making 3 of these. I painted them the same colors as you did. They look fabulous! I am so happy with how they turned out:). I know I will enjoy them for years to come. My mom will get one of them when I visit next week. Thanks for such a beautiful Easter project!
How wonderful! I’m so glad to hear you made some! Have a happy Easter!
Kim,
I love these topiaries. Thanks so much for sharing your procedure. I think I can handle this! They will look beautiful on my sideboard!
Thanks Barbara!
Kim I tried these yesterday in arts and crafts session with my residents and they are great. I cheated a little and used ready painted eggs with one group as my other group painted eggs ready for next session. Really impressed with results.
Thank you for sharing the idea.
Kind regards
Julia
That is wonderful to hear! I’m glad you all had fun. Thank you so much for sharing with me!
Love the idea. Sounds easy to do with your instructions.
Thanks for sharinh it.