Perk up those planters and add a little pizzazz to your patio or deck this summer! I’ve been painting fiberglass planters for years, but did you know that you can also paint on inexpensive terracotta clay pots? Decorative glazed pots can be pricey, but you can get the same look for so much less. Today I want to show you How to Paint Terracotta Pots that will end up looking like they were custom glazed!

Gather the following supplies:
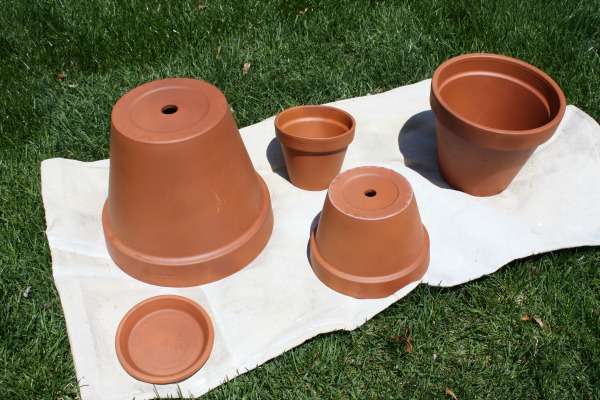
- Terracotta pots
- All-purpose aerosol waterproof sealer
- ScotchBlue™ Painter’s Tape for Exterior Surfaces #2097 and ScotchBlue™ Painter’s Tape Original Multi-Use #2090
- Drop cloth
- Interior/exterior primer for all surfaces (water or oil based)
- Latex paint (interior, exterior, chalky finish, or craft paint)
- Flat edged paint brush
- High gloss clear sealer

The first thing you want to do is to make sure your terracotta pots and clean and free from dust, dirt, and debris. Wash with water and allow to dry completely in the sun. Next you need to seal the inside and outside of the pot with a waterproof spray sealer. Don’t forget the bottom! Follow manufacture’s directions. I recommend applying 2 coats at least. Allow to dry 24 hours. There are several waterproof sealants available that you can use. Look for one that seals concrete, cement, brick, etc. You can usually find them in the paint and stain departments of home improvement stores.

The second step is to prime the outside of the pots with a good quality all surface primer. Follow manufacturer’s recommendations for drying times. **Note** If you will be using a chalky finish type of paint to decorate your pots, then you can skip this priming step. Chalky finish paints do not require priming to adhere to surfaces.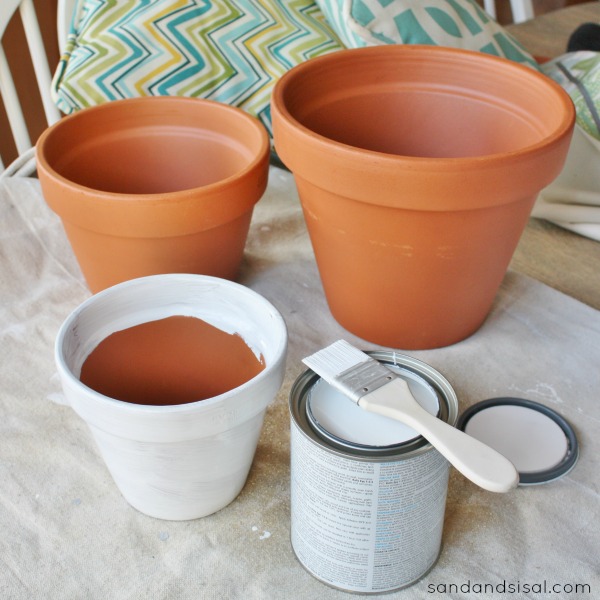

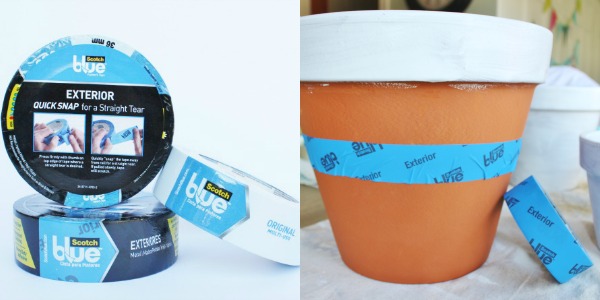
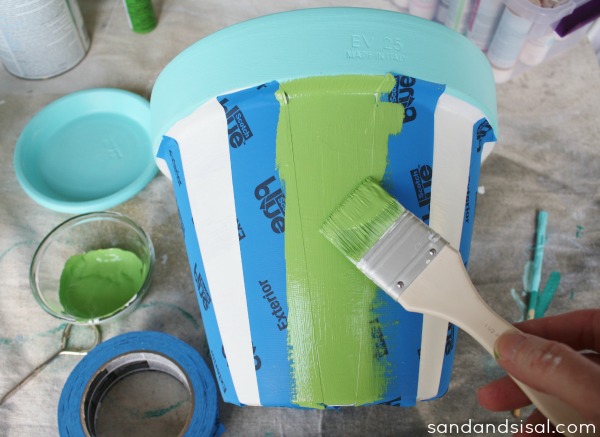
Are you ready to create a design? Pull out your ScotchBlue™ Painter’s Tape .

I used the ScotchBlue™ Exterior tape and their original tape. The ScotchBlue™ Exterior tape has amazing sticking power! It is a heavy duty adhesive with a waterproof backing that adheres to metal, painted wood, vinyl, and glass, and terracotta pots! Use the tape to create stripes, zig-zags, checkers, or bands of color. To create bands of color, simply wrap the tape around the pot and smooth the edges. The exterior tape snaps off cleanly, leaving your with a super straight tear line.

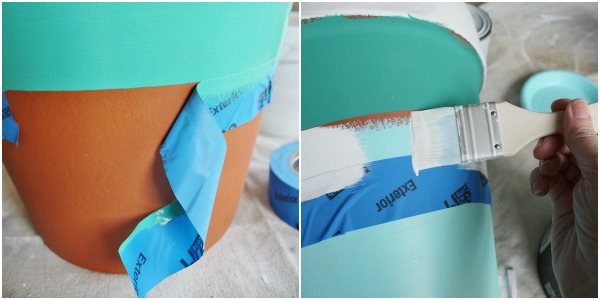
Time to paint! You can use left over interior or exterior paint, acrylic craft paint, or chalky finish paint. I happened to use all three for my pots. I used what I had in my garage and craft supplies. Paint on bands of your desired color and then slowly remove the tape before the paint drys. Look at that crisp line! Allow your freshly painted color band to dry completely. If your design requires placing tape over newly painted areas, then switch over to the original ScotchBlue™ Painter’s tape. It has a lighter adhesion.
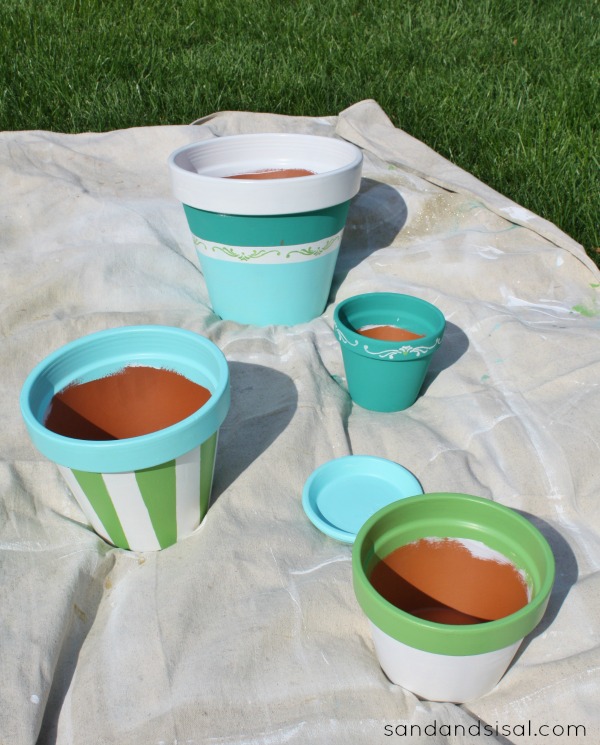
When painting the top rim of the pot, be sure to extend the paint color a few inches down inside the pot to where the soil level will be. Feel free to use stencils, stamps, or free hand painting to embellish your painted terracotta pots even further.

The last step is to glaze and seal all the painted areas of your pots. Be sure your paint is completely dry. I recommend waiting 24 hours before sealing. Use a clear, high gloss sealer, such as spray shellac, clear lacquer, clear acrylic spray sealer, or polycrylic gloss sealer. All can be found in the paint section of your home improvement stores. For my pots, I used a super high gloss spray sealer and applied 2-3 coats. It left the pots with a glass like shine! They look like beautiful glazed pots now!
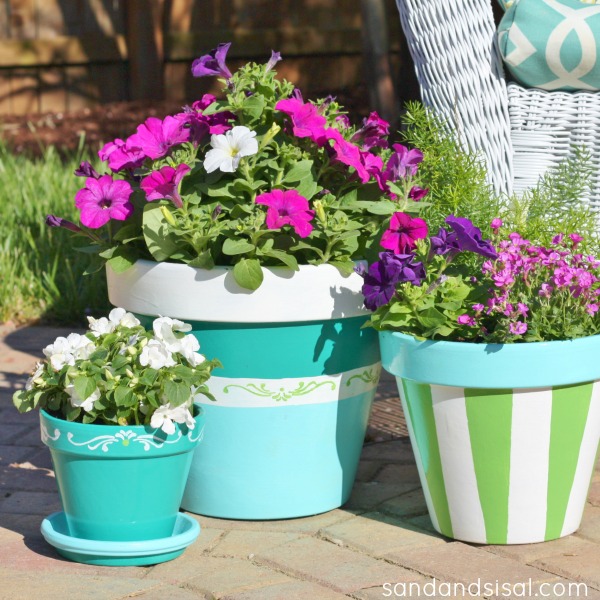
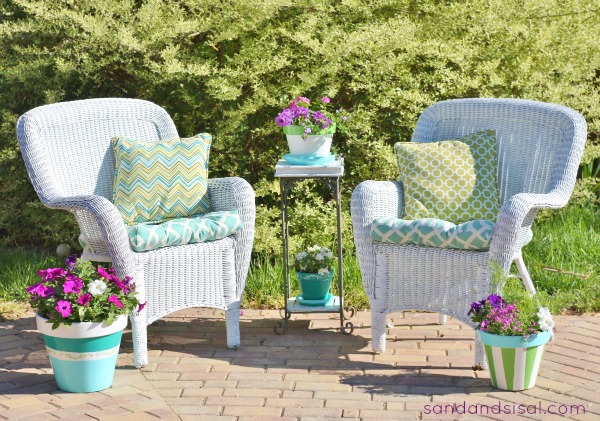
Once you paint a few pots, you will find yourself wanting to paint more! It is so fun to paint, and not only are they crazy affordable, but they turn out so pretty and will boost your curb appeal!

Enter the Home of ScotchBlue™ Painter’s Tape Contest at www.scotchblue.com/homecontest now through July 15, 2014 and you could win $5,000 to put towards a home makeover! The first 500 to submit an eligible entry will receive one (1) roll of the new ScotchBlue™ Painter’s Tape with Advanced Edge-Lock™ Paint Line Protector!
Check out this project as a featured project example in the contest!
Contest open to legal residents of the U.S. and D.C. (excluding AZ, MD, NJ, ND, TN and VT), who are 18+ (19+ in AL & NE and 21+ in MS) at the time of entry. Void where prohibited. Enter from June 2, 2014 at 12:00:01 a.m. CT through 11:59:59 p.m. CT on July 15 2014. All contest communications, entry/judging criteria and details subject to the full Official Rules. Sponsor: 3M Construction and Home Improvement Markets Division, St. Paul, MN.
Check out more amazing ideas and tips and connect with ScotchBlue™ here:
ScotchBlue™ Painter’s Tape Twitter page
ScotchBlue™ Painter’s Tape Facebook page
ScotchBlue™ Painter’s Tape Pinterest page
Happy painting!
KIM
I am proud to be a 3M sponsored blogger, and, as part of my responsibilities, I get the opportunity to evaluate new products from ScotchBlue™ Painter’s Tape. Opinions are my own and additional product used in the project were selected by me.


this is such a good idea!!! I am going to use this tutorial this weekend!! 🙂
Thanks Katie!
These are darling, Kim! I’ve never sealed pots before painting them before–that’s a great idea. Thanks for the tip. And I’m glad I saw this post; it reminds me that I need to pick up a new roll of Scotch painter’s tape!
One thing I love to do is to create pots that look age-worn and moss-covered. Simple to do with a couple of kinds of paint!
Thanks Richella! I’ve actually never tried creating the age-worn or moss covered pots before. I’ll have to check out your tutorials! 😉
Love what you did to the terracotta pots! The colors are gorgeous!
Thank you Katie!
Kim, I’ve recently had the opertunity to use Scotch Blue Exterior tape … it’s truly the BEST! I have reprinted all our exterior windows and screens using this tape. I’m heading out tomorrow for the sealer to begin this great transformation to my patio pots. Thanks Kim for such a well written tutorial! Not to mention the inspiration to keep the summer glow all around
What a kind comment Mary-Louise! Thank you! Happy painting!
~KIM
So fun and summery, Kim!! Love these!! And Scotch Blue is always top notch…I use their tape all the time!!
Those are SO pretty! Love the way they add some color to your outdoor area.
Thank you so much Randi!
Your pots turned out so pretty! I love the turquoisey blues you chose!
those look great! i’ve painted just the rim of my terra cotta pots-it’s enough of a commitment since i’ve painted them 2 different colors in the last 2 years, so it still gives me a little bit of a unique look with little effort. enjoy!
b
These pots are just so bright and fun! What a fabulous way to add some color to the yard! You did a great job! We would love it if you linked up with our party this week!
Was looking for a diy on painting terracotta pots but never found one on how to seal the interior. I knew from experience that the outside of the pots get rather dirty looking from the water going through and wasn’t sure on how to accomplish this. Thank you! I am going to paint my pots now. Since I live in the desert and have no grass, I really need to add some color to my backyard. Paint on my pots and my old plastic chairs and table will definitely spruce it up! Thank you again!
Hi LeeAnn!
I’m so happy you found Sand & Sisal and a solution to your problem! Be sure to spray the inside, outside and bottom really, really well with the sealant. Mine have held up great!
Have a great week!
~KIM
Wonderful idea!! These will make fun Christmas gifts. What do you mean by glaze? Is glaze just another step in the paint process/a type of paint?
Hi Rachel!
When you buy real glazed terracotta pots, they are first dipped in a color solution that is dried and then fired in a kiln producing a high gloss colored sheen. For this project, finishing the pots with a high gloss acrylic spray gives these DIY painted pots the same look as kiln fired ones. Hope that helps!
Thanks!
KIM
Now I know why my painting terra-cotta pots didn’t work. I didn’t waterproof the pots first, just primed and painted. The paint rubs right off with rain, dew etc. Wondering how to get all the paint/primer off and start over and do it correctly? Any ideas? Pressure wash the entire pots?
Hi Sarah! I’m sorry you ran into trouble. To be honest, if I were you, I would just start over. Terracotta is not expensive and starting fresh will most likely give you the best results. (Waterproof the heck out of them) 🙂
I have been making these pots about 15 years, and these are pretty much the same instructions that I use. My grandchildren have wonderful piece of art they have created, from 1 to 13. Each year they had 1 more to the collection. One was using black and orange, using the up/down striping with tape, alternating the colors. Rim was all black. Inside went all her Tiggers. We take our Beanie Babies and make homes for them of the smaller 4 inch pots, the theme for the Beanie. They then donated them to Relay for Life silent auction. Another technique is to do a solid base coat of paint and then dash on crystal shimmer, and using a sponge brush, smear it here and there. Looks like winter snow storm in the foreground. Now the last one the 9 yr old tried was picking up old nail polish at garage sales. Most gave them when she told of her project. Using the small 2 inch pots, she painted them with polish. Darling for her shelf to put her small items into.
Now for me, I do different kinds of flower pots for the cemetery each year, aligned with Memorial Day, a theme comes out to set in the family plot area. At home, we have John Deere, CNH, Ford tractor colors which line the steps, and I simply draw darling pots and add flowers…the kids use their thumbs and pinkies for the floral add ons.
Hey Kim,
Can you please give me an update on your pots? I am wondering how they have held up outdoors. Wanting to paint pots and sell (so I have to make sure they will be of good quality and last!) Thank you!! Great Article!!!
Hi Emily!
Great question! Two years ago paints made for terracotta pots specifically weren’t available on the market at all. So if I had to repeat this project today, I would most likely purchase terracotta paint. I know that Michaels carries a full line. That being said, most of the pots held up just fine. I painted more that just the ones you see in that 2014 blog post. The pots that I left outside during the winter were the ones that did not survive. I had several in my garage though and those still look as new as the day I painted them. So if you decide to sell them I would put a disclosure that they should be brought inside during winter or hard freezes. Now I used the same Martha Stewart paint on fiberglass pots back in 2012, sealing them with gloss afterwards, and they look fabulous still. Hope that helps! Good luck! ~ KIM
You are awesome!!! Thank you so much for your fast reply!!!!!