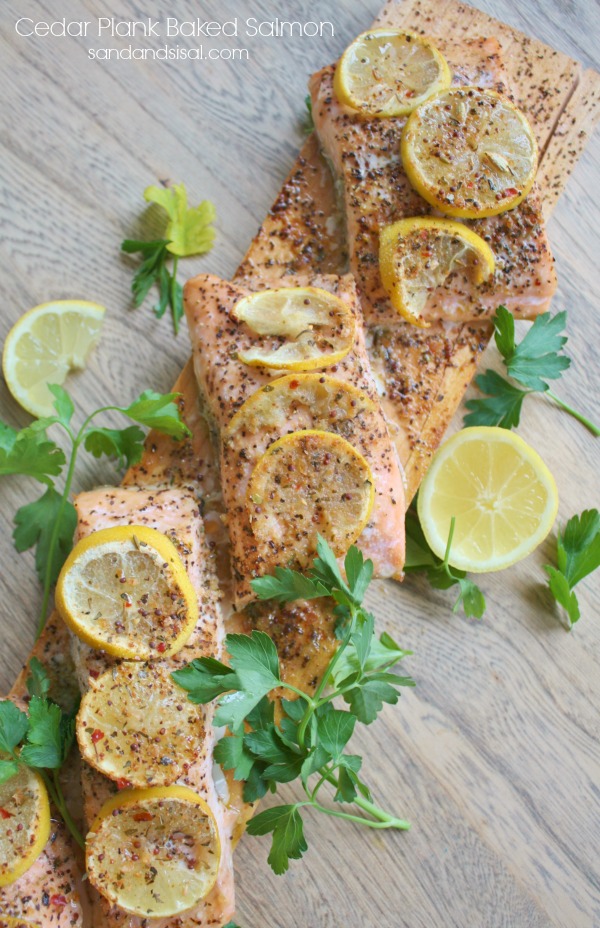
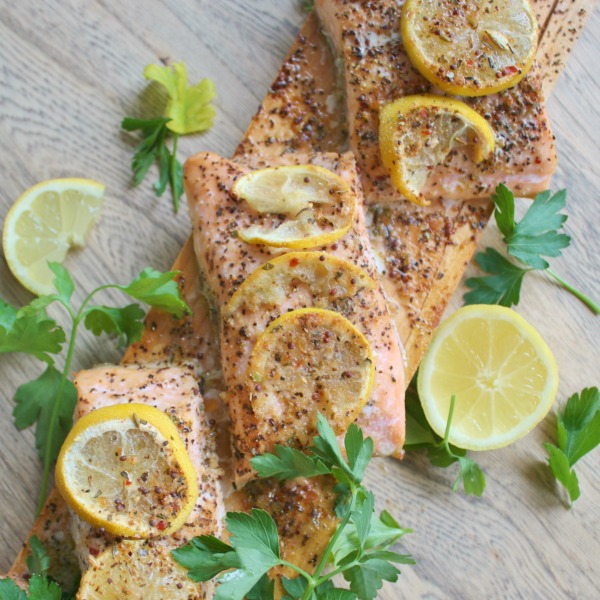
Our family’s favorite fish meal is salmon. It is the one type of fish that all 4 kids will eat, so we eat salmon usually once a week. Because we eat it so often I like to change up the way I prepare it. This week I made a delicious lemon and pepper Cedar Plank Baked Salmon drizzled with olive oil, melted butter, and garnished with fresh parsley.
Making cedar plank baked salmon is a quick and easy dinner. Head to your home improvement store and buy a 1/2 inch thick x 3 inch wide piece of fresh cut cedar. They usually come in 8 foot lengths and cost a few dollars each. I use cedar in many of my DIY projects, and this is one board that I had left over. I cut the cedar board to 13 inches long. Cedar planks can be used in the oven or on a grill over indirect heat. But first you need to completely soak the cedar plank in water for at least 30-45 minutes each time before you use it. We don’t want to start a fire, we just want to woodsy flavor to infuse the fish.
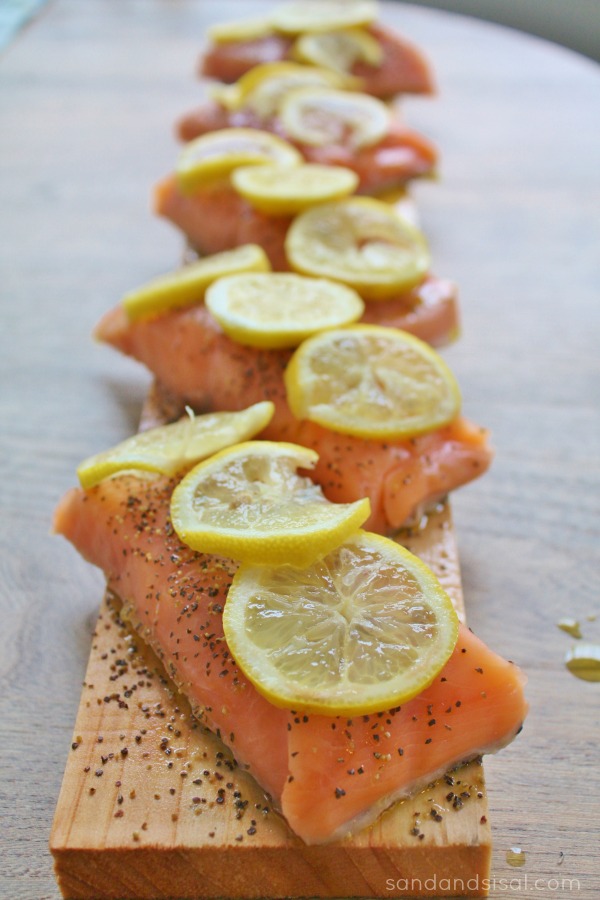
I like to use 4-6 ounce boneless salmon fillets. Each fillet is nearly 2 inches thick. Place the fish fillets on the cedar plank diagonally. Sprinkle the fish with salt and pepper, top with sliced lemon and then sprinkle on a salt-free seafood seasoning. I really like The Spice Hunter’s All Natural Seafood Grill & Broil Seasoning. It is a blend of spices and herbs containing brown mustard seed, lemon peel, pepper, onion, chile pepper, celery seeds, bay leaves, basil, fennel, oregano, red pepper, and thyme. Then I drizzle a bit of melted butter or olive oil over all the fish. Place the fish in the oven and bake for 20-25 minutes at 350° until the center of the salmon is flaky. Garnish with a handful of fresh parsley or fresh chopped dill weed. And serve directly from the plank.
- 6 boneless, skin on, salmon fillets (4-6 oz. portions)
- 2 lemons, sliced
- salt
- coarse ground pepper
- salt free seafood grill & broil seasoning (I used the Spice Hunter brand)
- extra virgin olive oil or melted butter
- handful of fresh parsley or dill for garnish
- cedar plank
- Preheat oven to 350.
- Submerse the cedar plank in water for at least 30 -45 minutes before using.
- Rinse salmon portions in water and pat dry.
- Place salmon on the cedar plank, skin side down.
- Sprinkle generously with salt and ground pepper.
- Place 2-3 lemon slices on top of each salmon.
- Sprinkle generously with the salt free seafood seasoning and drizzle with extra virgin olive oil or melted butter.
- Place cedar plank on the middle oven rack. I recommend putting foil or a cookie sheet on the lower rack to catch any drippings.
- Bake for 20-25 minutes until salmon is flaky in the center of the fillet.
- Serve directly from the cedar plank and garnish with parsley leaves or chopped dill.
Your family will be so impressed when you bring this Baked Salmon on Cedar to the table! For more delicious recipes check out the Kim’s Kitchen tab up on the top menu.
Enjoy!
KIM
Linking up to: Tidy Mom
YUM! this looks delicious! we are salmon lovers here as well!!! well, my kids put up with it, and chris and i love it!
Thank you Cassie!
Sounds delicious. We love salmon and I can’t wait to try this recipe.
Thanks Sharon! Hope you enjoy it!
Oh, this looks absolutely fantastically delicious! I am so pinning this recipe!
Thanks KC!!!