• Home
  • Meet Kim
  • Blog
    • Facebook
    • Instagram
    • Pinterest
    • Twitter
    • YouTube

Sand and Sisal

  • DIY
  • Home Tour
  • Decorating
  • Gardening
  • Recipes
  • Thanksgiving
  • Decor Crafts
  • Seasonal
  • Christmas/New Years
  • Winter/Valentines
  • Spring/Easter
  • Summer Holidays
  • Fall
  • Halloween

December 9, 2013 ·

Frosted Pear Ornament + Blog Hop

Christmas/New Years· ornaments

Prev postNext post
Use your ← → (arrow) keys to browse

Christmas Exravaganza Blog Hop and Linky Party Graphic

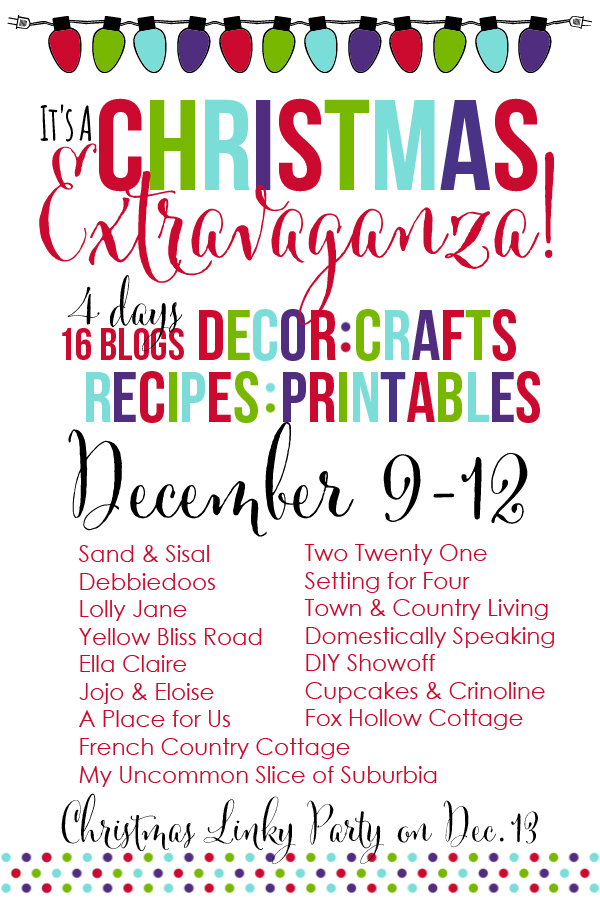
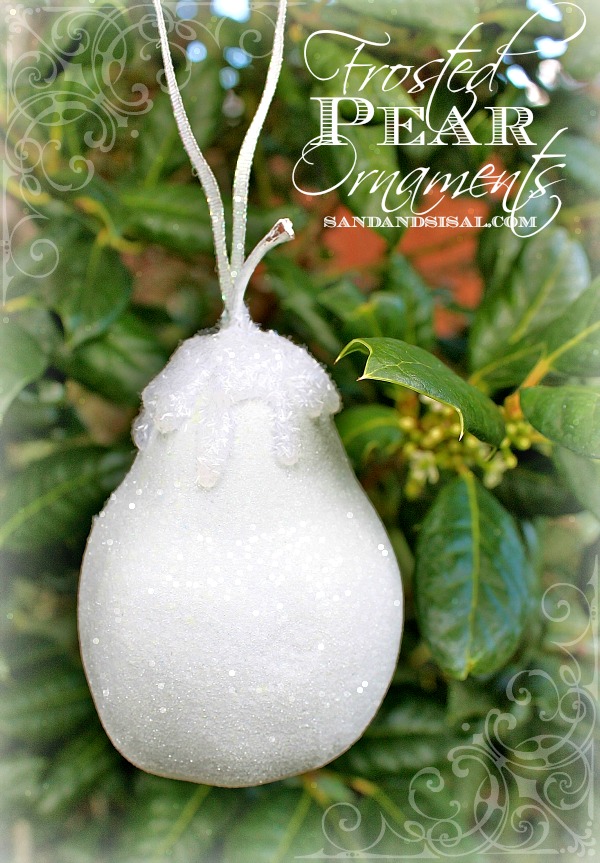
Get ready for a fun four days of Christmas decor, crafts, recipes, and printables.  Today I want to share with you how to make these simple and pretty Frosted Pear Ornaments.
Frosted Pear Ornaments - Sandandsisal.com

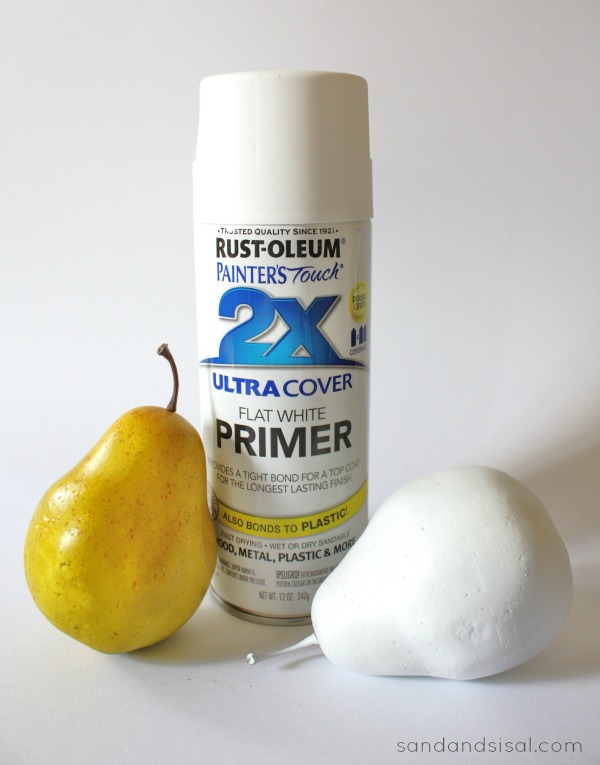
To make Frosted Pear Ornaments you will need the following items:

  • faux decorative pears (available at most craft stores, or big box supermarkets)
  • white spray primer or white craft paint
  • ultra fine white glitter & white tinsel glitter
  • decoupage medium (Martha Stewart Glitter Decoupage or Mod Podge)
  • hot glue gun
  • ribbon

STEP 1) Spray your faux pears with a nice coat of white primer or feel free to use white craft paint. Allow to dry.

How to make frosted pears ornaments

STEP 2) Coat the pears with a layer of decoupage medium. I used the Martha Stewart Glitter Decoupage.

STEP 3) While still tacky, sprinkle the ultra fine white glitter over the entire pear surface. Allow to dry.Christmas Ornaments - Frosted Pears

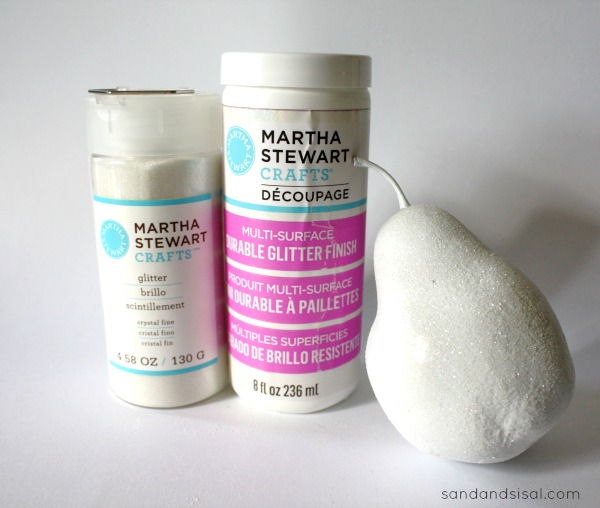
Step 4) With your hot glue gun, drizzle a layer of hot glue over the top of the pear, so it looks like frosting dripping down. Immediately sprinkle the hot glue with the white tinsel glitter. Frosted Pears

Step 5) Create a loop out of ribbon and hot glue the ribbon to the base of the stem.

Frosted Pear Ornament
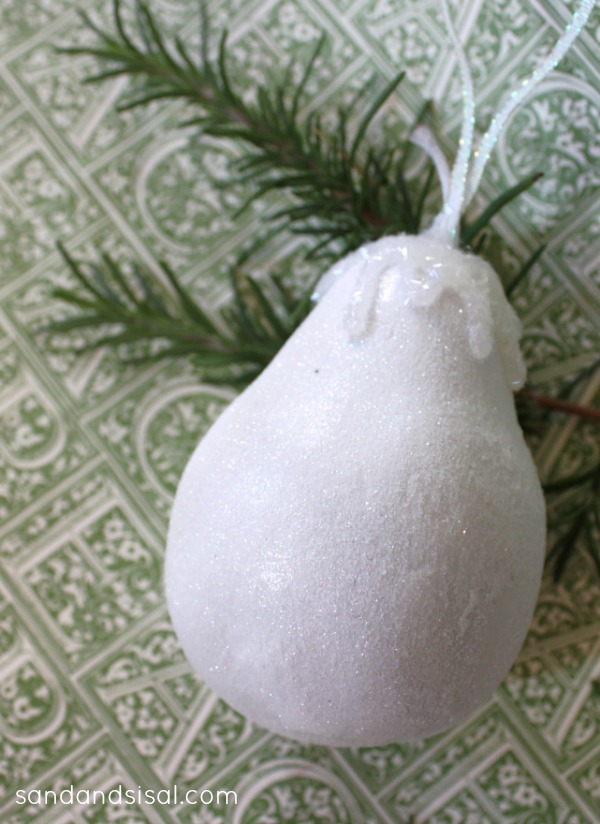
These Frosted Pear Ornaments are very easy to make in a short amount of time and will stand sparkle with a pearly shimmer on any wreath or Christmas tree.

Be sure to follow along with the blog hop for more fun Christmas crafts, decor, and recipes.

Christmas Extravaganza Blog Hop Participants

Monday

Kim at Sand & Sisal

Debbie at Debbiedoo’s

Kristi and Kelli at Lolly Jane

Kristin at Yellow Bliss Road

Tuesday

Heather at Setting for Four

Angelina at JoJo and Eloise

Destiny at A Place for Us

Kristen at Ella Claire

Wednesday

Courtney at French Country Cottage

Chelsea at Two Twenty One

Heather at Setting for Four

Jennifer at Town and Country Living

Thursday

Maryann at Domestically Speaking

Roeshel at DIY Show Off

Mary Beth at Cupcakes and Crinoline

Shannon at Fox Hollow Cottage

and Friday it’s Your turn… It’s the Christmas Extravaganza Linky Party.  Come share your Christmas décor, recipes and more!

Also this week I’m participating in a Christmas House Tour and it starts today at Just a Girl. Come visit!

ChristmasHouseTour

« Balsam Hill Christmas Tree Giveaway
Easy Etched Glass Vases »

Comments

  1. kristin says

    December 9, 2013 at 11:55 am

    This is just gorgeous kIm!!!! So pretty, thanks for sharing the tutorial with us, have a wonderful weekend. XO

  2. Destiny says

    December 9, 2013 at 12:05 pm

    Love this Kim!! Simple and Beautiful! xoxo

  3. Angelina-JoJo and Eloise says

    December 9, 2013 at 12:21 pm

    These are so very cute and so very WINTERY!!! I LOVE them. Thanks for sharing this fun idea with us!

  4. Kristin @ Yellow Bliss Road says

    December 9, 2013 at 12:32 pm

    Kim those are beautiful!! You always have such classy decor. 🙂

  5. Shannon @ Fox Hollow Cottage says

    December 9, 2013 at 2:05 pm

    Love the dripping snow with the glue gun! That glitter is so cute too. I don’t have that one…. 😉 You know I “need” it now right? Happy Holidays!!!!

  6. Georgie Horn says

    December 9, 2013 at 3:31 pm

    What a great idea! I love the tinsel glitter!

    • Kim Wilson says

      December 11, 2013 at 4:39 am

      Oh I do to! It’s so sparkly! Thanks for stopping by Georgie!

  7. debbiedoos says

    December 9, 2013 at 4:59 pm

    That is so festive and fun! Love it.

  8. Heather says

    December 9, 2013 at 6:08 pm

    As a girl who loves all things glitter, I’m soooo in love with these gorgeous ornaments Kim!! I have a bunch of faux apples that I’d love to try this with! Thanks for the inspiration!! It’s fun to party again with you this week! ~ Heather

  9. Debbie @Dewdrop Gables says

    December 10, 2013 at 10:40 am

    These are so pretty! I love the effect of the hot glue dripping on the top, perfect touch!
    Debbie 🙂

    • Kim Wilson says

      December 11, 2013 at 4:38 am

      Thank you Debbie!

  10. Courtney says

    December 11, 2013 at 10:17 am

    I am totally loving this idea- they are so cute!!!

  11. Lolly Jane says

    December 11, 2013 at 5:20 pm

    So pretty! LOVE the sparkle!

  12. Mary Beth|Cupcakes and Crinoline says

    December 12, 2013 at 9:43 pm

    You’re ornament is absolutely beautiful, Kim. It reminds me of sugar plum fairies and a snow village. Thanks for sharing the tutorial. I have some paper mache pears in my craft stash that I will try this one.

Trackbacks

  1. Memory Christmas Ornaments using Photographs | 3littlegreenwoods says:
    December 9, 2013 at 7:54 am

    […] on the inside let’s put some on the outside! Kim from Sand & Sisal created beautiful Frosted Pear Ornaments. She dripped hot glue on top of the pear then glittered it up. I loved the look and knew it would […]

  2. 15 Christmas Decorating Ideas ~ It's All in the Details! - Town & Country Living says:
    December 11, 2013 at 2:01 am

    […] Kim at Sand & Sisal […]

  3. Mint Chocolate Cream Torte ~ Easy Christmas Dessert | Cupcakes and Crinoline says:
    December 12, 2013 at 11:04 am

    […] Kim at Sand & Sisal […]

  4. Christmas Extravaganza Party: Decor Crafts and Recipe Ideas - Fox Hollow Cottage says:
    December 13, 2013 at 7:02 am

    […] Frosted Pear Ornament from Sand & Sisal […]

  5. Christmas Extravaganza Blog Hop Linky Party - Domestically Speaking says:
    December 13, 2013 at 8:00 am

    […] Frosted Pear Ornament from Sand & Sisal […]

  6. Christmas Extravaganza Linky Party says:
    December 13, 2013 at 8:01 am

    […] Frosted Pear Ornament from Sand & Sisal […]

  7. Christmas Extravaganza Party ~ Decor, Crafts, Recipes - Town & Country Living says:
    December 13, 2013 at 8:17 am

    […] Frosted Pear Ornament from Sand & Sisal […]

  8. Christmas Extravaganza Linky Party ~ Join the Party | Cupcakes and Crinoline says:
    December 13, 2013 at 9:29 am

    […] Frosted Pear Ornament from Sand & Sisal […]

  9. 16 Fabulous Ideas for Christmas + Christmas extravaganza link party! says:
    December 13, 2013 at 5:04 pm

    […] Frosted Pear Ornament from Sand & Sisal […]

  10. 25 Handmade Ornaments - Refresh Restyle says:
    December 10, 2014 at 1:01 am

    […] – Sand and Sisal – Frosted Pear […]

Welcome

Kim WilsonWelcome to Sand & Sisal: where love of home and sea meet! I share tutorials in DIY, decorating, crafts, gardening, & recipes.  [READ MORE]

Let’s Connect

  • Facebook
  • Instagram
  • Pinterest
  • Twitter
  • YouTube

Keep in Touch!

Love this post? Let's keep in touch!

Subscribe for free to have Sand and Sisal delivered straight to your inbox.

Search

Categories

Archives

Copyrighted Content Permission

All images and tutorials on this blog are copyrighted material. Please contact me if you would like to use any media (photos, video or audio files), tutorials, or ideas from this blog. 99% of the time I would be happy to allow you to use ONE photo with appropriate credit and link back to Sandandsisal.com (preferably to the same post it was borrowed from.) Absolutely no text or tutorials can be replicated. Contact Kim via email: sandandsisal (@) gmail (dot) com

Amazon Associates Disclosure

Kim Wilson is a participant in the Amazon Services LLC Associates Program, an affiliate advertising program designed to provide a means for sites to earn advertising fees by advertising and linking to amazon.com.

Privacy Policy

Click HERE to review our Privacy Policy

Copyright © 2025 · captivating theme by Restored 316