There’s a brand new kid on the block and girlfriend, she’s got TALENT! I’m excited to introduce y’all today to Brandi from the DIY blog: “Nest of Bliss” – Creating a Beautiful Home one Twig at a Time. I came across Brandi’s lovely blog recently and was totally wowed by her eye for design, DIY skills, and love of coastal decorating. For this Guest Feature Friday, Brandi will show us how to give your kitchen a Budget Cabinet Makeover by refacing the cabinets with a bit of wood and you won’t believe this… bead board wallpaper! How clever is that? Please give Brandi a warm welcome!
 Hello Sand & Sisal readers! I’m Brandi from Nest of Bliss, I’m so excited to meet you all!
I’ve been a huge fan of Kim’s for a long time now, so when she asked me to come visit today I was delighted!
My fiancé and I live in a century farmhouse in the maritimes that we have been working to fix up on a budget. This includes a LOT of DIY and sometimes getting pretty messy. We’re often covered in drywall dust and paint. 🙂

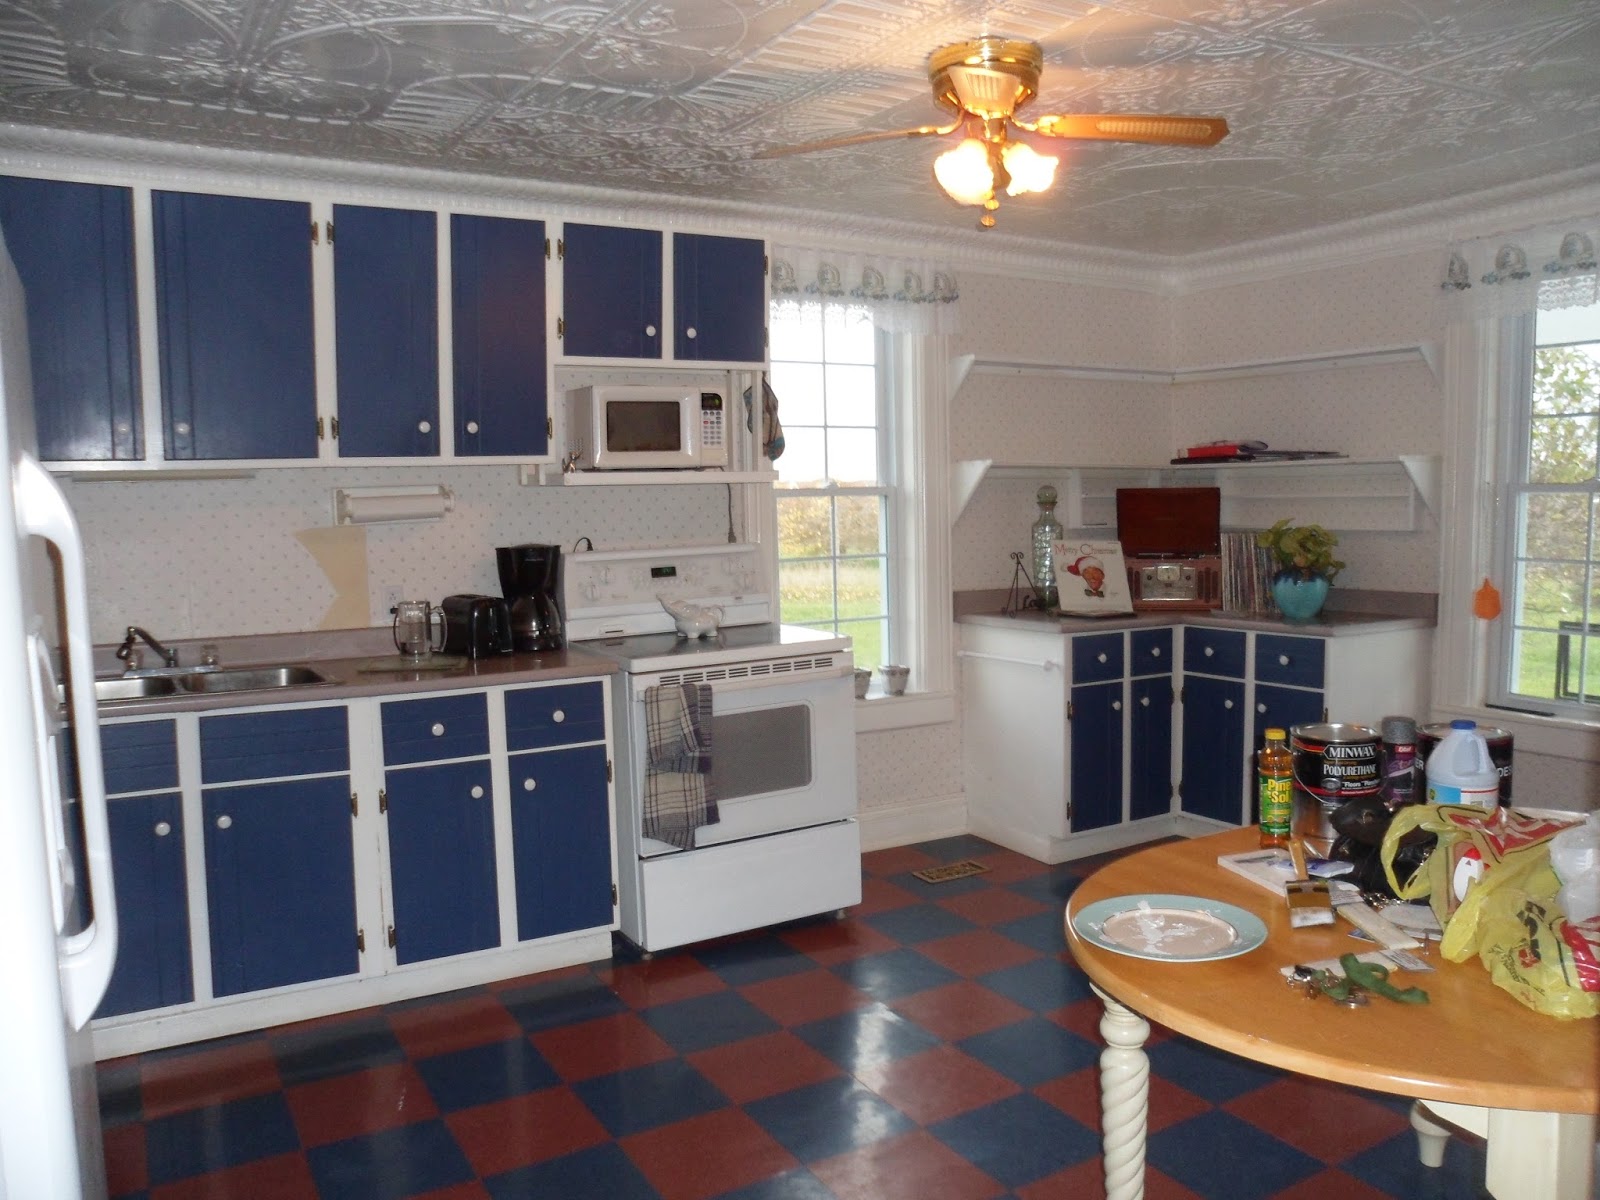

Our biggest issue that we had with our kitchen was our cabinets – The doors fell off almost constantly!
New cabinets just weren’t in the budget, so we found a way to make the doors more sturdy by thickening up the door frames, while of course taking advantage of this opportunity to give them a little makeover. 😉
For this Budget Cabinet Makeover you will need the following items:
(Amazon affiliate links provided for your shopping convenience)
- Measuring Tape
- 1/4″ plywood cut to 2″ wide
- Drill and drill bits
- Wood Glue
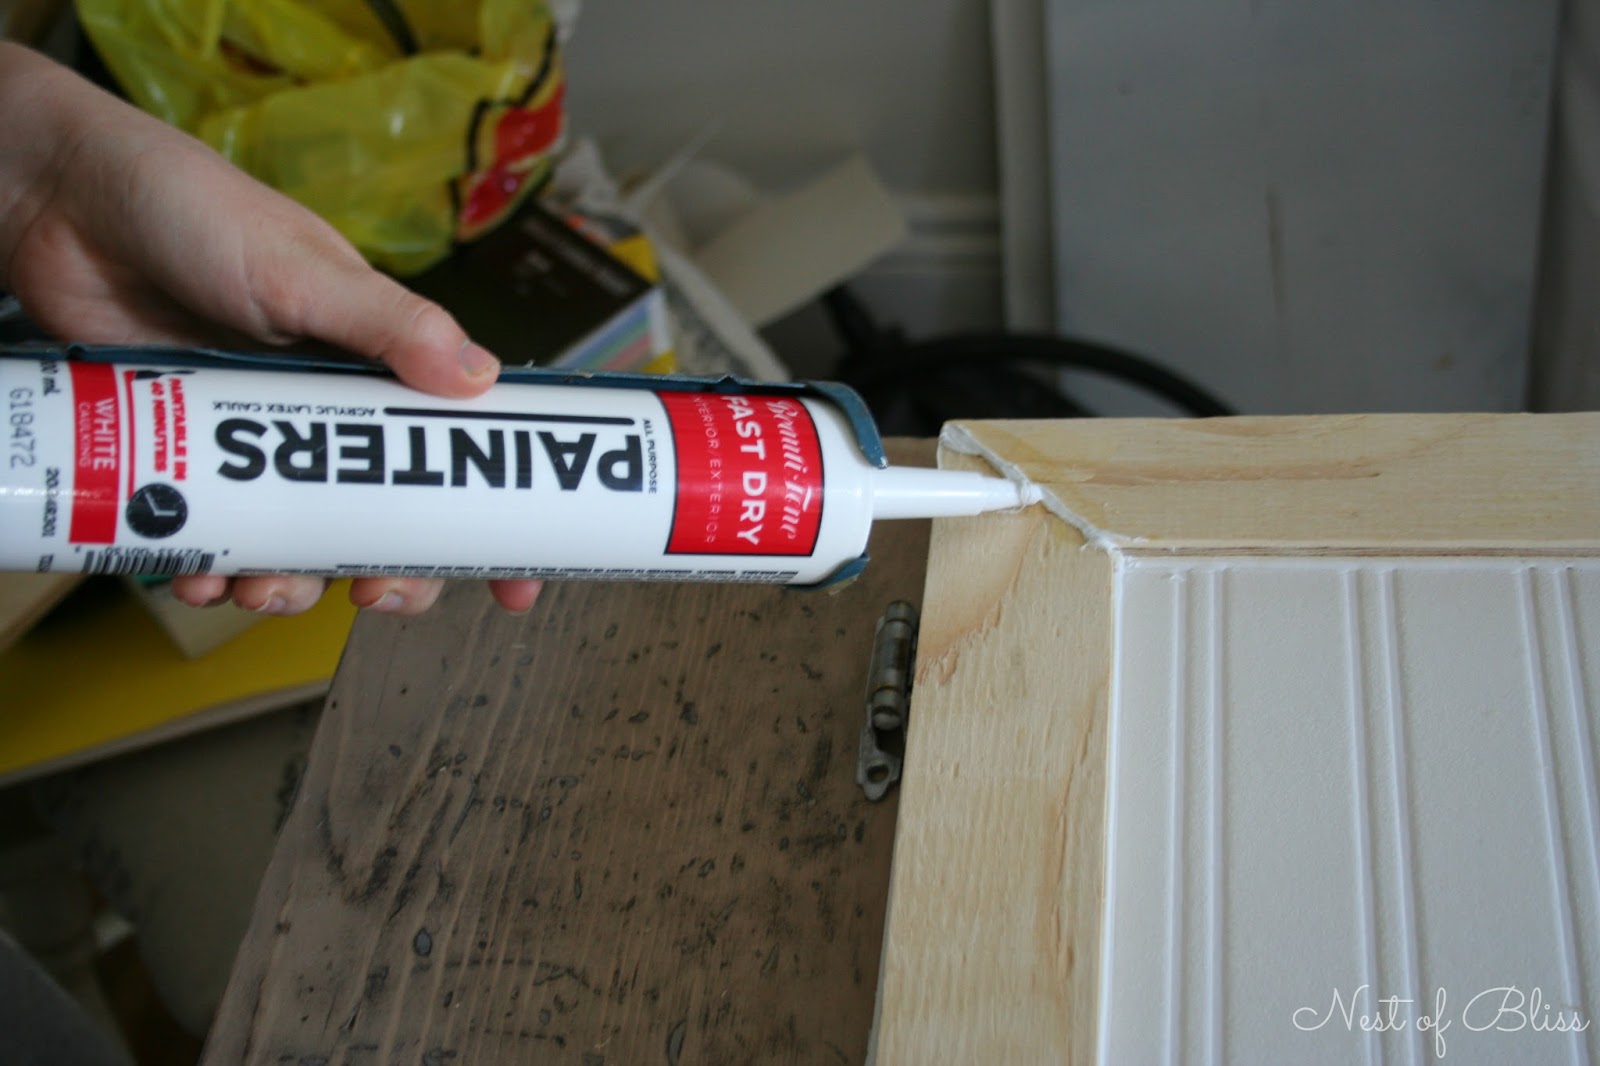
- White Paintable Latex Caulk
- Paintable Bead Board Wallpaper
- Pencil
- Straight Edge Ruler
- X-ACTO Knife
- 3/4-Inch Wood Screws
(This will depends on the thickness of your original cabinet doors)
- Paint – (we used a kitchen & bath semi gloss paint)
1) The first step is to remove your cabinet doors and hardware, and place them down on a workable surface with the outside facing up.
2) Next, measure the outside edges around your cabinet doors for each cabinet that is a different size, this is the measurement for the wood you will be cutting.
3) Cut your plywood into 2 inch wide strips (or the width of your preference) and then cut the strips to the measured dimensions you took before, mitering the edges.
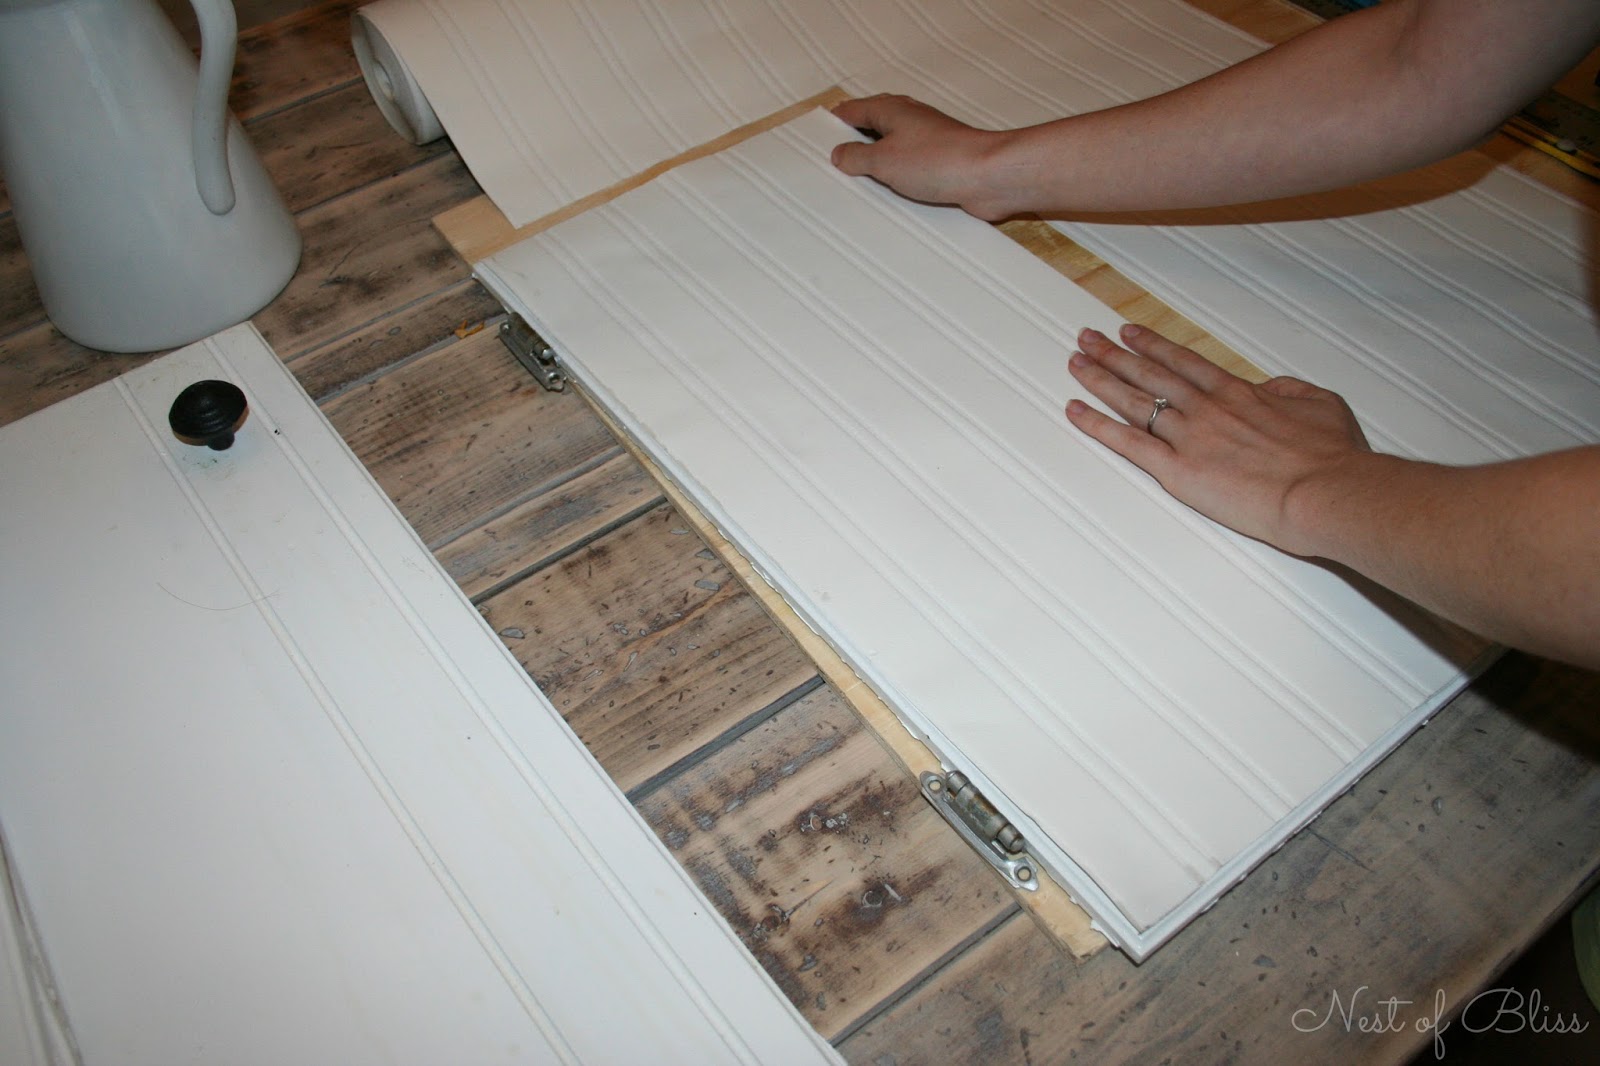
4) When you are finished you may begin measuring the beadboard wallpaper to the size of your cabinet doors, using a straight edge and pencil to draw a cutting line.

5) Using your X-Acto knife, cut according to your drawn lines (If you mess up a little, it’s okay! Your wood will be covering some of the outer edges!)

6) Apply your beadboard wallpaper to the doors according the package directions. Keep an eye on your wallpaper as it is drying, so you can smooth out any bubbles along the way!
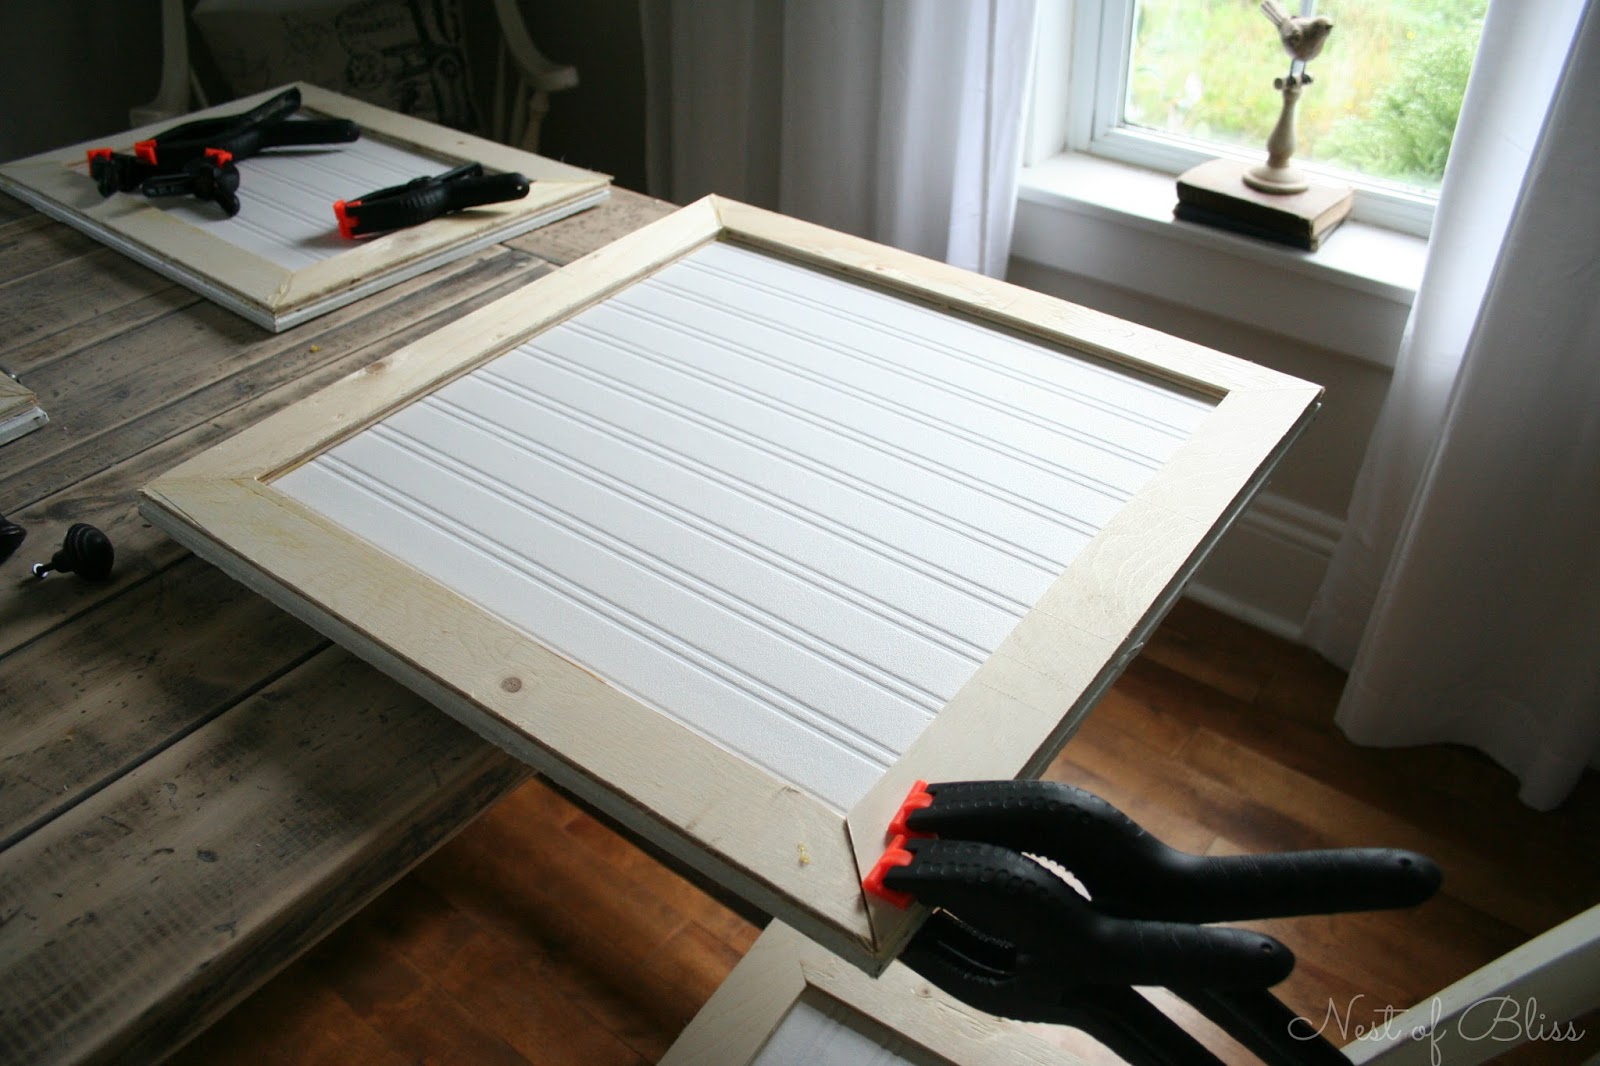
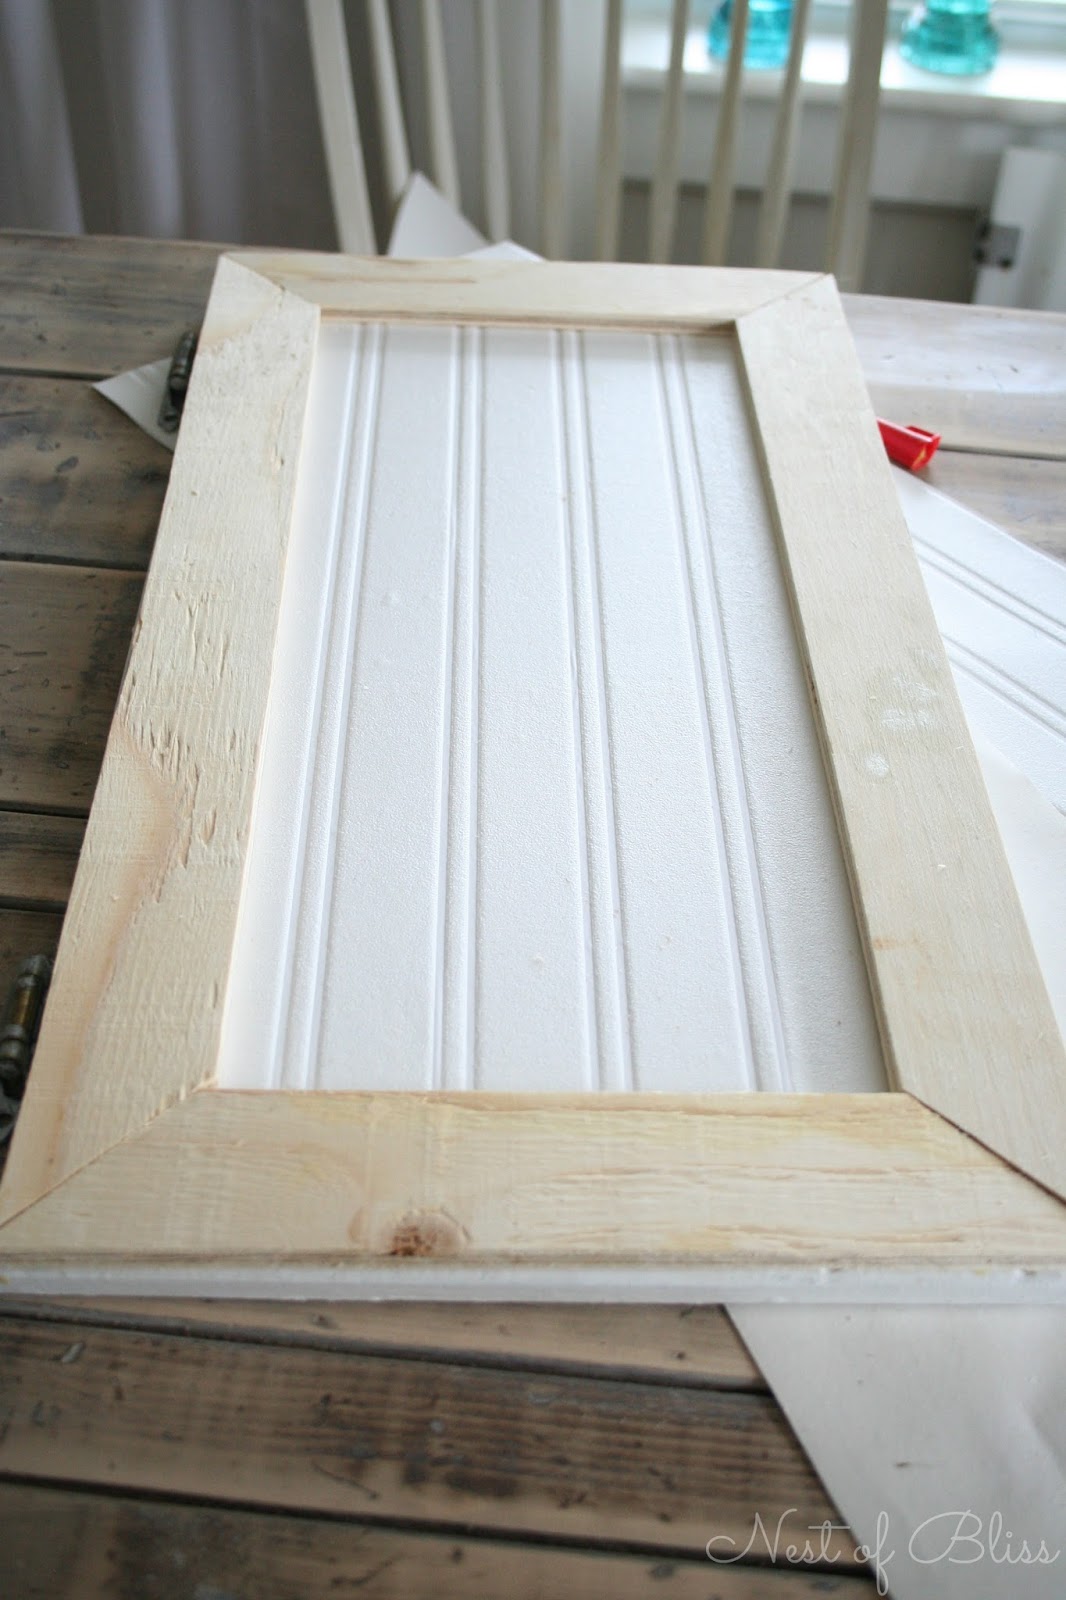
7) Using wood glue, apply your outer frame for your cabinets.
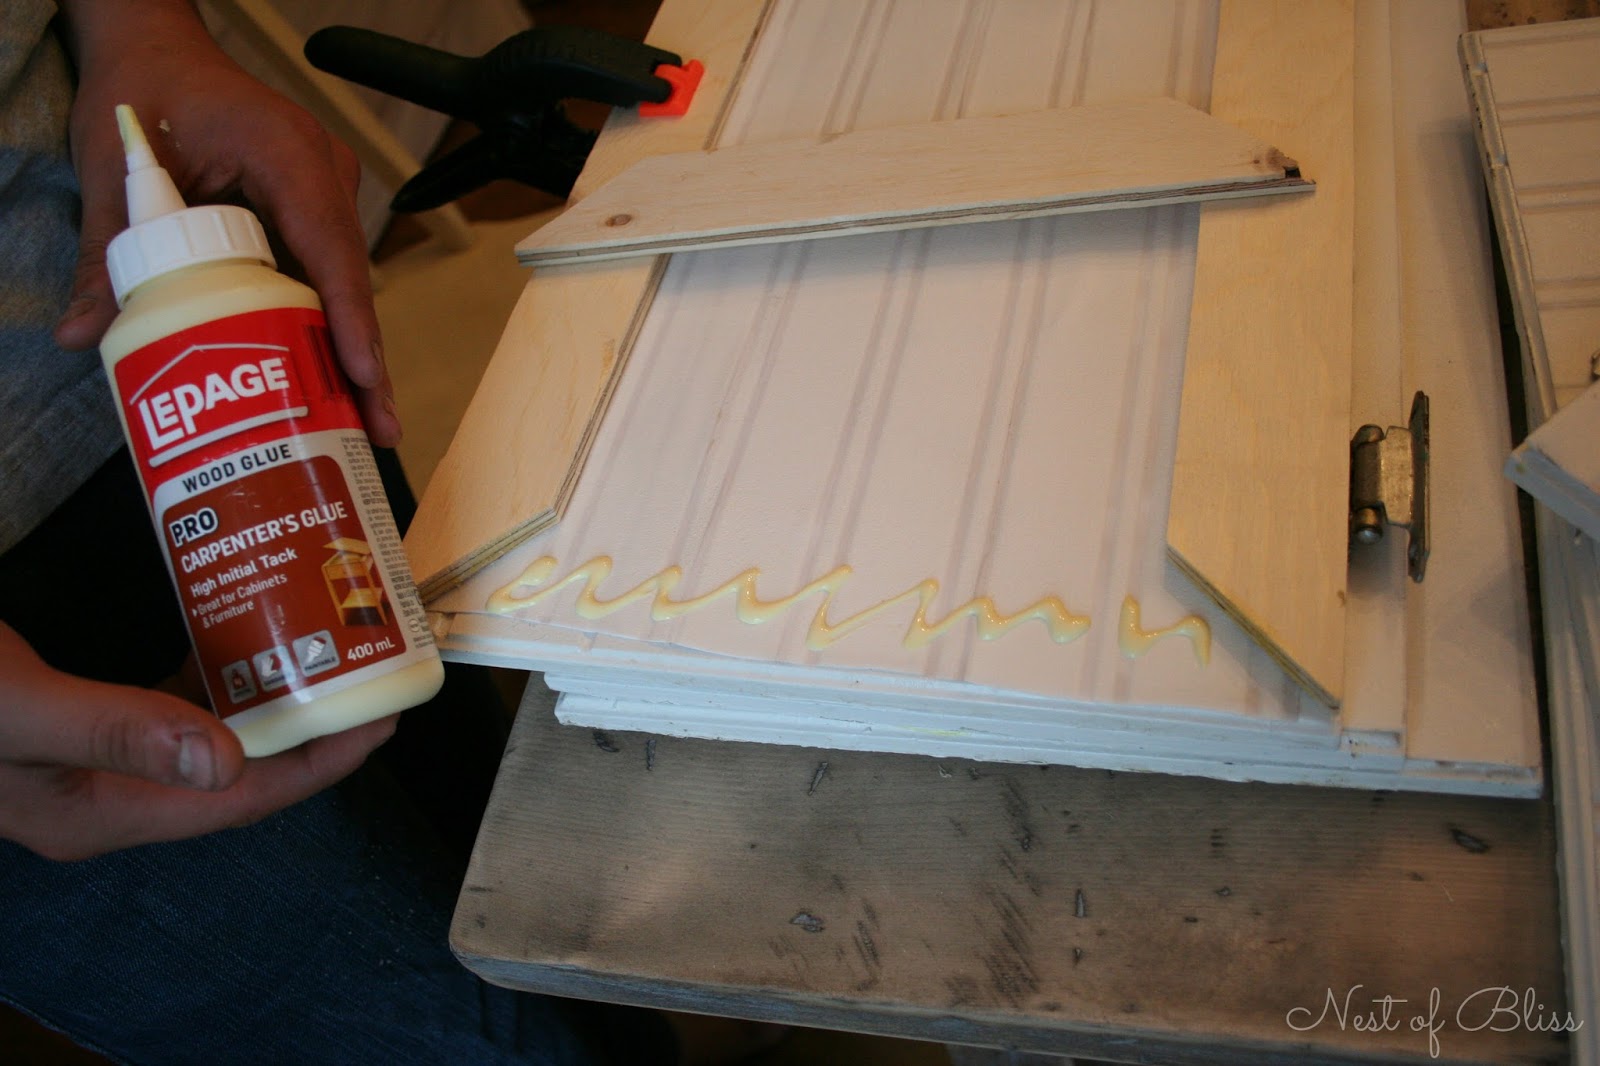
8) When this was dry, we secured a few screws from the inside for extra support to hold the frames.

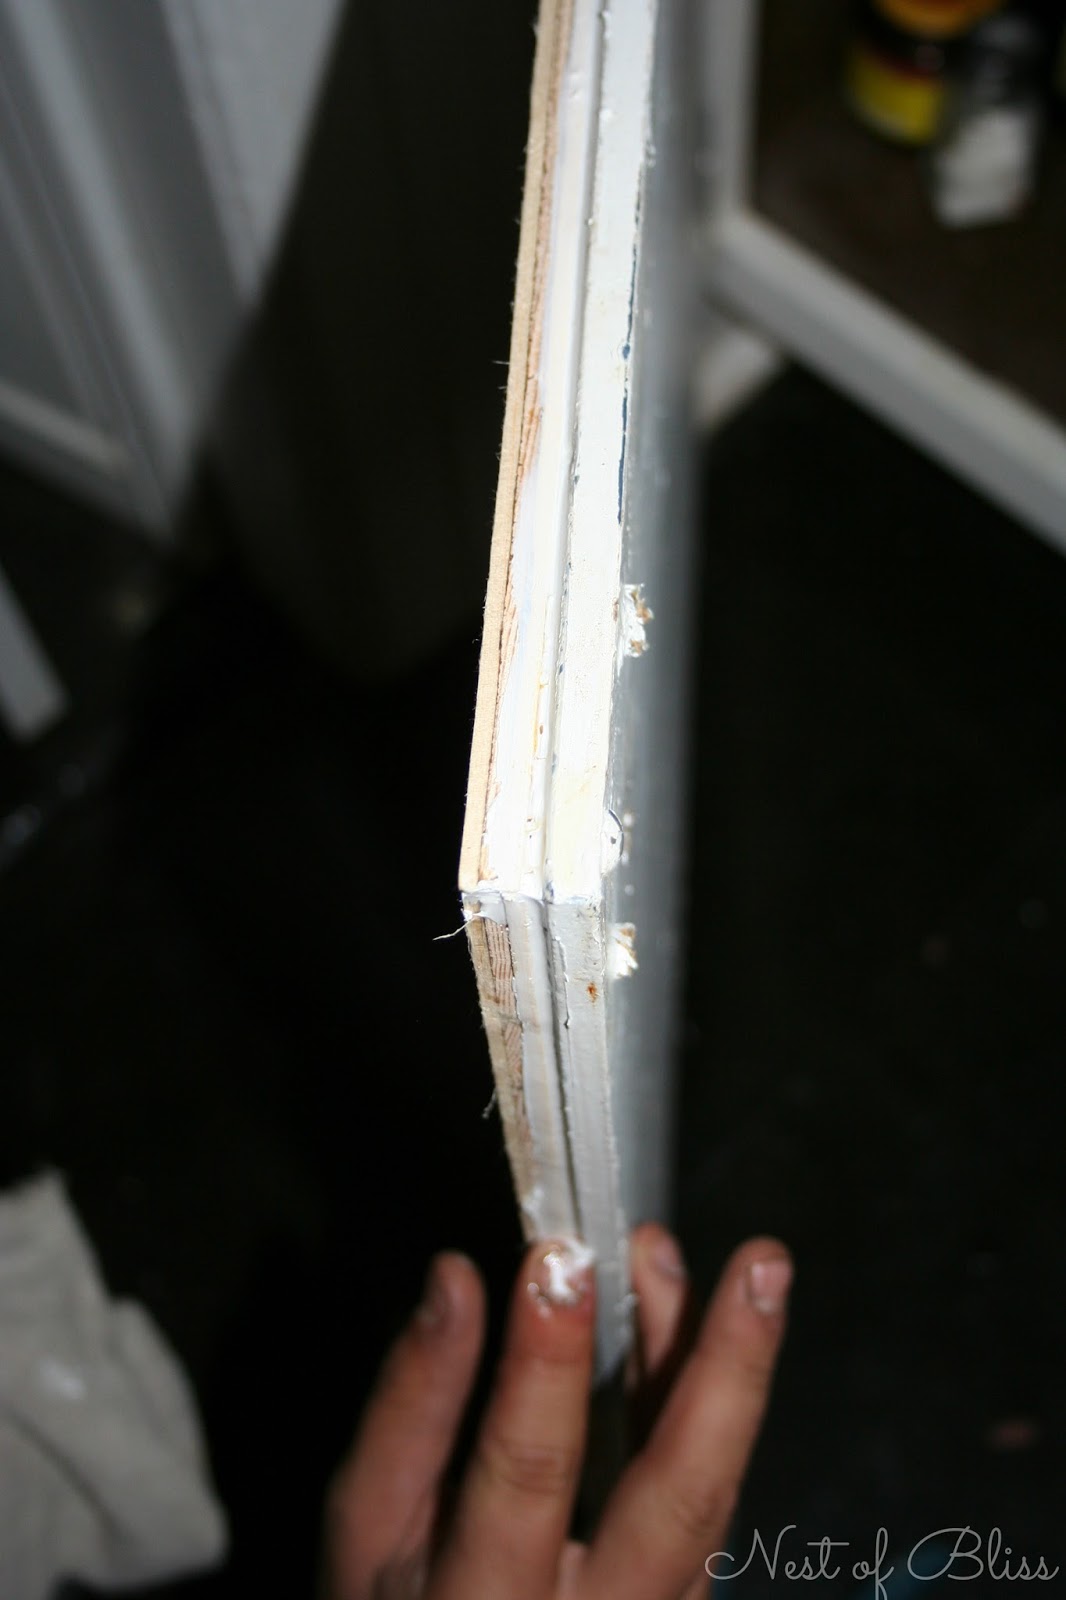
9) Apply caulking to your mitered edges to help minimize cut lines, and also to the inside and outside edges where your frame meets up with your existing cabinets – this just creates a smoother transition. We dipped our fingers in water and glided them along the edges to make them smooth.
When your caulking is dry you may choose to paint your doors, or attach them to your cabinets first. We chose to paint and apply our hardware when the doors were up, just to be sure of where we wanted to put our handles (which was a slightly different position than we chose originally!)
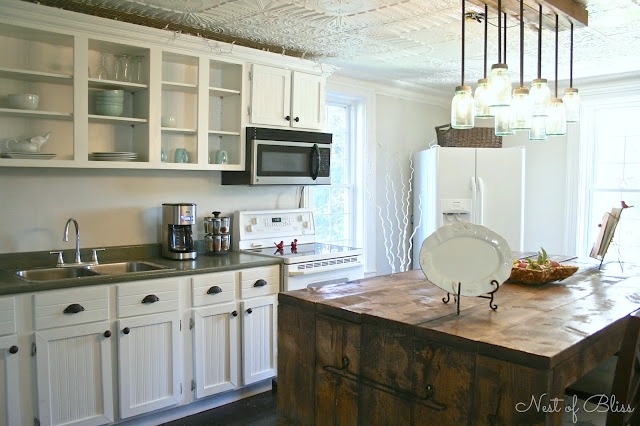
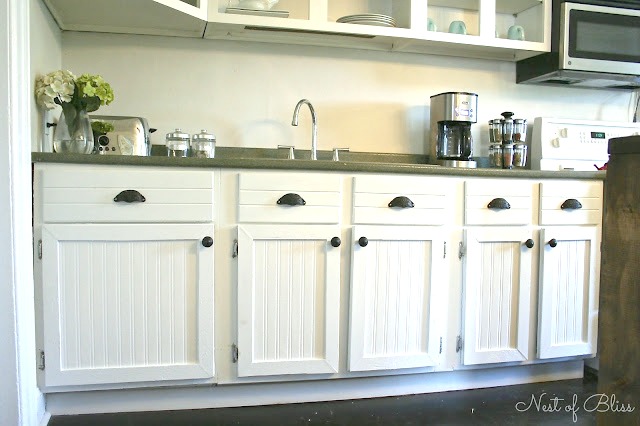
We are so happy with how our cabinets turned out, and not a door out of place. 😉
It’s been wonderful meeting you all! Please stop by Nest of Bliss for a visit soon!

![]()
WOW this is beyond amazing and what an amazing transformation!!!
I Agree. Brandi and her honey have been doing an amazing job. The kitchen is really shining with the improvements they have made!!
Totally awesome! Love that beadboard wallpaper. What a great idea!
Kim , that’s AMAZING!!!! I love her and love her kitchen 🙂 xo
Love the look of the bead board wallpaper. Wondering where to buy and is it washable. I’m thinking it could get really nicked up in kitchen. How’s it working so far? Thanks for the idea!!
What a wonderful way to update and beautify your kitchen. Looks like a million bucks!
Brandi, I am drooling over the island in your kitchen. Can I ask where you found it?
Keep up the great work!
Hi Deb, thank you so much! We built the island. 🙂
I plan to have a tutorial in the future.
Love this. I have the same plain ugly cabinets in my kitchen. Thanks for the tutorial!
Love the cabinets… did you also paint the wall paper? Or just the trim?
What did you do on the drawers? Are they bead board paper too?
This is exactly what I was looking for as a cabinet makeover! Thank you! It’s absolutely beautiful, low-cost and easy to do. My wallet thanks you and my kitchen thanks you!
Dorcas
I love it. How durable is the bead board wallpaper. I have several sheets of bead board that I picked up at yard sale. Could I use that instead of wallpaper?
I have done the beadboard wallpaper on my own cabinets. I also have a 7 and 3 year old. I loved the way it looked when we did it but once my, at the time 5 year old, noticed the texture of it she notices she could use her fingernails and draw in it. It has a sort of foamy texture behind it like foam board and completely collapses when you “draw” on it. Like I said I absolutely loved the way it looks but it is NOT durable. It also nicks if you put it on a flat surface. We also put on our drawer fronts and that is where we saw nicks. Recessed is better if you don’t have a fingernail picture drawing toddler.
I close on my ‘new’ house in a few wks. I’ve already ordered my bead board wallpaper. I previously had formica cabinets refaced by a ‘professional’ carpenter. It cost a couple thousand $$$ for a not very ‘professional’ job for new doors. My new hardware(hinges) didn’t show. What did you do to prep your hinges. I’m planning on using my old porcelain knobs.
I am so impressed with what you have done with your kitchen. What a great job and well done.
I did 4 doors like this in my Landry room. Came out great but was not good at the 45 degree cuts so I squard them off. Love it thanks for the ideal!
Great idea! Can I ask how the wallpaper’s holding up? Is it easy to clean? And where did you purchase? I guess It’s cheaper than real beadboard?
Sorry for all the questions:)
Hi Lauren,
Brandi wrote this tutorial as a guest post (so she doesn’t see your questions). If you click any of the links in the post then it will take you to her blog and I’m sure she’ll be happy to answer if you ask. Thanks! ~KIM
Looks great! Did you paint the headboard wallpaper when you painted the trim?
Hi Eva,
Yes, Brandi painted the trim and paper at the same time. It looks great doesn’t it?
~KIM
My kitchen doors have a beveled edge. How do you refinish?
This is exactly the style I was looking for last year when we repainted the cabinets and the kitchen. I have exactly the hardware that you show but we couldn’t get the mitering to work on our doors. Hence the beadboard wallpaper still sits in the box. It never occured to me to secure the framing with screws on the inside of the cabinet doors – GENIUS! A little wood putty and a few coats of paint and no evidence! I’m going to give this another go after Thanksgiving, never give up!
Thanks Barb! I’m so happy it inspired you!
I have a 130 y/o farm house. I used bead board to finish out the 8″ wide doorways. I love the idea to use the bead board wall paper on the cabinets. Great idea!
How did you do the drawers? It’s amazing. I was looking for an idea for my kitchen cabinets. Had visited lots of websites. Saw nothing that compares to this. Love it. Gona use your ideas for my kitchen. Maybe you could show how you did the rest of the kitchen. aka floors, countertops, etc.
Gorgeous! Have you had any issues with the wallpaper tearing? I’m debating whether to use wallpaper or real beadboard. I don’t want it to tear, but I don’t want to use real headboard because the wood layers will show on the sides. Thank you!
I’ve been wanting to redo 30 year old cabinets and took this project on. It was so easy and no one can believe it is wall paper. One of the best DIY projects I have done. Don’t think there will be any problem with wallpaper tearing I think real bead board will make cabinets to thick and heavy.
That is awesome Margie! Yay! I’ll be sure to share your success and happy news with Brandi (the guest blogger).
Beautifully done. My husband and I will adventure on this project soon! Just a quick question: is the wallpaper used on the drawers different from the ones used for the doors? It looks so lightly different in the picture.
Thanks for sharing this tutorial!