The deck was always a mess. It rains here almost every day and I would have to grab the cushions off the chairs and lean them against the overhang so they wouldn’t get wet. Cushions and pillows were everywhere. This was not working. I shopped around trying to find an affordable and stylish outdoor storage box and was aghast at the prices! Ridiculous! It was time to make my own. It was pretty easy and turned out just as I planned. I’m excited today to be partnering with 3MDIY.com as one of their 3MDIY Experts and share my instructions on how to make your own DIY Outdoor Storage Box & Bench!
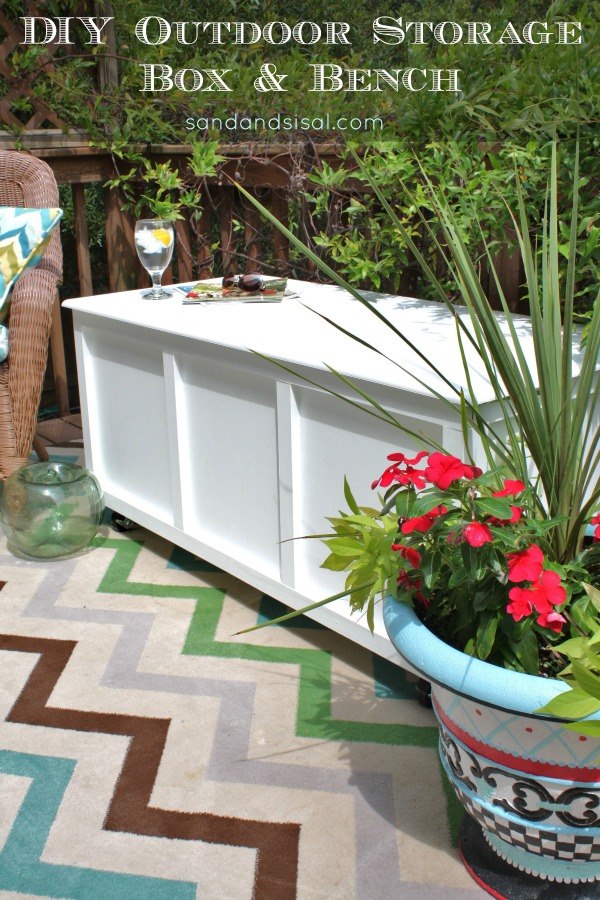
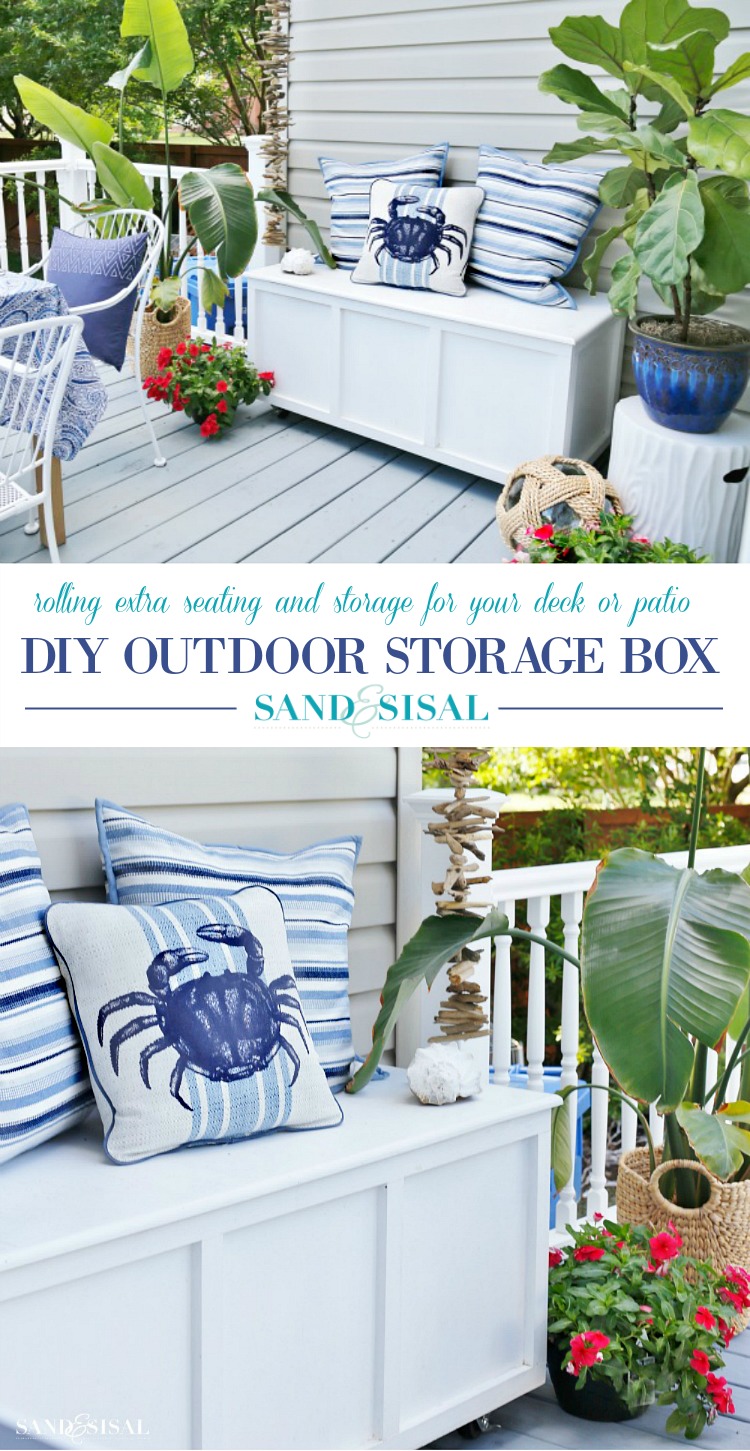
DIY Outdoor Storage Box / Bench
 STEP 1: To make the storage box you will need the following items:
- (1) 4’x8′ sheet of quality pine plywood 3/4″ thick (use the best quality you can afford)
- (6) 2″x1″-8′ pre-primed trim board
- (1) 5/8″ x8′ PVC quarter round trim
- (2) 3.5″ galvanized utility hinges
- (2) 2.5″ rubber wheel swivel casters
- (2) 2.5″ rubber wheel swivel casters with locks
- Finishing nail gun
- Skil saw or table saw
- miter box or miter saw
- 3M Marine adhesive
- 3M Advanced Abrasives SandBlaster Sand paper with No Slip Grip Backing
- 3M Wood Filler in White
- 3M Tekk Protection Work Tunes Hearing Protectors
- 3M Tekk Protection Holmes Premium Safety Glasses
- quality primer
- exterior paint
- ScotchBlue™ Painter’s Tape & Drop Cloth
 SandBlaster Sand paper with No Slip Grip Backing
 in White
 Work Tunes Hearing Protectors
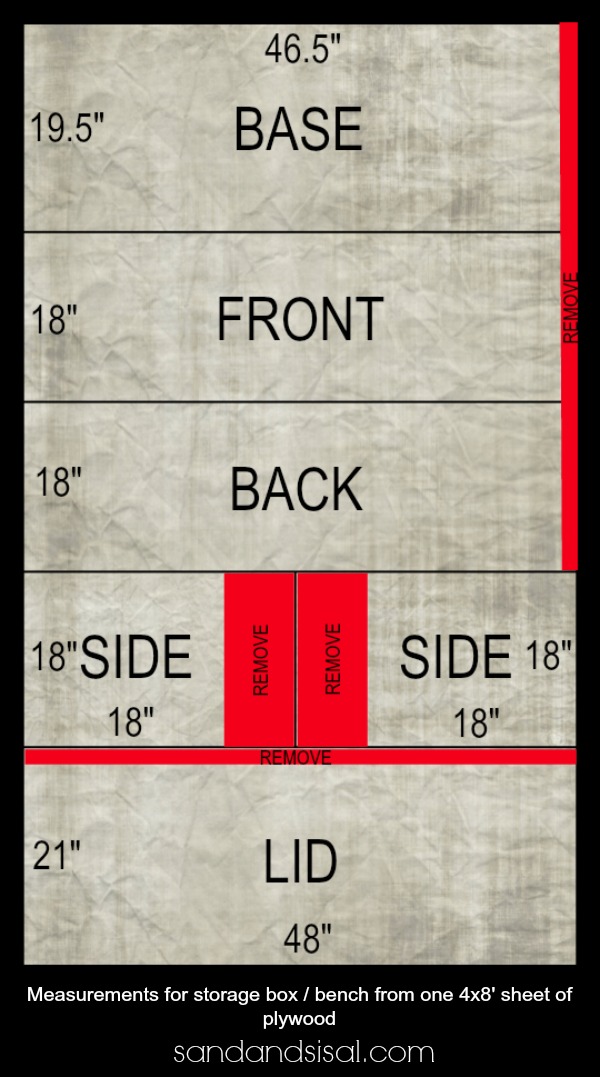
Let’s get started! To keep the cost of the box down we worked hard on our dimensions so that we would use only one sheet of plywood, yet be able to build a box that would hold all of our cushions. I drew out a diagram for you below. Cut each panel to these measurements and you will have minimal waste left over. (Just don’t mess up or you’ll be buying more plywood!!!)
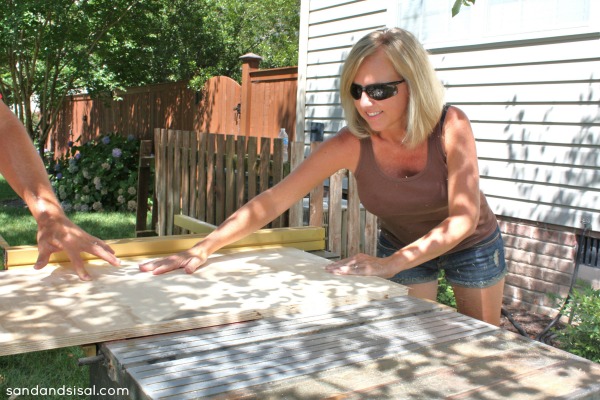
Now I used our table saw but you can easily use a skil saw also. Always have someone else help you when cutting, for safety and accuracy. Wearing proper 3M Tekk Protection eye wear is a must! The sawdust will be flying everywhere. I’m wearing my 3M Tekk Protection Holmes Premium Safety Glasses. We always have several sitting around so we never have the excuse not to protect our eyes. They look good and fit just like sunglasses. I am also wearing the safety ear buds that come with the glasses.
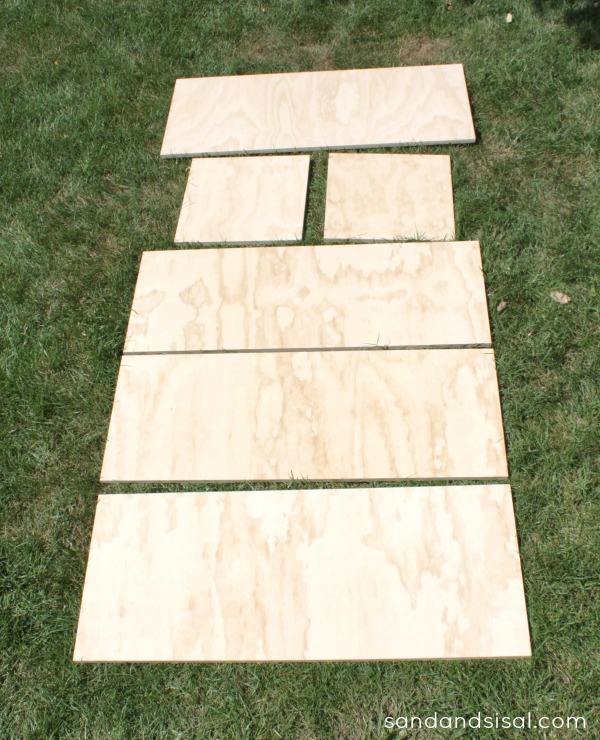
Below are all the panels cut and laid out. Measure twice and cut once. Whew! No cutting mistakes!
 STEP 2 ASSEMBLE: Now because I will be using this storage box/bench outside on my deck, I want it to be as weather resistant as I can make it. We were going to use liquid nails, but decided to use the 3M Marine Adhesive Sealant. We’ve used it on our boat and know how very effective and strong it is, so why not use for an outdoor storage box?
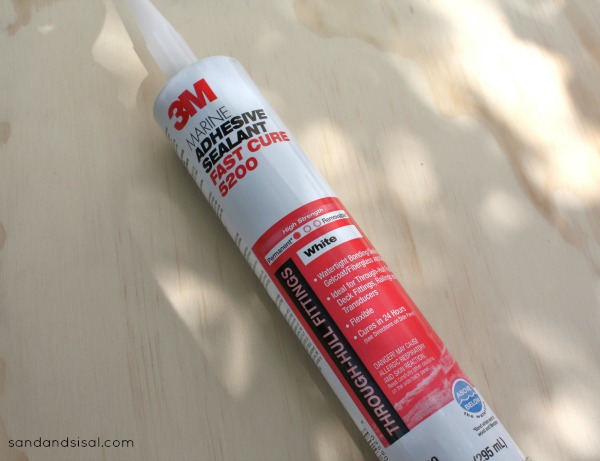
You will lay your base panel on an elevated surface and be sure to let it hang off the edge a bit. You’ll see why in a minute. Run a bead of adhesive near the edge of a long side.

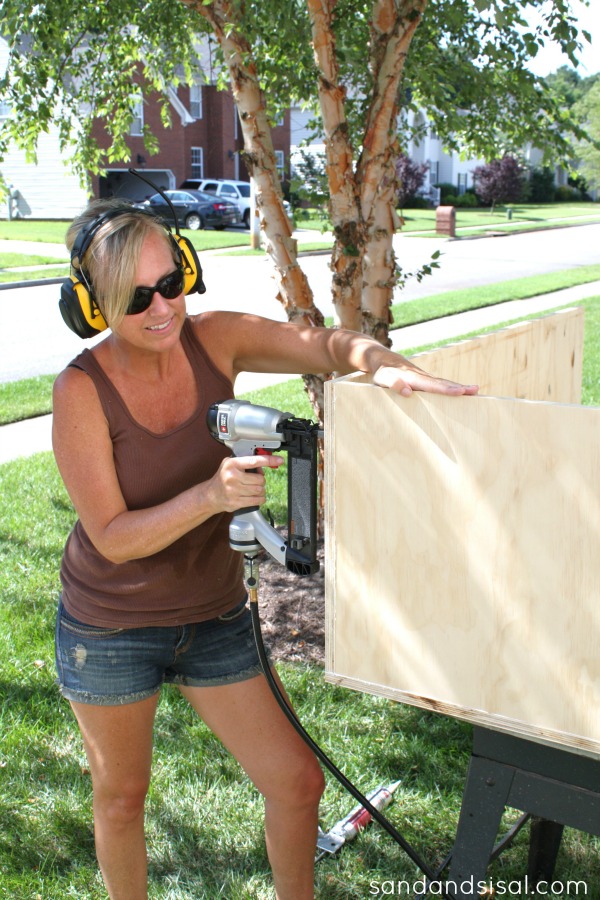
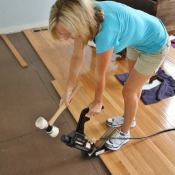
Next, stand the back panel along that edge you just laid the adhesive on. Have someone hold it steady for you and secure with nails every few inches. Use a nail gun with finishing nails for this. 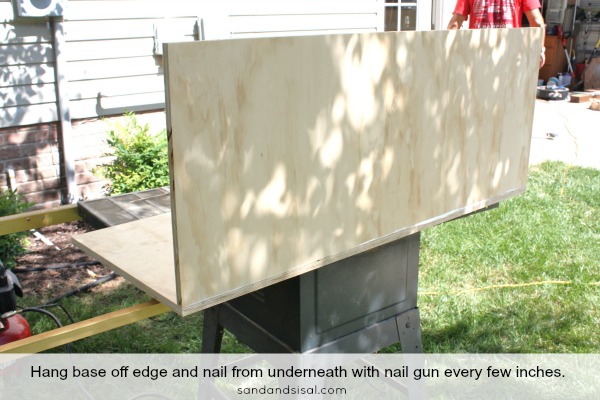
You will be doing a lot of nailing and it gets loud! Protect your ears with ear buds or this awesome 3M Tekk Protection WorkTunes™ Hearing Protectors. I can hook it up to my iPhone or use the radio with over 50 pre-set channels. My kids all fight over the WorkTunes™ when they mow the yard, so we got a second one for them.
Continue around the box, next with the sides, applying sealant to the every edge where the panels meet, and then nailing.
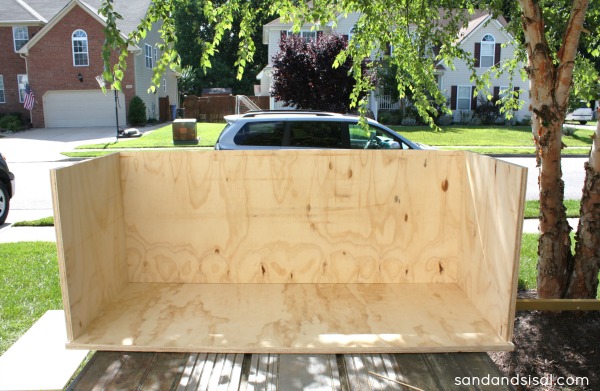
Apply sealant to the side edges and base edge and then nail in the final front panel.
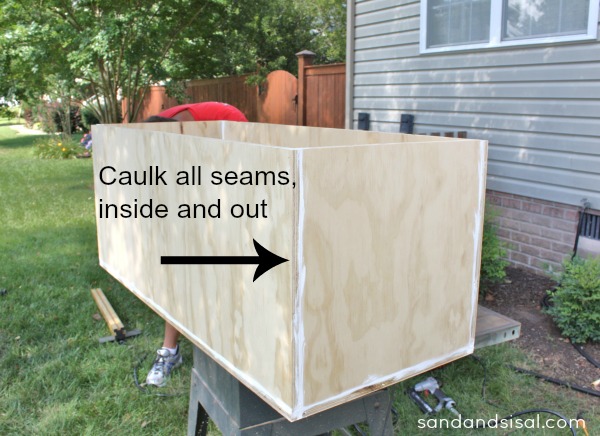
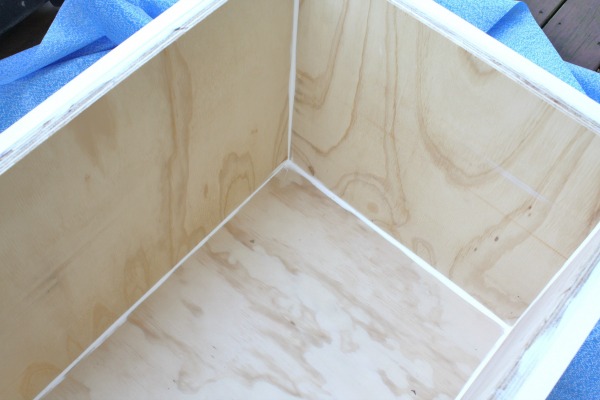
Caulk all the seams, inside and out, with the same sealant. You could always use paintable caulk for this part, but the 3M Marine Sealant takes care of it all. Keeping it nice and dry.
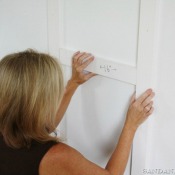
 STEP 3 DETAIL & PAINT: Congrats, you just made a box. But a box is boring. Let’s add a bit of pizzazz to it with some simple trim. Cut your trim board with straight cuts, gluing and nailing the top and bottom trim boards first, then measure the sides and cut those trim boards to length. TIP: For easy and accurate measuring of the trim, hold the trim board in place and then mark with a pencil where you have to cut. (see the lower left pic below). This method will give you an accurate cut and save you the hassle of pulling out the measuring tape every 2 minutes!
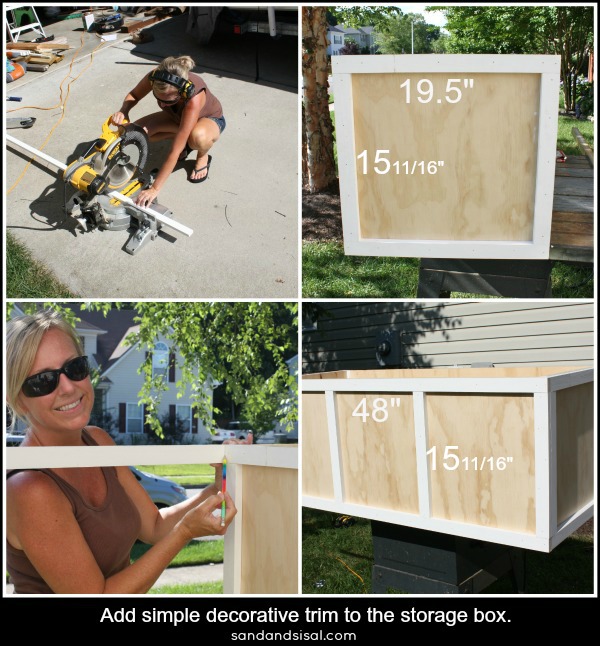
Finish the edge of the lid with PVC quarter round molding. It’s lightweight, easy to cut, and yet strong and super smooth. Glue and nail it to the box. 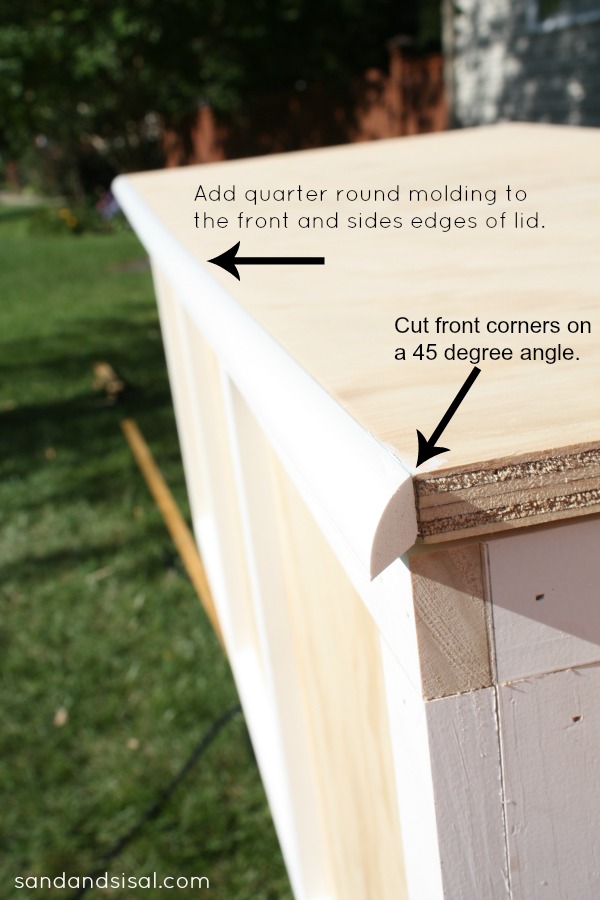
For added strength and rigidity, cut two 1×2″ trim boards and nail to the underside of the lid. (See the knots? This is why you want a really good piece of plywood. These knots were the only one’s on the entire sheet, so we purposely chose to hide them on the underside of the lid. They could always be filled with wood filler if you prefer.)

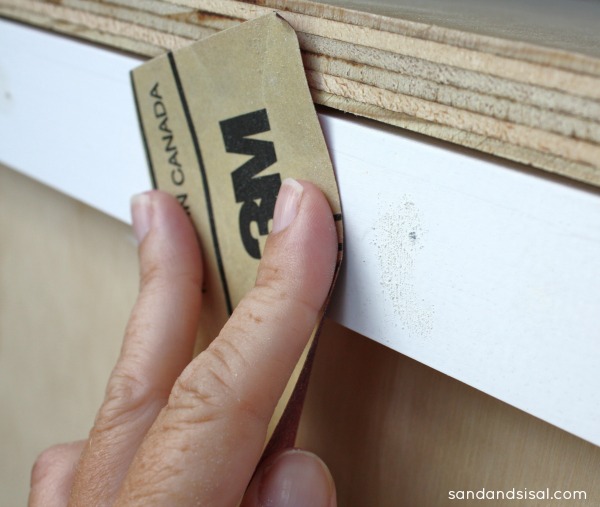
Fill all nail holes on your outdoor storage box with 3M Wood Filler and then lightly sand where you patched with 3M Advanced Abrasives sandpaper.
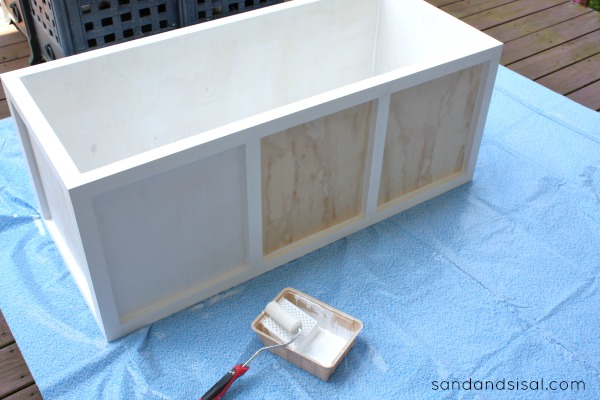
Place the box on a ScotchBlue drop cloth and prime every surface of the box with 2 coats of quality primer, even the underside. Next give your box at least 2 coats of good exterior latex paint.
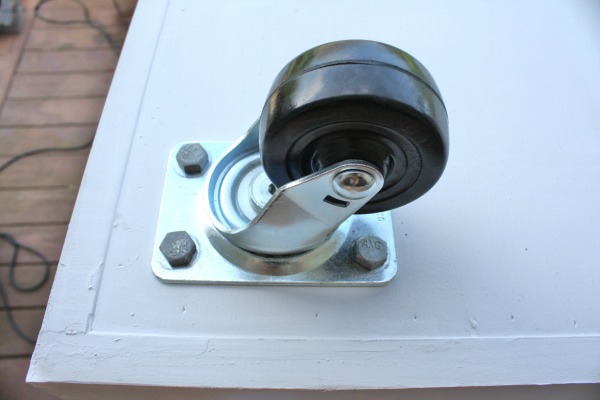
Screw in the 4 casters to the bottom corners of the box and also attach the galvanized hinges to the lid first and then the box.
For a fun pop of color I painted the underside of outdoor storage box lid in “Provance” Annie Sloan Chalk Paint. I didn’t want to get the turquoise paint on the underside of the quarter round molding trim of the lid, so I taped it off with ScotchBlue™ Painter’s Tape and then painted on the accent color.
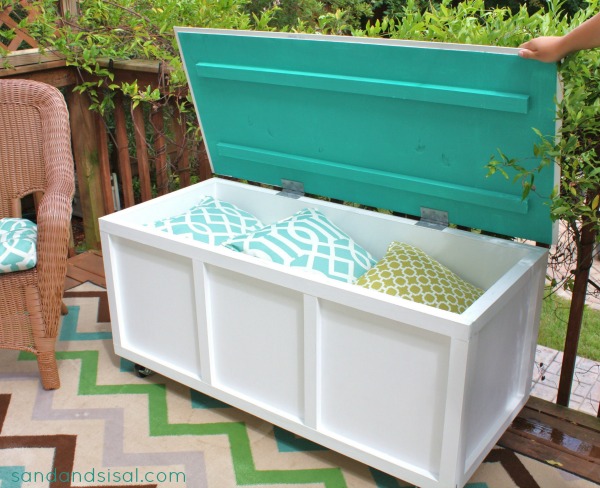
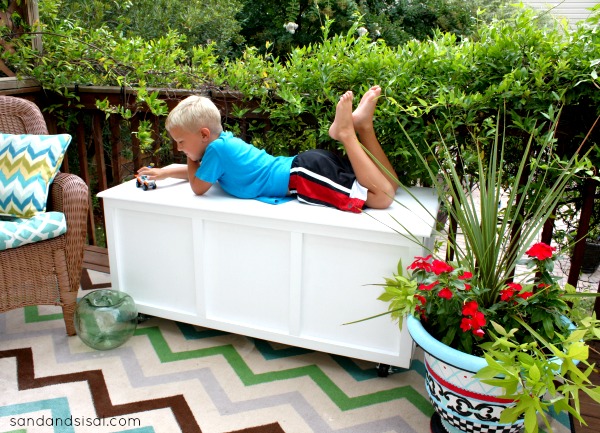
The outdoor storage box fits all of our cushions easily and we have been using it both as a side table and as extra seating. I love it!
UPDATE!
Here is an update on how it looks 5 years later (summer 2018)! It could use another coat of outdoor paint but overall it still is looking fabulous and holding up amazingly well. The outdoor storage box has sat outside in the elements for the past 5 years (several hurricanes and snowstorms!). See the rest of our coastal deck makeover HERE.
LOVE IT? PIN IT!
Find out more awesome projects at 3MDIY.com and be sure to visit their “Experts Corner” where you see me featured along with some awesome DIY-ers.
 and be sure to visit their “Experts Corner” where you see me featured along with some awesome DIY-ers.
Check out my other 3M DIY projects!
DIY Deck Repair Installing Hardwood Floors Installing Board and Batten

Connect with 3M DIY Twitter Page, 3M DIY Facebook Page, 3M Pinterest Page.
Kim


This post is a collaboration with 3M DIY. To keep up-to-date on projects, products and sampling visit 3MDIY.com.
WOW! That’s great! You did a great job – the storage and the whole deck look fabulous. (And so do you in your cool glasses! ) Julia
Haha! Thank you Julia! I appreciate the sweet comment! ~KIM
This looks great, Kim! We could really use something like this on our patio. I can’t wait to try to make one!
Thanks Michele! It took us just the afternoon to make and then I painted it the following day. It was far easier than I thought it would be. (thankfully!)
~KIM
You amaze me every time! One because you are super talented, two because you manage to always look so darn cute while working with power tools! grin! I laughed out loud at “now you’ve made a box.” Great tutorial and love all of the 3M products!
Heather
Awww, thank you sweet Heather! It was about 97 degrees and 80% humidity. (Note how the hair QUICKLY went up into a clip!). I think I drank about 6 bottles of water during that afternoon project! Construction seriously only took one afternoon. I painted it the next day. Even I was surprised at how easy it was (and was kicking myself for not doing it sooner!). $120 vs. $900 retail…. ummmm. yah. No brainer.
I love how this turned out Kim! The pop of color on the inside is fabulous. And your tutorial is awesome. Thanks!
Thanks Mique! I’m so happy with how it turned out. I actually built it about a month ago and we are loving it!
Kim, I just love this, perfect for patio pillows. I’m an Annie Sloan chalk freak, and I love the color you choose.
xoxo
Denyse
Thanks so much Denyse! I’ve had an entire quart of Provance, but I’ve only used it in a few places (like my front door). This was a fun project to utilize the gorgeous paint!
Love how it turned out! Awesome! Great job.
Thank you Erin! It was sooooooo needed on my deck. Pillows were laying everywhere getting dirty and targeted by bugs.. eww. It’s nice to have everything all in one protected place now.
You make this look so easy! I really like the pop of color
Thank you Carissa!
Awesome job KIM! That came out great. So smart using the marine adhesive too. That would work great here in wet Oregon. lol. I love the extra decorative/detail touches you added. Looks wonderful :)))
Thank you Shannon! I think my cushions are happy they are no longer subjected to slugs , rain, and pollen anymore!
What a great DIY ~ not only does it look great but it is so useful. Love it!
Thanks Mary Beth!
This is a smart project in a lot of ways. I love that it’s frugal on the plywood and watertight. Just the thing I need. Can’t wait to give it a try. I might even try it from scraps. Great tute. Jo @ Let’s Face the Music
Thank you Jo! I tried to make it as water tight as possible. It rains here constantly!
Perfect for storage! 🙂
Thanks Jess. I wish I had built one last year!
This is such a great idea. I love the storage but have to ask about your rug too. Where did you get that?
Thanks Kristen! I recently did a post & giveaway with Mohawk Rugs so they sent it to me. 😉
I love how it turned out. You did an amazing job! I love the pop of color on the inside.
Thank you Leanne 😉
Look at you using those tools! Love this project and it’s one that you’ll enjoy for years.
Thanks Paula! I adore my power tools!
Wish you wrote this 2 years ago before I bought one at Costco! Super cute and functional, thanks for the directions, they were simple to follow. Pinning it now.
Thanks so much for pinning it June! I wish I had built it a few years ago! It was simpler than I thought it would be and only cost $120 in supplies!
Great job and great tutorial! Well done! From your neighbor in Newport News!
Thank you Kim!
I have the same problem- what a great solution! I would love to link to your tutorial if you didn’t mind.
Love the bench! I’m curious, how thick was the plywood you used?
Kim, this is awesome, color the storage box, it is very chic and classy for your deck. And I L-O-V-E how you made it look like a piece of cake. Haha, I’d give a leg and arm to look that amazing/hot while working! 😀
Great work!
xo
-Eva
You really know how to rock a nail gun! Love this – was just talking to the hubby that we need a storage box for our cushions (the giant cardboard box the cushions came in just isn’t cutting it!
Kelly
I keep pinning things that are coming from your blog, I think it’s time to start following you!
Ha! Thank you so much! You just made my morning! Have a wonderful week. ~KIM
Great idea! Only question is what thickness is the plywood? Looks like half inch but not sure.
Thanks Matt! We used 3/4 inch plywood.It give the box of this size added strength.
Hello. Very stylish. How thick was the plywood used?
Hi Zerita,
Thank you! We used 3/4 inch thick plywood.
LOVE this! Next on our Summer DIY to-do list for sure!!! I can’t wait to share it with my favorite projects for the summer tomorrow at http://www.makingitinthemountains.com! Wishing you a lovely weekend!
Looks awesome! I love the colors you used. Where did you get the chevron rug? I’m having a hard time finding one that has all my favorite colors!
Wow! What a beautiful job you did on making this box..Is that cushion/pillow box going to be staying outdoors in the elements? Shouldn’t iyou have used pressure treated lumber? You were very wise to put on the casters/rollers..We have one of those “like fiberglass” ones but it is not as pretty as yours. A nail gun is about the only power tool my DH doesn’t own..He is not able to physically do projects like this now because of back surgery and I keep wanting to have him to teach me how to use some of his tools, especially the compound miter saw. I have no way of transporting the plywood unless I hire somebody which I’m seriously thinking of doing just that.
Kim, have you ever thought about teaching workshops at some of the Home Improvement stores? You’d be great at it or offer some small workshops at your home and charge a fee?
Hi Betty,
I actually have been invited by Home Depot once to help out with a workshop but I had scheduling issues and couldn’t do it. Thanks for your vote of confidence! 😉
Hey its great! I really luv it , try to make further one . Outdoor storage in essential for my fmly too.
Thanks
regards
Mostafa
Just wondering how the wood has held up. I’m trying to convince my hubby to build this but he says it’ll just fall apart front the rain/snow. Do you move it when the weather changes? Thanks so much! I LOVE this bench!
Hi Heidi! It has held up just fine but like I mention on the post, we keep this on our deck and move it under an awning if it rains.It is protected from getting drenched but it does get wet. It’s survived through several storms and snow though.
A few days passed after I cut the pieces for the storage box…by the time I got around to putting them together, the plywood had begun to bow a bit. This was not a problem for the sides and bottom because I could force the wood back a bit back before attaching. However, the top/lid is only attached by the hinges so I can’t fix the warping…any suggestions on a fix for this problem? Is it because I didn’t finish the box the same day I cut the plywood? Thx
Hi Tim! I’m not sure why your plywood warped. It shouldn’t have unless it got wet or was a lesser quality type or thinner plywood. We used 3/4 inch thick plywood. Have you attached the two 1×2 trim pieces to the underside of the lid? That adds extra strength and should prevent warping. If you haven’t yet, then go ahead and add them. It should help straighten the lid out hopefully.
Are these waterproof?