Wainscoting, wall molding, picture frame molding…your head can start to spin with all the different terms these days. I just wanted those picture frame-rectangular-do-hicky-things that go under the chair rail, whatever they’re called. Many call it wainscoting, which I have for this tutorial, but technically, wainscoting is actually panels applied to a wall. Picture frame wall molding was invented to mimic the look, hence you could also call it poor-mans wainscoting or faux wainscoting. What ever you want to call it, I’ll show you how to install it today. It’s pretty easy and adds so much classic architectural detail to a room.

My dining room was boring, dark, lacking of all character, uninviting and never, ever used. I believe every space in your home should be beautiful AND used and if it isn’t, then change it until you love it and will use it! I painted the lower half white, to lighten it up, removed the traditional rug and replaced it with a gray, modern one,added stunning artwork, and the picture frame wall molding. You can see the post about that here- How to Decorate a Dining Room.

Choose a molding: Installing the wainscoting is really, one of the easiest molding installations I’ve ever done. Choose the type of molding you like. I chose a pre-primed molding from Home Depot and it is 1.5” wide. They came in 16 foot lengths! Now that is LONG! You pay by the foot, so cut what you need right in the store.
Have the right tools: My all time favorite power tool is my DEWALT 12-Inch Double-Bevel Compound Miter Saw. If you are planning on tackling any type of DIY projects, I seriously recommend buying a miter saw. The right tools make everything easy. You will also need a nail gun that handles 1.25” finishing nails. I use a Porter-Cable Compressor and Porter-Cable Nailer.
Decide on a size: I looked at my wall lengths and decided on the dimensions for my picture frame. There is no “right” dimension for this, it is what ever you find appealing. Thank God, because math and I are like oil and water. I don’t “do” math. I am an artist, a visual person, and am more concerned about the overall look vs. the exact measurements. I liked the look of rectangles and decided that a 16×19” rectangle would look best. TIP: You can create different size rectangles with painters tape 1st to see if you really like that look.
Start cutting frames: It doesn’t get any more basic than this. Cut 45 degree cuts, inward, for each top & bottom piece and repeat with the side pieces. Remember I chose 16 x 19” so my longest, outside dimension for the top & bottom piece will be 16 inches. The longest, outside dimension for my side pieces will be 19 inches. Make sure your top and bottoms match exactly and repeat with the side pieces.

Glue and Nail the Frames: Rub a bit of wood glue on each joint and carefully nail into the thickest part of the molding with your nail gun. One nail per corner is ample. (I did this on my kitchen table… um, not the best spot, because I nailed the frames to my table a few times! SHHHHHH! Don’t tell hubs!!!!! It’s our little secret.) Feel free to paint your frames with semi-gloss paint at this point. It will save you time and is easier than trying to cut in around all those edges.

Supply & Demand Spacing: Ok, now that you have made a gazillion frames, start spacing them around the walls. I made 16 rectangle frames for my dining room. I recommend finding the center of each wall, mark it, and center one frame at that point. Arrange all your frames outward from that center point. This ended up creating about appx. a 6 inch space between each frame. Again, the spacing is up to you, there are no official rules.

Make it EASY!: I’m all about figuring out the easiest way to do DIY projects. I rested a 2×4’ on the baseboard and positioned each frame on top and then nailed it to the wall with the nail gun. This ensured that each frame was at the same height and level. The distance from the top of each rectangle to under the chair rail was also the width of a 2×4. I also cut a spacer board for the spaces in between each frame as an easy reference point. For the areas under the windows, I turned my rectangles sideways.

The only area I needed serious help on was this triangle. Like I said, I don’t do math. Triangles might look easy but they aren’t. We needed our daughter who is in trigonometry to help us out! It’s not so much figuring out the correct angles as it was trying to physically cut those angles. You are on your own when it comes to triangles…. I simply can’t help you there. Sorry. I know my limitations when it comes to DIY. 

Finishing Touches: After you have nailed in all your frames you will want to finish them off by caulking around each edge with paintable caulk. Fill all the nail holes with wood filler and touch up the frames in a nice semi-gloss paint, the same color as the wall color. I used a white satin paint for the wall and a semi-gloss for the trim.

Over all I’m thrilled with the wainscoting and how the entire room came together. It is so much more inviting, lighter and brighter and guess what? We’ve actually eaten in there several times since the makeover! Success!
I think the results speak for themselves, don’t you?
Kim
Join me on FACEBOOK, TWITTER, PINTEREST, G+ or SUBSCRIBE.
You might also like:
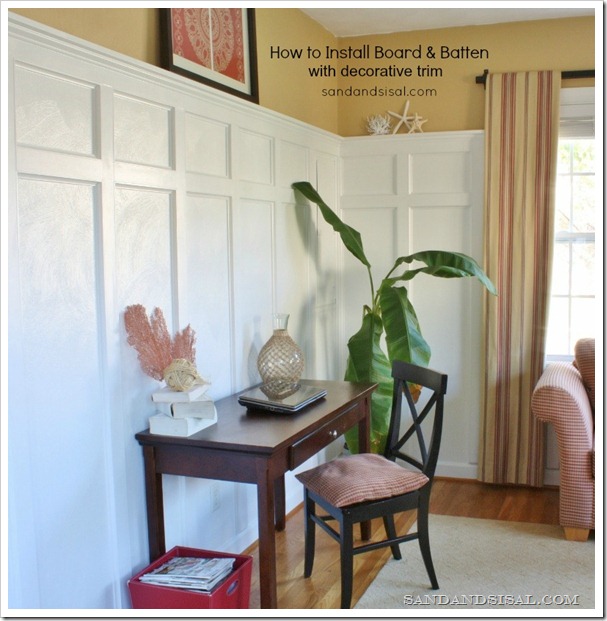
How to Install Board & Batten with Decorative Trim
or
Installing a Bead Board Ceiling

Linking up to: Home Stories A to Z
Very pretty. I am a fan of the picture frame molding.
We installed those in the dining room this summer. But I left the bottom half of the wall the deep red that it was. We were to paint the entire thing molding and wall a nice bright white… but we all agreed to wait and live with the red for a bit. It is still here.
We cheated and bought the already made molding though 🙂
I luv your dining room.
Come on over a take a peek at ours…
Cheers, Gee
Beautiful Kim!! We installed it last year in our hallway and dining room, I love the look it gave the rooms!
It is just gorgeous Kim!!!
XO
Kristin
This came out soooo nice! I was just telling my husband that I wanted to do that in our house. We have no idea what we’re doing though so I will have to call my dad to help. lol
Gorgeous job! Love it!
Gorgeous!!! And can I just say THANK YOU for the detailed instructions? Not only am I not a math person, but I’m not much of a DIYer (yet) and I need all the help I can get! I think I’m going to do this!
Beautiful Kim. I am definitely going to tackle this when I am done in my kitchen. Boy what a project that has turned into. But will look great when I’m done. Thanks again for all your help and details too!
Just what I needed! We’re in the midst of a great wainscoting debate at our house. Well, mostly me. The hubs could care less. I always wondered if I was capable of doing picture frame molding. You’ve given me a boost! 🙂
Great tutorial and you are right, there are so many names for wall treatments. Half the time I don’t even know what it’s called! 🙂
The wainscoating makes such a big difference. Thank you so much for the fantastic tutorial! x
It’s gorgeous! What work, but it really looks like it was worth it! Is that picture a painting or a photo? I just love it!
Thanks and love your blog, BTW!
Sheila in Oregon
Thanks Sheila! That is a giclee on canvas entitled Storm Over the Marsh by James Way. I love it!
My gosh, you’re a beast with the power tools, Kim! Look out Ana White! 😉
This is gorgeous and the perfect finishing touch.
xo Heidi
Thanks for the tute Kim! I love your molding and dining room makeover! Your post comes at a perfect time for me since I want to add this molding to our dining room, living room area! I also love your Ballard painting! I’ve wanted that for so long! Beautiful room!
Beautiful! I would love to try this for my home’s living room — it’s the first room one enters when entering my home, and I’d like to make it special! Thanks for the tutorial.
This is so inspiring! Are you willing to share the upper paint color? It’s beautiful!
How did you keep the frames square/true while gluing and nailing them? It would be great if you would do a little blog/tutorial on that. Keeping them square while constructing them is easier said than done. Beautiful job! I bookmarked quite a few of your pages. 🙂
Beautiful job! Wondering if your walls are textured. I have textured walls and would love a simple way to have the wainscoting look without having to attach a lot of plywood.
Thanks
Hi Amanda! My walls are very textured and we did not use any plywood panels (too much work). It is important to caulk all the seams of the boards, especially with textured walls. It helps give it a more professional appearance.
Just beautiful! Around here I’ve heard that type of molding (the frames) called “beauty boxes.”
I really want to put them in my dining room, which already has a chair rail in place but no paneling. You may have given me the courage to tackle the job! Thanks!
Thank you Lynn!
So Beautiful, but could I just buy picture frames instead of making them?
Hi Verna! I guess you could, but they would have to be pretty large frames and the sizes would need to be figured out mathmatically to fit around the room. Buying frames would cost 100x more at least also. But it might be cheaper than hiring someone if you don’t plan making them yourself. Thanks so much!