I will admit, I’m not a huge stencil girl, but I do like to use them occasionally. The walls in my home were textured by an evil plaster man, I’m convinced! Ninety percent of my walls are covered in a thick, sharp swirly texture that draws blood if your hand brushes against it! Evil I say, EVIL!!! I hear you laughing at us Mr. Textured Plaster Man. Anyhoo, the point is that I can not enjoy the artistic beauty that stencils can bring to a wall like some homeowners can. I do use stencils on projects though. My issue is that I know what stencils I like but I can’t find them for purchase. I’ve learned over the years how to make my own stencils two different ways without a cutting machine, therefore getting exactly the design I want and I pay nothing for them. Sound interesting?
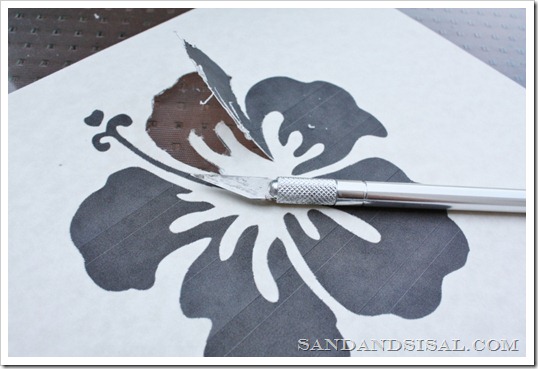
The easiest way to make your own stencil is to find a royalty free clip art image online, download and paste it onto a word document. In the word document you can resize it to your desired size. Then print it out on to card stock paper. Card stock is a nice option and will hold up for a quick project. Simply print it out and cut it with an exact-o-knife. Easy-peasy, but if you will be needing the stencil for an extended period of time, I have a different option for you.
Now if you own a Cricut Expression or a Silhouette Cameo cutting machine, you might be wondering why such elementary methods are being discussed. Well, I own both machines and to this day they both are still in their boxes! (GASP!) I’m scared of them and haven’t had the time to research how to use them. (Note: one was a gift and the other I won on a blog giveaway… enter giveaways, you can win big!).
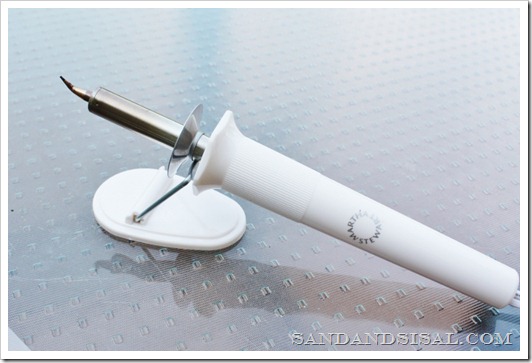
I have to introduce you all to the new Martha Stewart Multi Purpose Electric Cutting Tool by Plaid. The Martha Stewart peeps sent it to me to try out along with a whole bus load of products. You can see it all by clicking here. It’s her multi-purpose heating tool. Plug it in for about 10 minutes and you are good to go.
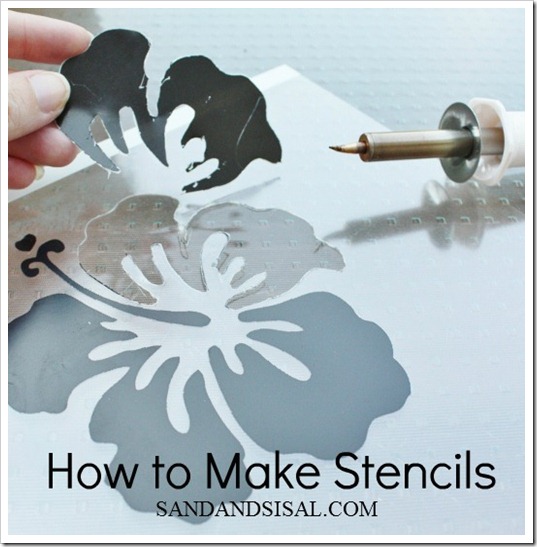
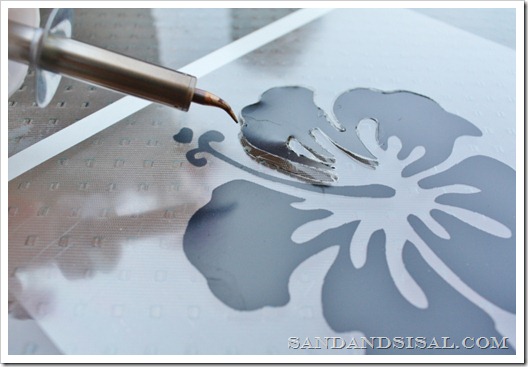
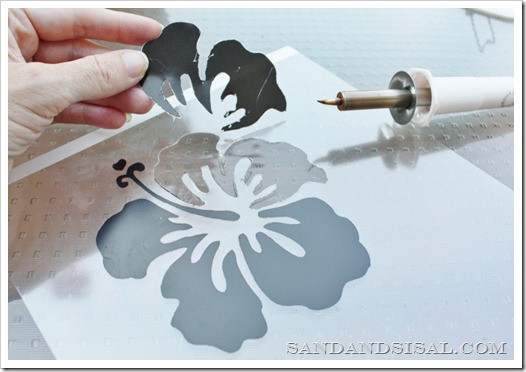
Instead of printing onto cardstock, this time print onto transparency film. You can find inkjet transparency film at any office supply store or at Amazon.com. Make sure you set your printer settings to “transparency” and allow it to sit untouched for a few minutes after printing to allow the ink to dry. Now it’s time to use Martha’s heat tool! I’ll admit, I was quite intimidated at first by this tool because I had never used anything hot besides a hot glue gun! Just use common sense with it and you’ll be fine. This tool comes with 3 different tips, one of which is made specifically for stencil cutting. Simply trace the tool around your design very slowly and watch it melt away the edges.
After cutting, lift out the pieces and you are left with a beautiful stencil. This tool is especially nice if you have an intricate design you are working with.
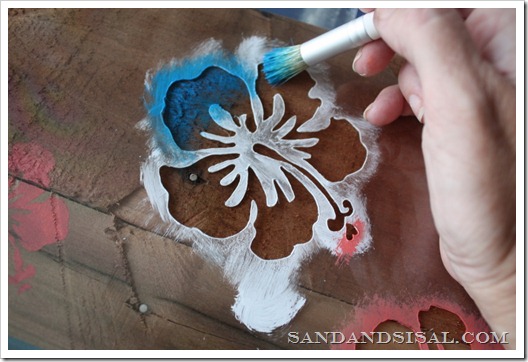
The advantage of using a transparency for making stencils is that they are reusable! You can see how I used this hibiscus stencil on my Surfboard Pallet Art I created for my boys’ room and the hibiscus in my daughter’s Roxy Surf Girl Room and her Roxy hibiscus lamp.
Keep your stencils in a folder and you will have them for life! No expensive, big cutting machine needed, just a printer, an exact-o knife, or Martha Stewart’s Multipurpose Heat Tool by Plaid. Save some money and get decorating people!
Pin it if you love it!
Check out my Décor Crafts tab up top for more crafting tutorials!
Kim
Find me on FACEBOOK, TWITTER, PINTEREST, G+ or SUBSCRIBE
Disclosure: this post may contain affiliate links.
Thank you for this post! I have no machines, and I would love to be able to make stencils, so I am pinning this to reference later.
Thank you Lauren! I appreciate the pin too!
Love this! I am terrified of stencils for some reason. I have the Cricut Expression 2, and love it. You should really get yours out, watch a 5 minute You-Tube video and get busy. I was terrified of mine, but since I figured it out, I have learned to do so many things with it. I’ll try stenciling if you promise to try one of your machines 😉
Jessica @ Mom 4 Real
Haha! Yes ma’am!!! I’m excited to try them out, I just have not had the time and frankly, this method has been a lot faster for me (until I get those darn machines figured out). 😉
Great tutorial Kim!!!!
Thank you Pam!
Love this – I have been doing some glass etching lately and can’t get nice clean lines for the small details with my utility knife (yeah, no machine here either).
On a second note… I’d be happy to take your unused machines off your hands instead. 😉
Thanks! I do a lot of glass etching too and the details are hard. Have you ever tried Martha Stewart’s adhesive stencil film? It works well too and comes in a roll. It will stick to the glass so that the etching cream won’t seep under. Haha, you’d think I was getting paid by the Martha peeps to say all this, but I’m not. They just have really nice products.;)
i have a circuit machine i bought at a yard sale and have yet to use it too! i think it was one of the earlier ones…it’s small…but like you, it’s in the box because i really don’t know how to use it!!!! thanks for this diy…i am going to try it!
Haha! We should all start a Cutting Machine Fearful Anonymous support group!! Thank you!
Can we be BFF’s? I owe a Silhoutte that I haven’t taken out of the box because I am afraid of it as well!! I thought I was the only one who felt this way!!! This is a great idea for creating stencils, and I MIGHT even work up the courage to try to Martha Stewart heat tool. I know they sent it to you, but do you have any idea what the cost is on it?
Thanks!
Thanks Maureen! We are already friends, silly!!! The tool runs around $20 and comes with 4 different types of tips for varied purposes. It’s very fast to work with.
Great question! If you are using cardstock then you can spray the back of the stencil with non-permanent spray adhesive and for the transparency stencil I highly recommend using Martha Stewart’s stencil adhesive. It works great! I’ve used it for working on glass and other curved items.
I have a stencil cutter from back in the 80s (guess that makes it almost vintage) anyway just a tip. Make sure you keep the cutter moving or the stencil will melt and you will have waves. Cutting your own stencils is such a cost effective way to stencil.
Great tip Anna! I agree, slow and smooth tracing at a consistent speed makes for a nice clean cut.
You need to be a part of a contest for one of the best blogs online.
I most certainly will recommend this blog!
oh,, i want to try this now.. thanks for sharing.
Awesome! Fabulous tutorial, pinning and FBing now!
wao, it seems so easy 🙂 I will try & if i will be sharing any tutorial,so definitely linking back to you for this idea 🙂
I totally have one of those tools and have never thought to DIY my own stencils like that! Great job Kim!
This is so cool! I will definitely have to try this.
~Steph @ Silver Boxes
Cricut is easy-peasy!
Great pin. I didn’t know about the Martha Stewart heated cutter.
As for the cricut, I ve bought one three different times. Then I get scared and either resold them on eBay or returned them to the store. I don’t make cards or have kids still at home so I couldn’t justify spending the money.
Wow, I wish I had red this before getting involved with my Silhouette. This seems a lot easier. Thanks!
Late night typing. Read, not red!
I have 2 different “hot knives” as they are called. One by Plaid and the other by Martha Stewart. I just can’t get a smooth cut with either, especially with an intricate design, so I have reverted to using my old stencil cutter knife that I have had for years. That blade is easier to control and the results are much better for me. For my stencils, I take my pattern to the local Office Max and have them print it on a transparency. Their prices are really cheap. Really wish I could master the “hot knife”. Would love some tips. Thanks
I wish I could give you more tips. I haven’t tried any real intricate designs using the knife. I’m sorry. Thanks for taking the time to comment!
~KIM
Hi there, I came across this page and instantly recognised our stencil design. Whilst our company sells stencil cutting tools and gives advice on cutting stencils, we would never advise people to take pictures from the internet and use them without getting prior permission from the owner of the design/image. You have taken a copyrighted design from our website to show people how to cut their own stencils, you are actively encouraging your readers to do the same. We make our money from selling stencils, stencils which we have taken time and money to design and develop, its unfair and irresponsible to promote the use of images like this. I will not be taking this matter further, I only hope that you will consider your choice of words next time. Kind regards, Nikki, The Stencil Studio Ltd
What a great idea !!!
My Silhouette also sat in it’s for a while. I research various Videos on the ‘net and finally found ‘Silhouette School’. This woman is amazing….clear simple instructions…easy to follow in a logical way. I dug out my machine, set it up, connected to the Silhouette website and haven’t looked back. I also found that the office supply store became a new friend….their clear plastic file folders worked wonderfully for making stencils. I can honesty say that the results I’m getting with the Silhouette are far superior to craft knives or hot cutters. And best of all, once you understand the process, you can use almost any graphic you find on the ‘net!
Wow, I know this is an old post but I wonder if any of you ladies would interested in selling your machine. I want the Silhouette Cameo but can’t cough up $269.00 right now!
Oh please open your Cricut explore or check out the Brother cutting machine – because they make stencils so much easier AND so much cleaner.
Thanks for posting this, I am going to try this for my artwork! The Martha Stewart Cutting tool is exactly the same as a wood burning tool, it comes with several different tips, and you can cut/burn etc with it! It can be purchased at Michael’s craft stores/any craft stores and probably much cheaper! I use mine for my pyrography art which I have been doing for over 15 years now and for burning designs/pictures onto leather!
Thanks again
Julie
Oooo, now your artwork sounds interesting! Thanks Julie!
Thank you so much for teaching me how to make a stencil. I truly appreciate all of the effort that you put into your post. Now I feel I can create something beautiful for my daughter by using such simple measures. My confidence is starting to grow.