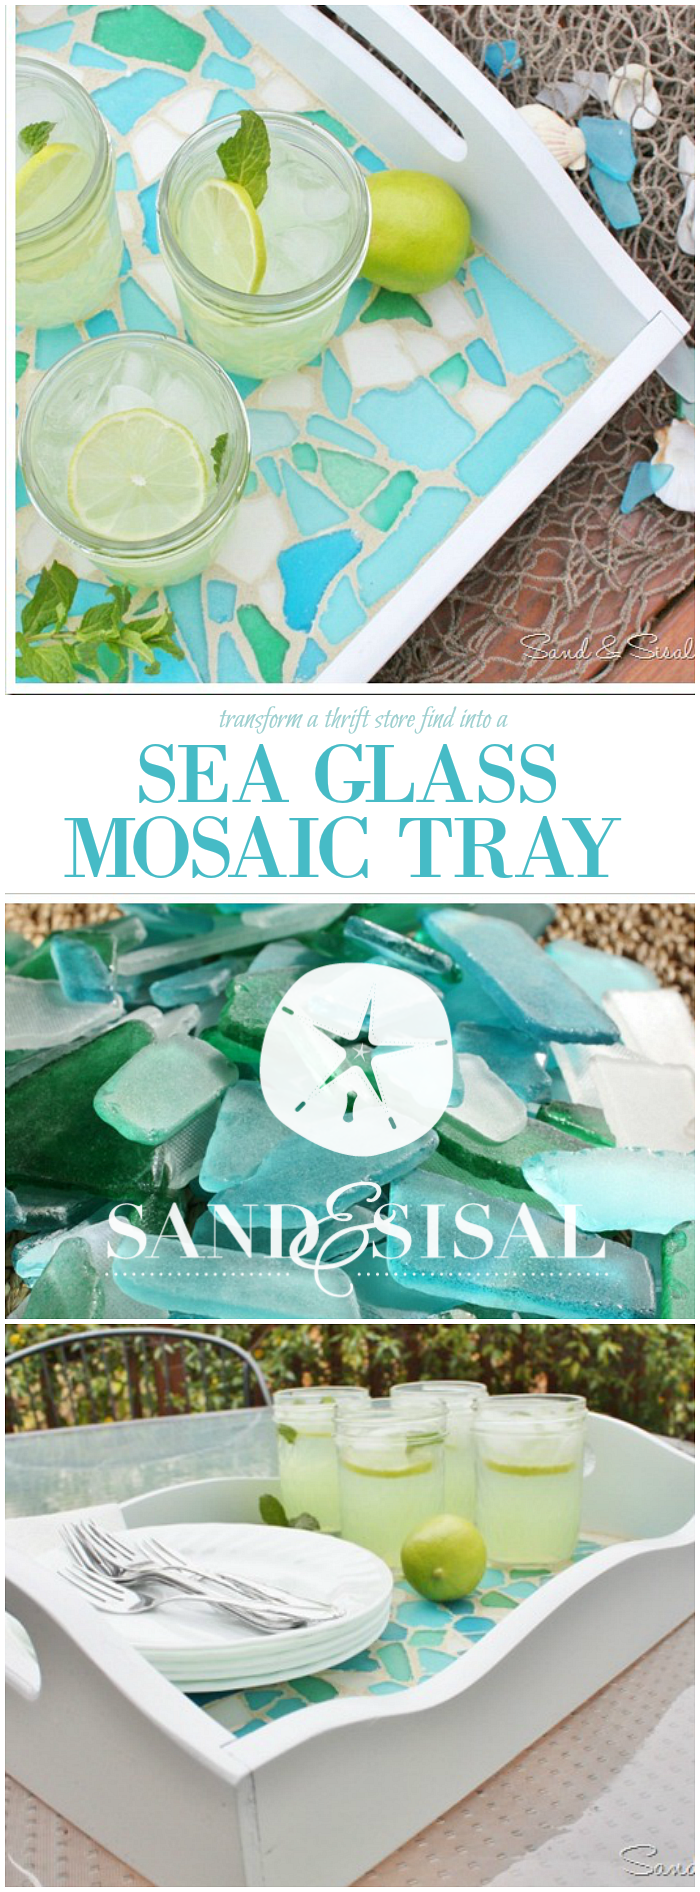
Move over June Cleaver… Sand & Sisal’s serving up drinks in a sassy, modern Sea Glass Mosaic Tray! I was blessed to grow up in a “Beaver-esque” home, complete with parsley garnishes on our dinner plates. My mom has always been an amazing hostess and has a huge collection of beautiful serving trays. The more meals my family eats outside, the more I realize the sheer practicality of trays, not to mention “Betty Draper” charm trays posses. Any Mad Men fans out there?
 `
`
Sadly, I don’t own a single tray. (gasp!) When I came across this colonial pictured tray in my favorite thrift store for less than $1, I knew I could transform it into something beautiful! I’m going to show you how to make your own Sea Glass Mosaic Tray.
How to Make a Sea Glass Mosaic Tray

The first step is to lightly sand the tray with 100 grit sand paper. You want to remove any shiny lacquer. Next, give the tray a few coats of spray paint which is suitable for wood.

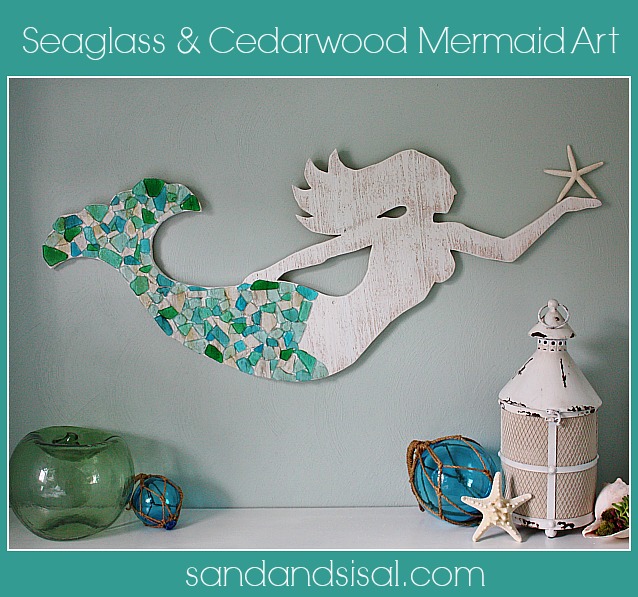
Now it’s time for the beautiful sea glass. I adore sea glass! I love the color, the soft, dusty texture and the way the light hits it! Our beaches here in Virginia Beach/ Norfolk are groomed each and every morning by big machines that comb the sand. This grooming makes more beautiful clean beaches, which tourists love, but it also removes all the gorgeous gems of the sea! I think I might have to look into some dumpster diving from these beach combing vehicles! Have you seen how much drift wood is going for online?!! Crazy!

I do have a little collection of sea glass found while beachcombing, but for this purpose where you need a lot, you can purchase bags of sea glass at Pier One or you can find Sea Glass on Amazon. Each bag has slightly different colors.

The supplies you will need to make a sea glass tray are:
- wood tray
- spray paint
- 1-2 bags of sea glass
- ready-to-use tile adhesive
- premixed grout
- a toothed trowel
- pallet knife
- a rubber tile float
- sponge

With a toothed trowel, apply a thin coat of adhesive to a small part of the tray base and comb the teeth through the adhesive.

If your trowel is large (like mine.. not to mention rusty), try using a pallet knife to spread the adhesive and work into the corners and edges, then comb it with the trowel.

Work in small sections. It is imperative that you apply the adhesive in a thin layer. You don’t want the adhesive so thick that it oozes over the tile. Start pressing in pieces of sea glass into the adhesive. The tile should sit half way in the adhesive. Follow the adhesive manufacturer’s directions for the amount of time for set-up. If you find you have too much adhesive in areas, then remove it with a toothpick.
")
Time to add the grout. Put some grout on your rubber float and start pressing and smearing it into the sea glass.


Be sure to get the grout into all the edges.

Once your entire tray is covered in grout, take the edge of your rubber float and scrape off any excess grout.

This is the time that you want to clean off all the messy edges where you got grout on the sides of the tray. Use a wet sponge to clean up your edges. I also suggest taking a clean, damp sponge and gently removing the thicker layer of grout from the top of the sea glass. Once it looks “mostly clean”, allow it to dry. There will be a dusty glaze to the glass. This is when you take a clean damp sponge and buff off all that dusty glaze and make that sea glass shine!

You are left with a beautiful Sea Glass Tray to serve your guests!


LOVE IT? DON’T FORGET TO PIN IT!
Kim
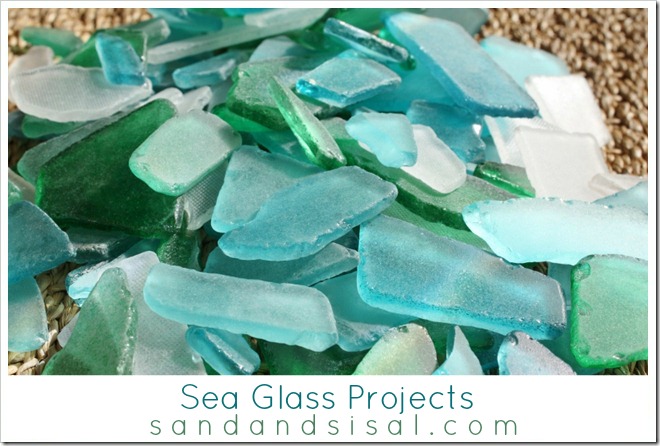
You might also like these Sea Glass Projects & Posts:
Linking up to:
 |
 |
 |
 |
Kim such a gorgeous transformation, makes me wish we lived in a warmer climate! Love Betty Draper, if only I could pull off those dresses the way she does, can’t wait for the next season to start someday.
I love those dresses too! Thanks so much!
Oh Kim, this is gorgeous!
Thanks Gina!
LOL.. Mad Men obsessed here! Ah Betz ! Can’t wait for season 5 to start. BTW I have the same tray that looks the very SAME way, but with Grapes in it. Circ 1970’s ? lol It is filled with seashells and driftwood at the moment because I haven’t painted it yet. Sadly, I don’t own a tray either ! double gasp! I love the sea glass Idea ! PRETTY..
Haha! I had mine filled with seas shells too (anything to hide the painting)! Thank you!
I’m supposed to be packing! {busted}
But these are my colors so I was sucked in 😉 LOL
I think I will suffer withdrawal without my computer on vaca.
Sharing on my fb page. Great project AND tutorial =)
Thank you & Thanks for the FB share!
Oh so pretty and my favourite colours too.
Thank you!
Kim, this is positively gorgeous!! I have all of this on hand including the adhesive/grout left over from a recent tiling job! Thank you for the inspiration!
Thanks Michelle, I had everything left over from when I tiled the bathroom. A little goes a long way!
Kim, it’s beautiful! Makes the lemonade look pretty too!
Debbie
Thanks Debbie!
Your tray is beautiful! I love the colors of the sea glass, thanks for the tutorial
Thank you!!
I just took a couple of trays to the thrift shop – should have kept them for this. Love the color (and those drinks looks delish)! Hurry up summer!
Kelly
Thanks!
looove this project idea. The colors and the glass goes perfectly with my decor. I have tons of beach glass so this is a perfect idea for me. Make sure you add to pinterest so I can pin it!!!
Thanks Rasonda! I added the pin to my Sand & Sisal Crafts board. Do you not have the “Pin it” button on your favorites menu bar? I highly recommend installing it (super easy to do). Then you can pin anything you see almost anywhere. 🙂
That’s a nifty and attractive little tray! Looks like it’s ready for the beach! I never gave much thought to sea glass. I don’t think I realized that you can actually find it on a beach! How interesting!
Thanks Leslie! Beach glass is formed by broken glass being washed and smoothed by the sand and waves over years of being in the ocean. It’s a favorite collectible of my kiddos.
How beautiful! Have seaglass…have tray…can’t wait to try it! Saw you at TT&J.
Well I’m so glad you popped on over from Jen’s party to say hi! Thanks!
I couldn’t just pin and run without saying that this tray is beautiful! I need to make one for our coffee table, I think. Thanks for sharing.
Thank you and double thanks for PINNING!! A pin is like a comment and a big hug wrapped into one!
What a great idea!! I have TONS of sea glass sitting in an apothecary jar and this never occurred to me. Can’t wait to give it a try. Thanks for the inspiration!
Thank you!
Beautiful…but I am glad you showed the bag from Pier 1, bc I know I could never part with my sea glass findings!!!
Have a fabulous weekend…
Smiles~
Cricket
haha! I totally understand. Thanks!
Beautiful…but I am glad you showed the bag from Pier 1, bc I know I could never part with my sea glass findings!!!
Have a fabulous weekend…
Smiles~
Cricket
This is gorgeous! Such a great idea!
Thank you so much!
Very nice! Recently saw bottle caps done in a similar way (only painted in varying colors) while using a resin instead of grout. This is SOOOO much prettier — doesn’t matter if you live close to the shore or not — this could be a ‘summer tray’ for those who live inland. Love it — great job!
Thank you!
Oh, WOW! This is just gorgeous!! I love all things beachy, and the colors plus the seaglass itself are just so pretty! I recently tried my first mosaic and it actually turned out okay, so I think maybe, just maybe, I could pull this off! Thanks for the great idea! I’d be thrilled if you’d share here:
http://oneartmama.blogspot.com/2012/02/shine-on-fridays-14-and-some-fabulous.html
Thank you so much Amy!
What a fabulous idea!! I love it!! Thank you for sharing your wonderful DIY projects!!
~Lacey
Thank you!
That is absolutely beautiful. I might just have a tray hanging around that I can try this with. Thanks for the idea.
Thank you!!!
Oh, Kim! That is lovely and I will be trying my hand on this soon.
Thank you Jen!
Kim,
I have always wanted to try mosaics, Thanks so much for showing us how!! Living in Florida I have shells, sea glass on top of Shells and sea glass! I can’t wait to try and make a tray!!
Huggs, Nancy
Oooo! You’re stocked and ready then for sure! Thanks Nancy!
I am in LOVE with this!!! It may even call for me to come down this summer and share some fresh lemonade with you after a day of thrifting! 🙂
Pamela
PBJstories.com
Come on over girlfriend! You’re only 15 minutes away!! Thank you!
I love it!
Thanks!
What a gorgeous makeover! I love anything white and I love sea glass…so this is perfection!!
Jo-Anna
Thank you!
I love everything about this! It’s my colors and I LOVE seaglass, so so pretty!
Thank you so very much!
WOW!!!! Soooo LOVE this transformation of blah to ABSOLUTELY STUNNING!!! You seize to amaze me with your talent in taking Thrit Store finds & making Glamour Store goods 🙂 Amazing!!
What a sweet comment! Thank you so much!
This is beautiful! I adore the colors! Would love it if you came by and linked up to my Manic Monday Linky Party!
-Melissa
http://serendipityandspice.blogspot.com
Love this project- so pretty and perfect for summer fun. You have been featured in today’s Saturday Spotlight Talent Show. XO, jen-
oh. this is gorgeous! I’d love to try this out!
amanda
softandstiffpeaks.blogspot.com
This is beautiful!! And we love Mad Men!
This is beautiful! I have been looking for some sea glass projects. I would have chosen the same colors of glass; it’s the colors I decorate our home in during the summer months with lots of sea shells and beach inspired things. I recently told my husband I want to buy a mirror; preferably a round one, and add sea glass to the frame. I guess I need to find some mommy time to go look through some thrift shops! I pinned this tut so I can use it for reference later. I love your blog; very inspiring!
What a terrific tutorial on how to make a sea glass tray. Sharing this with other sea glass lovers. Thank you ! Going to give this a try myself.
I have always wanted to try mosaics so will need to try this out as I have lots of sea glass collected in Musselburgh in Scotland. My daughter sent me your link as I am always wondering what to do with my sea glass as it is so beautiful.
This looks beautiful !! I have a question though. I collect colbalt blue glassware and have broken a few pieces over the years. I saved the pieces, thinking someday I would find a use for them. Do you think this method would work with this kind of glass?
I’m sure it would work! I’d just pay close attention to make sure your grout was flush with the glass so no sharp edges are raised. Thanks!
Hi!
Your ebautiful DIY is on my blog!
http://fioridiflowerland.blogspot.com/2012/03/un-po-di-colore-per-la-tua-casa-touch.html
Thak you so much!
Sara
Hello!
I LOVE this beautiful tray and have added it to my Friday Finds at The Northend Loft.
Thank you for sharing your creative talents and inspiration.
Laurie
http://www.thenorthendloft.com
When you use glasses or glass jars on this tray, does the glass on glass make a disconcerting noise, like glass that’s about to chip or crack? I recently bought these gorgeous glass mosaic coasters on sale from Hobby Lobby and when I put a glass on one, it freaks me out a bit. I’m new to crafting and DIY, so idk how to tell, but I’m wondering maybe they weren’t grouted? Or even if they were, would another layer help? Any input you have would be appreciated!
I guess you would definitely have to use manufactured sea glass for this project as the glass I find on the beach is not as flat as this. I will have to go buy some though as I can surely appreciate this project.
How many bags of sea glass from Pier One did you use? I bought 1 but I’m thinking I should swing by and get another. My tray is about the same size as yours.
I used 1 and a half bags. Thanks!
Thanks! I used about the same amount of glass. I finished it tonight to give to my boyfriend’s mom for Mother’s Day tomorrow. She loves blue glass and lives near the beach. I’m so excited to give it to her. Thanks again!
I am so happy you were able to make it! I hope your boyfriend’s mom loves it! How could she not with such a sweet person like you in her son’s life! 🙂
That is SO beautiful. I just wish I was crafty! Mine would look like a 3 year old made it. I have JARS of sea glass…..LOVE it!
Kim,
This is gorgeous! If I can make it out of the house today I will be heading to pick up all the supplies mentioned and starting this project tonight. I have a boring tray I bought from Ikea for super cheap that I had intentions of doing something cool with and I haven’t had any cool thoughts yet. Thanks!
This is exactly the type of project that gets my creative juices flowing. Thanx for sharing! 🙂 Hx
I am wondering if I can then coat it with some thicker sealant or such. I am going to use the sea glass we collected in Puerto Rico as kids and the pieces are not the same thickness at all.
My thought is after setting it like you did, the thick clear coat would give me a flat usable surface. Any thoughts?
There are clear coat epoxy that you can mix and layer on, but I’ve never used one yet. They involve mixing in a catalyst, pouring it on, smoothing it very quickly before it sets up. I’d like to try it someday though.
Hi Kim. Sending very happy birthday wishes for yesterday! Not sure how I missed it, but better late than never! 😉 I saved this tutorial for a time when I managed to find a suitable tray, which I did yesterday at a Thrift shop in Brisbane. Reading over your instructions, I find I need some guidance on when to apply the grout. Once the glass is in the adhesive, must you allow time for the adhesive to dry and set before applying the grout? Sounds loopy, I know, but I’m just a whole lot slower on take-off!! 🙂 Cheers, heather x
Thank you! Yes, wait until it’s dry (it dries pretty fast), then apply the grout.
I came across this site when I was searching for a how-to website for making a mosaic out of sea glass. Super helpful! One question though… I’d like to make a mosaic that light can shine through, so I’m thinking of having my base be an old window. Is there an adhesive I should use so that the light can still shine through the pieces of sea glass?
Thanks!
Becca
Great idea Becca! I’m thinking you’d have to use some type of apoxy, but I’m not that familiar with how to use them or which to recommend even. I’m sorry I can’t help you out more.
Bellísimo trabajo!!!!!! Felicitaciones!!!!!!!
pinned 🙂
Hello!
I just abosolutely love your idea and I am trying it myself! I am planning on using it to serve some guests tomorrow, though the problem is that I just started making it today. So I have one question… How long did you wait to put the grout on the sea glass? I’m afraid that I am going to put it on too early and ruin it. How long did it take you to make it?
Thankyou 🙂
How pretty! Pinning it now 🙂
I love this idea!! I want to use it to decorate a head board to go with the surfer girl room you did!!
Love this Kim, so pretty! I shared it on FB 🙂 it was a hit! https://www.facebook.com/CraftsbyAmanda/photos/a.353593675216.349539.323548680216/10154341162565217/?type=1
Hi Kim – Love this idea and am going to give it a try! I just wanted to ask before I order…How many bags of the Pier 1 Seaglass do you think I would need for this project? Thanks!
Hi Allison! It really depends on how large your tray is. I used 1 and 1/2 bags of sea glass for my tray. Have fun!
Hello there!
Your beautiful tray was just featured in the July 25th, 2014 issue of All You. My mom and I love this and we each want to make one. We got the sea glass at Pier One today. : )Question, what size tray did you use?
Hi Jeni! Thank you so much for following Sand & SIsal! I’m actually away on vacation now, but as soon as I get home I’ll double check the measurements, but I’m thinking the tray was something like 13×17″ (it’s an odd measurement).
Thanks!
KIM
I just made this tray for my mom’s birthday. It is gorgeous! What a great way to use sea glass as my mom had wanted some sea glass but wasn’t sure how to use it. This is perfect!