Painted cabinets are rich and beautifully custom looking, but have you ever considered painting them yourself? The idea scared me to death. I didn’t want to screw them up and if I did, I knew I’d never hear the end of it from the spouse! And I certainly was not interested in the whole stripping, sanding, priming, painting process. My mind was set on dark painted cabinets though. So what could I do?
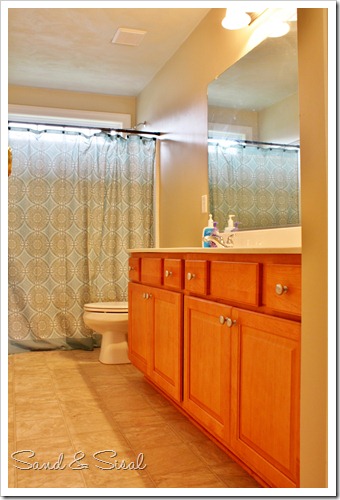
All the cabinetry in our home is exactly the same, much like many modern day, cookie-cutter homes. The cabinetry is maple which is very strong and dense. But ours has an odd orangey hue to it that has always annoyed me. I looked into staining maple but discovered that because of it’s density, it will not accept stain. I’m glad I found that out, but I did not want to live with all this orangey-ness any longer. We’ve been remodeling our daughters’ bathroom and I knew darker cabinets would really make the whole look come together. (Click HERE to read about their bead board bathroom.)
One day in Home Depot I came across this new product by Rust-oleum and it intrigued me. Rust-oleum Cabinet Transformation Kit claimed that no sanding or priming is needed. This sounded too good to be true! After going back and forth to Home Depot, indecisively staring at the box… four times…the paint dept. people think I’m a stalker…. I finally decided to go for it. I mean, come on! This was a big decision!
Rust-oleum Transformations has over 70 colors to choose from; another reason why I was so indecisive.
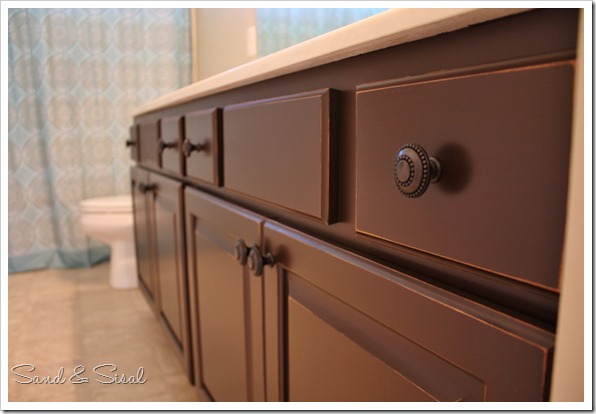
I chose Espresso!
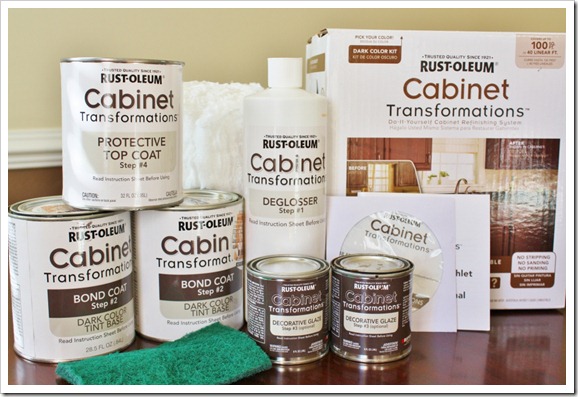
The kit comes with a ton of paint and everything you need to do this project except for a few items. There’s even a DVD to give you step by step guidance.
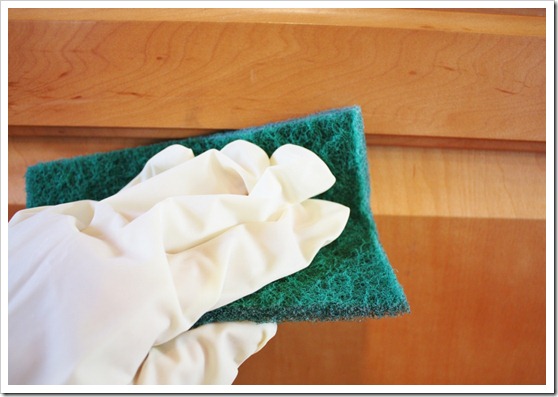
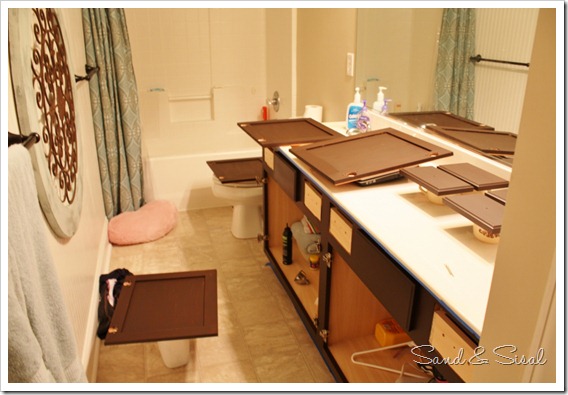
First things first, you must remove all the doors, drawer fronts, and hardware from the cabinet base. Keep the hardware and screws in plastic baggies. Next with gloves on, start using the De-glosser on the rough scrubbing pad provided and thoroughly scrub the cabinets and wipe clean with damp cloth. Follow the wood grain while scrubbing.
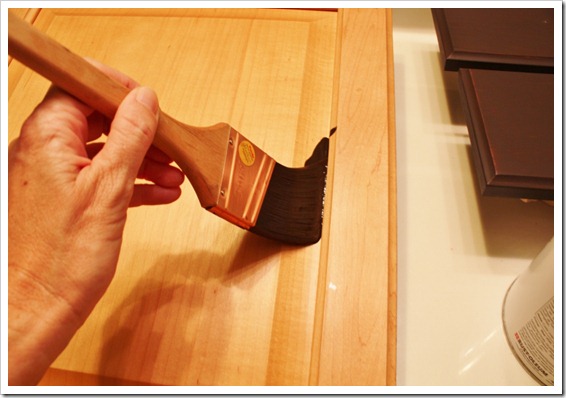
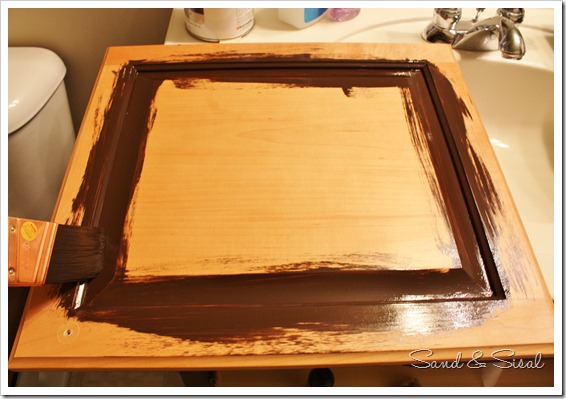
After cabinets are clean and dry, start painting on your base bond coat. Start in the deepest corners and work in long smooth strokes. A 2 inch beveled edge, synthetic brush is recommended. Buy the best brush you can afford. I used my Purdy 2 inch beveled brush. A really good, quality brush is important for the success of this project and it is not recommended to use a foam roller for painting the cabinets with this product.
Always follow the direction of the wood grain when painting. Do not over stroke an area, especially if it has already started to dry.
Rust-oleum recommends starting on the backs of all the door and drawer fronts first. This will help get your stroking technique down. Allow the base coat to dry the recommended time and then apply a second layer of base coat. This paint has a very nice “leveling” quality which means how smooth a paint is after drying. It’s one of the best I’ve seen in a long time.
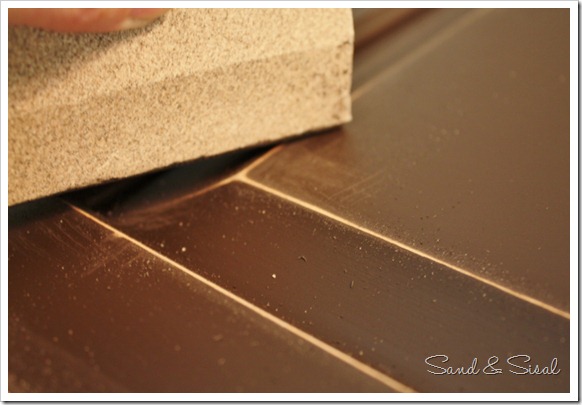
Now this part is totally optional. I like the look of distressed cabinets. But I wanted just a little bit of distressing, nothing dramatic. After the two base coats are dry take a 100 grit sand paper and very lightly brush it along all the raised edges. You want the detail of the cabinets to show up. 100 grit paper is very rough, so apply a light touch. It’s all I had on hand, I’m sure a higher grit paper would be a better choice, but I’m too impatient and just used it.
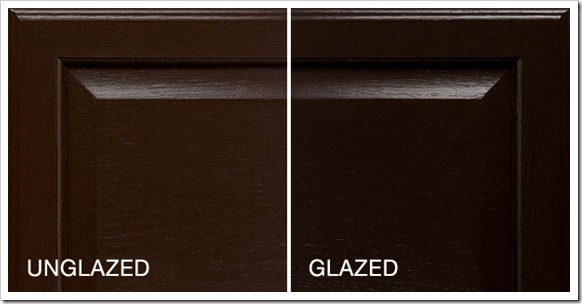
Wipe the cabinet clean. With a clean brush, paint on the decorative glaze, working it into all the cracks, crevices, and entire cabinet, then wipe off in long smooth strokes with scrunched up cheese cloth provided in the kit. The decorative glaze is very workable and forgiving, for 5 minutes or a bit longer. Play with it until you get the look you desire. Add more glaze to darken or add just a little. It’s up to you! The glaze will be very subtle on dark colors.
Allow the glaze to dry overnight, then apply the final protective coat, which I’m assuming is a poly-crylic. I’ll be honest, I HATED THIS PART!! This sealer is not forgiving at all, unlike an oil based polyurethane. I’m a fine artist and have rather good paintbrush skills, but I’m telling you, this part is hard. Turn off the TV, don’t answer the phone, make sure the kids are at school or the baby is napping because you’ll need full concentration and you have to work precisely and fast! You must not pause until one entire cabinet face is coated.
Use a clean brush for this! Apply the protective top coat sealer the same way you apply the base coat, starting in the corners, stroking in the direction of the wood grain, with long SMOOTH STROKES. If you see bubbles at all you will need to super lightly stroke over the bubbles until they disappear. Follow all directions in the manual concerning this important part.
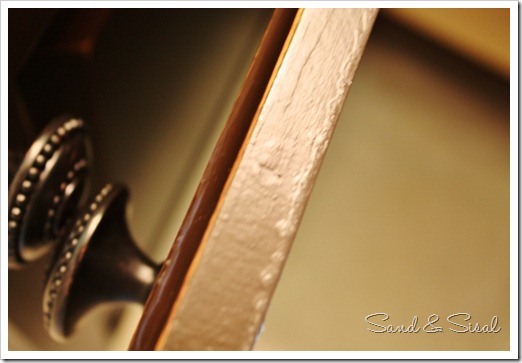
Below is a picture of what will happen if you get too much sealer on your cabinets. It looks like Elmer’s Glue when painting it on and if it is applied too heavily it will look like this, bubbled and bumpy.
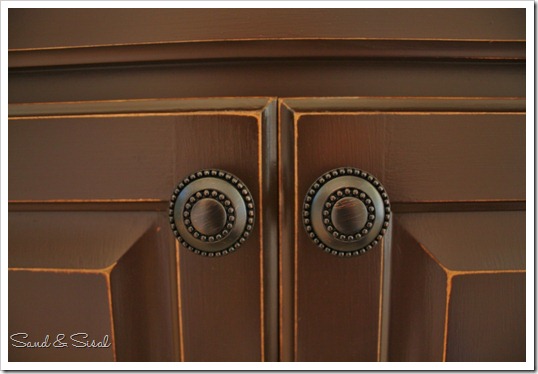
The sheen is satin and does protect the cabinets well. After just 2 hours of the poly drying, your cabinets are ready to be reinstalled! I found these oil rubbed bronze knobs at Target. I was really impressed with them. The are quite heavy and feel comfortable to the touch. Not to mention they look FAB!
I’m so excited how the cabinets turned out. Yes, it was labor intensive but not as intensive if I didn’t have this Rust-oleum kit to use! I definitely recommend giving this product a try, but be warned, it’s a bit pricey.
Tell me what you think! Do you have painted cabinets? Tell me about your paint stories!
Kim
Join the conversation on Facebook!
linking up to these parties:
 |
 |
 |
 |
This looks incredible! What a transformation!
Love the new cabinets! Perfect color!
Your cabinets look awesome…you did a wonderful job!
XO,
Jane
LOVE the transformation! Great job! Hummm… now that you see how easy it is I wonder what’s going to be next! Martina
Just saw this product in a magazine and was wondering how it would work. So glad you shared your experience with it! Now I just might be brave enough to give it a go………maybe!
That would be me too, standing there in the paint aisle just staring at all the choices! I swear, the older I get, the harder it is for me to make a decision!
It looks great, like some of the custom cabinetry you see. Our kid’s bathroom has pickled oak, kind of looks pinkish and I would love to make a change like this. I’ll have to check out the hardware stores here in Ontario, Canada to see if they carry it.
They totally look like brand new cabinets! I am just amazed at how you took a standard basic bathroom & transformed it into an amazing beautiful room, both in your daughters & sons!! It’s like watching an episode of Design on a Dime, but better 🙂
They look gorgeous sis!
They turned out beautifully!
It turned out great! I’m getting ready to paint my kitchen cabinets…I’ll have to check this product out before I start. Thanks for sharing!
This comment has been removed by the author.
Those turned out great… visiting from Tea Rose Home.
Rhonda @ home.made.
What a great job you’ve done…you are a wonderful tutorial-ist (new word, I think). I’m planning on painting at least some of my kitchen cabinet…I’m not a fan of the builder cabinets that you had to deal with, but I despise our 70s kitchen…the knob are RIGHT IN THE MIDDLE OF THE DOOR….uhhh, what? and we have red countertops. Red. And the shades of red do not match. My husband says it reminds him of the Brady Bunch kitchen. Oh, and it also has carpet…carpet in the kitchen. Fantastic idea! Anyway, sorry for my rant…thanks for the great cabinet tutorial! I’m following now and will be back for more! Thanks.
great work! they look fabulous.
These look wonderful and your tutorial makes me think I might just be able to pull it off. Thanks!
These turned out really beautiful!
They look great. Thanks for sharing this. I’ve wandered past those kits a time or two at HD and Lowes…now I know they work!
I, too, have used the Rustoleum Transformations on three bathroom cabinets. It totally changed the look of the rooms! I have had the most difficulty with the protective coating, and had many spots where it dried with bubbles. I am going to sand ever-so-lightly and see if I can repair it . . . But other than that, LOVE IT!
Could you use something other than the protective coating that comes with the kit?
Sure! If you prefer a furniture wax that would work fine also. I just recommend using something to protect all your hard work.
Could you also use a satin finish oil based poly? You mentioned that they were more forgiving…just trying to think outside the box.
Absolutely! I don’t recommend using oil based poly on light colors though… It tends to yellow over time.
Hi, I have laminate cabinets. Can this product be used on laminate?
Loved all your projects, btw. Found you through Pinterest and bookmarked you on the spot. so many great ideas here!
~Laura
Thank you Laura! In fact, I just met with the Rustoleum peeps this past weekend at a conference and overheard them explaining how YES in can be used on all wood, laminate, and melamine surfaces. 😉 You can do more research on it by clicking the link provided in the post.
Excellent review and job done! The look great! I am wondering, how do the cabinets clean up now? I am thinking of doing my kitchen and it seems that my husband and children can NOT touch the cabinets with clean hands! So I need something that is greatly wipe-able! 🙂 What are you thoughts?
This has held up wonderfully, no chipping or scratches. They actually recommend it as an ideal product for kitchen cabinets. Because of the poly top coat, it can take a good deal of scrubbing. 😉
Your cabinets look fantastic! I used the Rustoleum kit long before I found this post & loved it. Wish I had thought to distress my cabinets & use a better paint brush, but overall I’m very pleased. Thank you for the post.
I’ve got a 5 piece bedroom set that I would like to refinish… but I’m on a budget. This would probably not be the way for me to go, eh?
Possibly. It really goes a long way. I only used a fraction of the paint.
Your cabinets look really good. It’s been a couple of years now, do they still look that good? Do you have any regrets so far? For a year+ now, I’ve been researching painting my cabinets and this seems doable.
Hi Olive,
Yep, NO regrets…. they still look amazing. I wish I had done my kitchen island with this product because it has serious staying power. You will NOT be disappointed. 🙂
They look great. I have the exact same cabinets in my bathrooms and kitchen. I painted my bathroom cabinets about six months ago. I used Baer tinted wood paint with a coat of minwax poly. I did 2 coats of paint and one poly. I washed my cabinets but didn’t sand them. I had those ugly brass knobs, I spray painted them with rustoleum oil rubbed bronze paint. I still need to take of the hinges and paint them but I’m happy with how they turned out and it cost me about $25. I’ve been debating on rustoleum kit for the kitchen cabinets. Glad to know it holds up well.
I’m so glad to have come across this! I have the same “orangey” maple cabinets. No matter what color scheme I try to go with, the room never seems to come together because of the irritating orangey color! I can’t wait to try this the next time my husband takes a trip! lol
I just used it and chose the same finish, I agree regarding the top coat. It was SO hard to work with. It kept getting cloudy because I would go over where there was excess. The rest was so easy and that part was so hard! I actually stopped after one cabinet to watch the video to see if I was doing anything wrong.