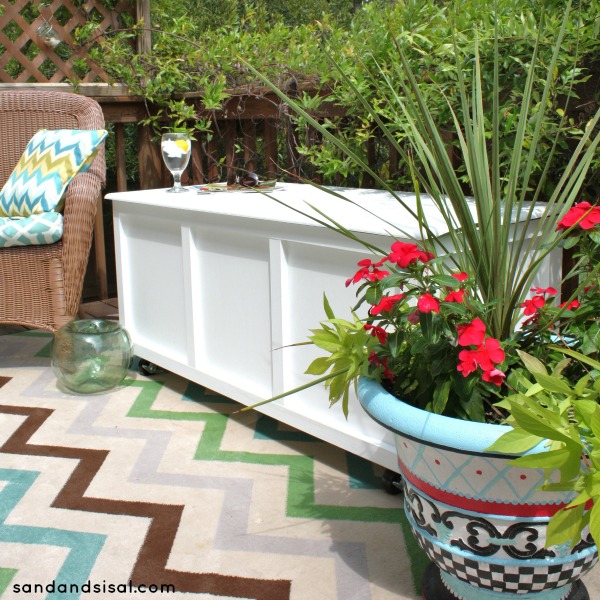
Our family loves spending time together in our backyard. This spring has been one of the rainiest springs on record for our area and because of the rain, we are very behind on getting the yard and patio in shape. Sadly we also know that all this rain means mosquitos will be in full force this summer! There are few things I despise more in this world than pesky mosquitos. I am also very concerned about the rise in Zika virus cases and other viruses carried by mosquitos. So when Nutone contacted me and asked if I’d like to try out their new Haven™ Backyard Lighting & Mosquito Repellent System and I jumped at the opportunity!
We have always wanted to install backyard lighting, but to have backyard lighting that repels mosquitos sounded fabulous! This was also the motivation we needed to get the yard spruced up for summer. Ok, don’t look to closely, it’s embarrassing…. but here is the before picture.
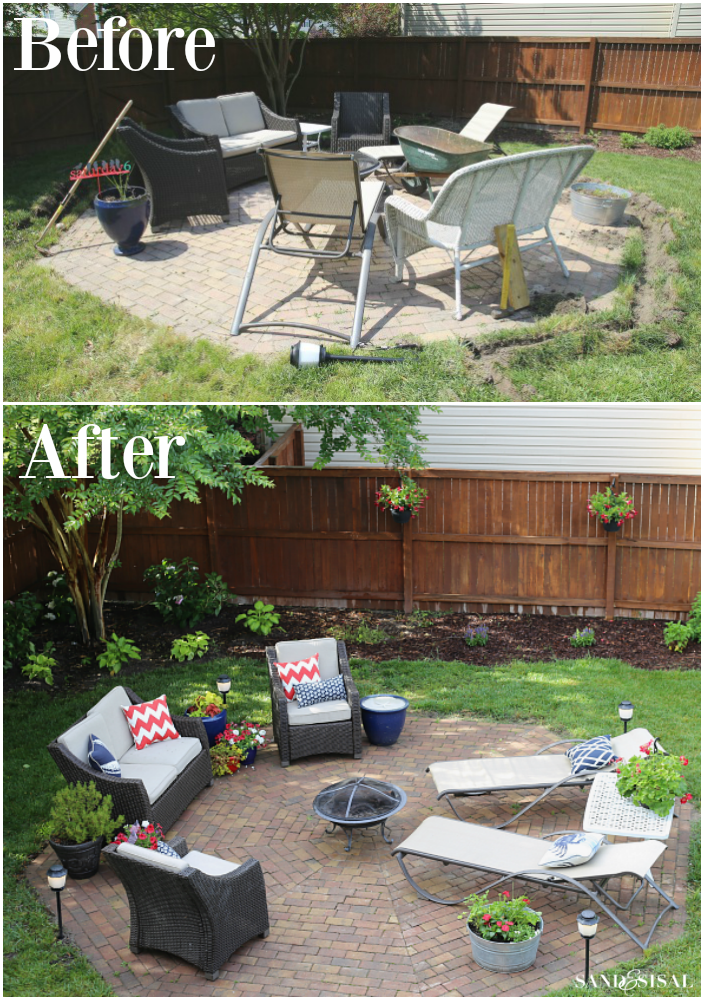
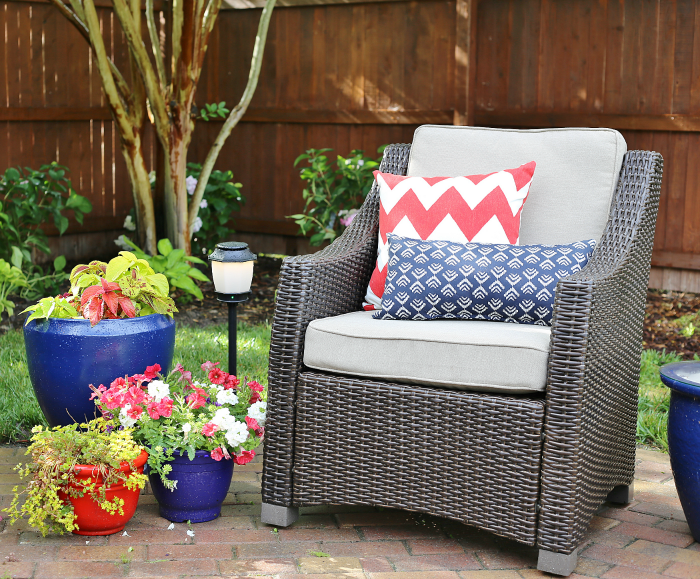
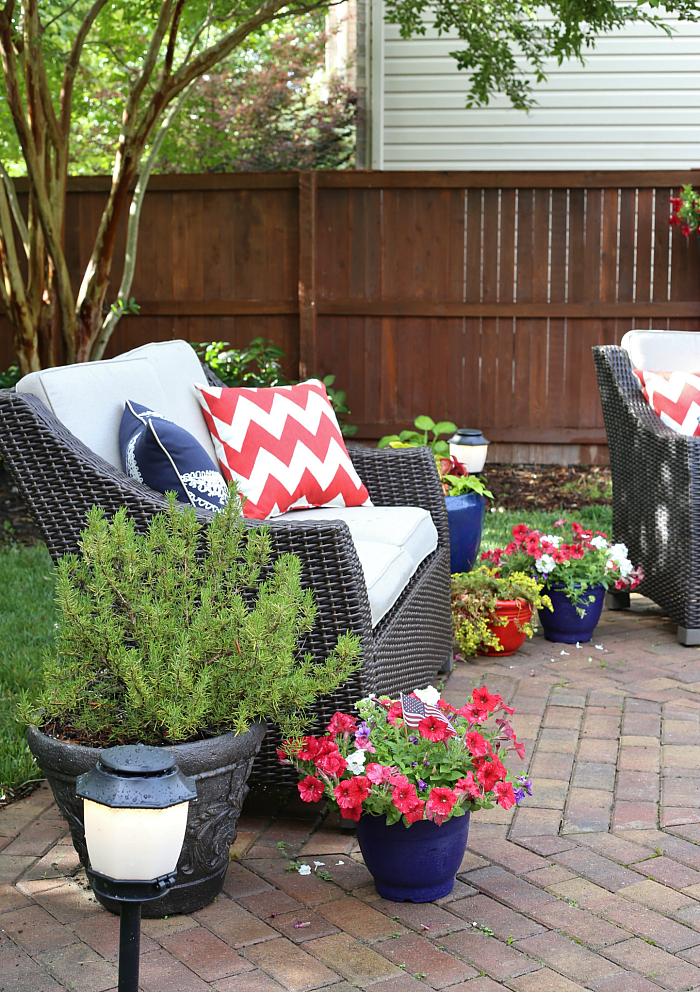
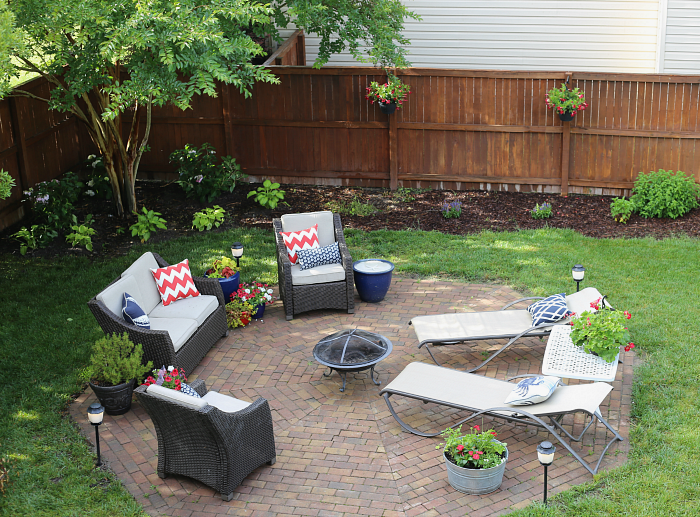
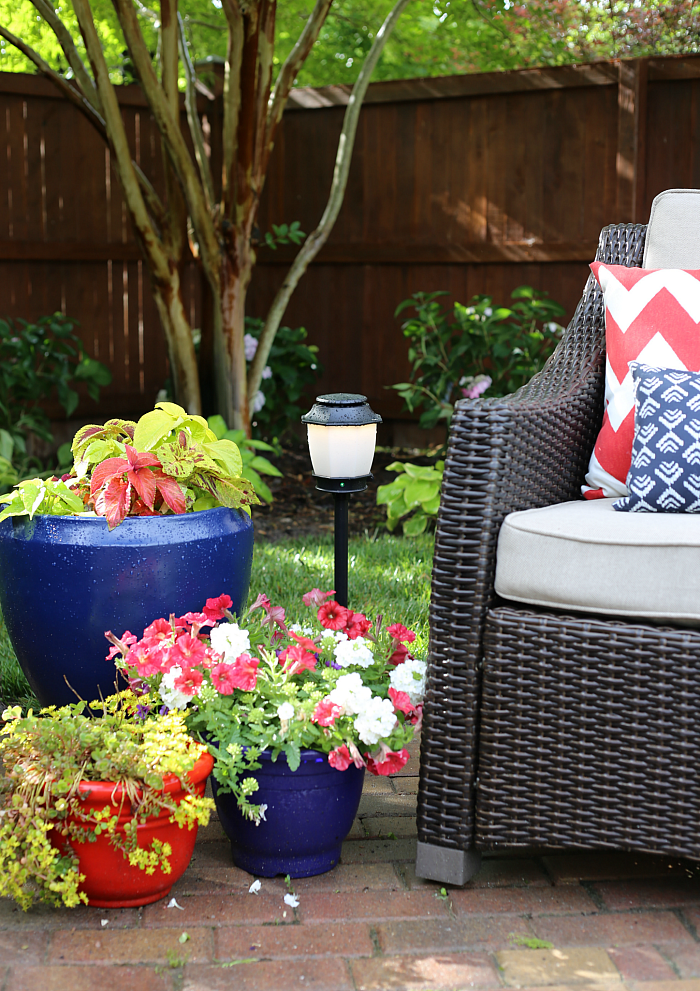
Isn’t the after picture a thousand times prettier? We still have a lot of work to do in the yard but we are off to a good start! I’m going to walk you through a bit on how we installed the Haven™ Backyard Lighting & Mosquito Repellent System. Installing the system does require some electrical knowledge but your system will come with full instructions. If you are not comfortable your skill level then I recommend hiring an electrician.
You will need to purchase outdoor low voltage cable. Our required approximately 200 feet of cable. You will also need to purchase a landscape power supply (transformer). Nutone has an optional control panel which allows you to schedule the lighting and repellent.
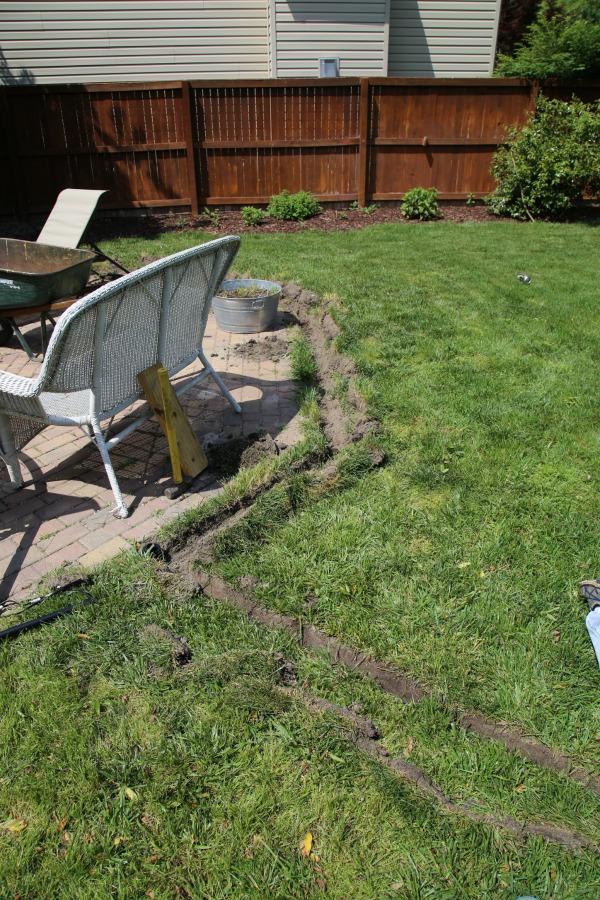
After we gathered our supplies we dug a shallow trench leading from our deck to the patio and around the perimeter of the patio. Two continuous cables were laid in the trench. One is for electricity and the other for the repellent. Use colored tape to mark the cable you designate for the repellent/vaporizer. We marked the cable every few feet with blue tape.
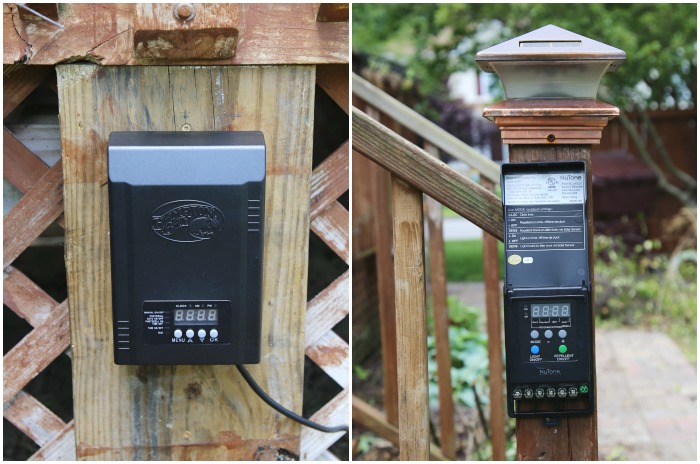
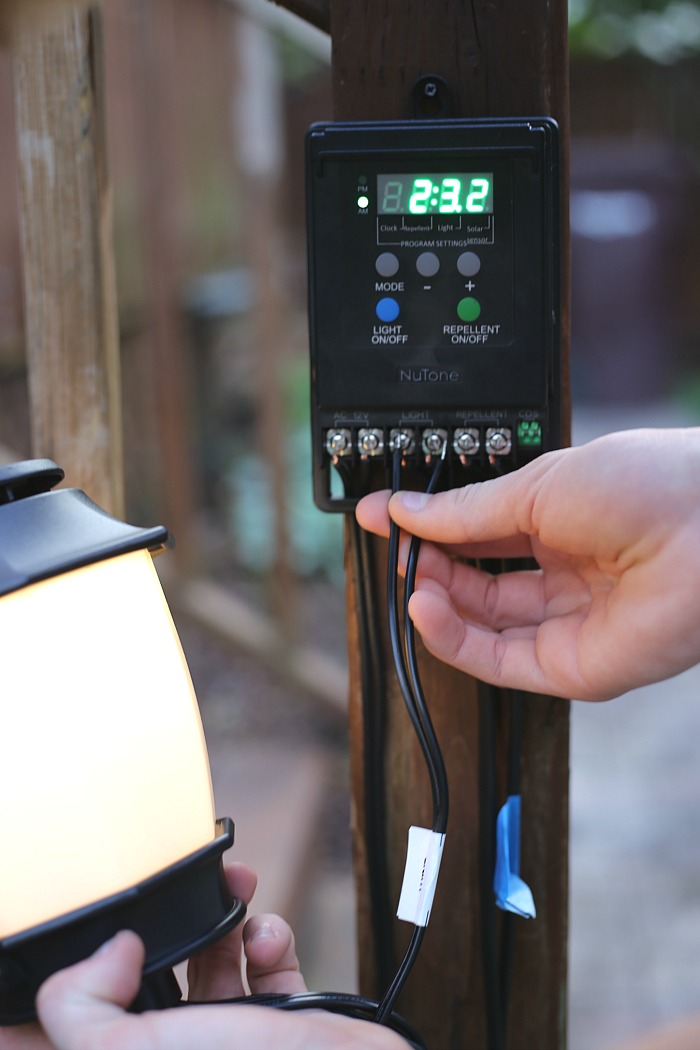
The transformer and control panel was attached to the sides of the deck for easy access. The transformer plugged into an outlet on the deck and we connected cables from the transformer to the control panel.
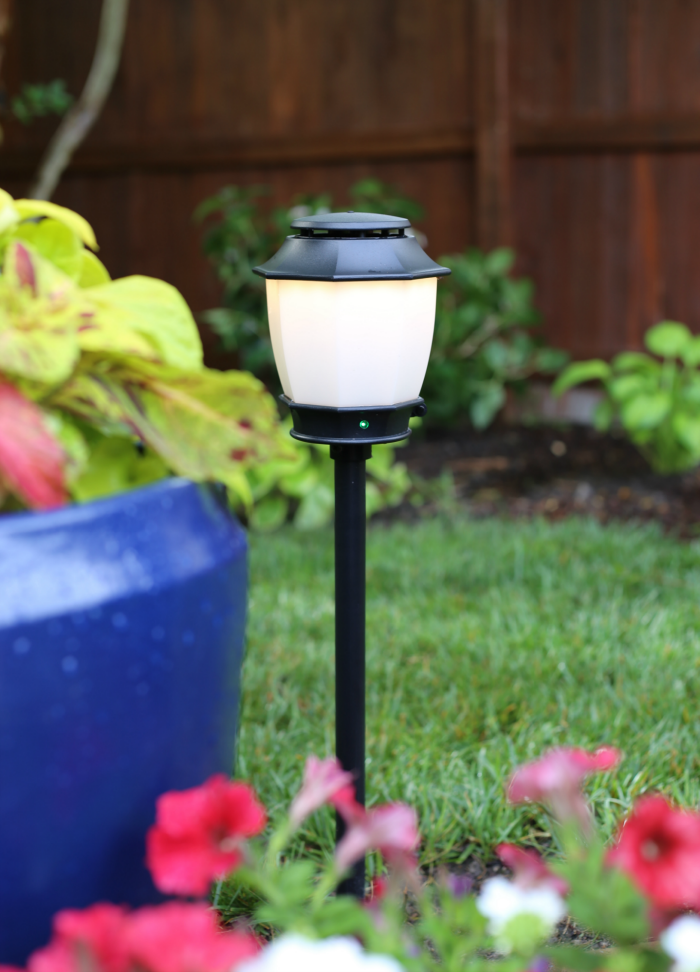
Assembly of the LED fixtures was quite simple. Each fixture has one wire clearly labled “electricity” and one wire labled “vaporizer” which is for the repellent.
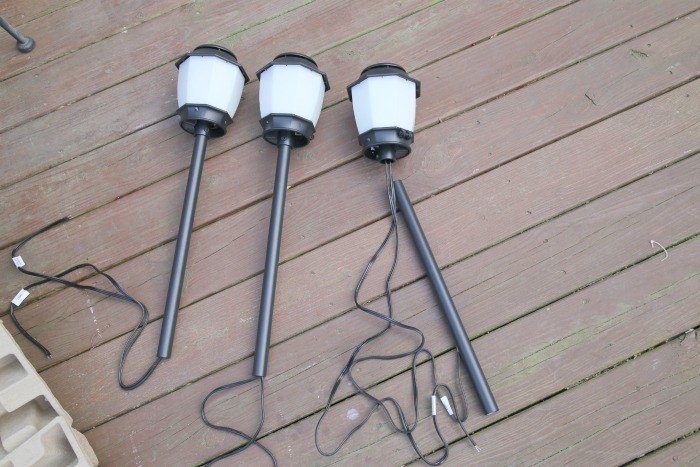
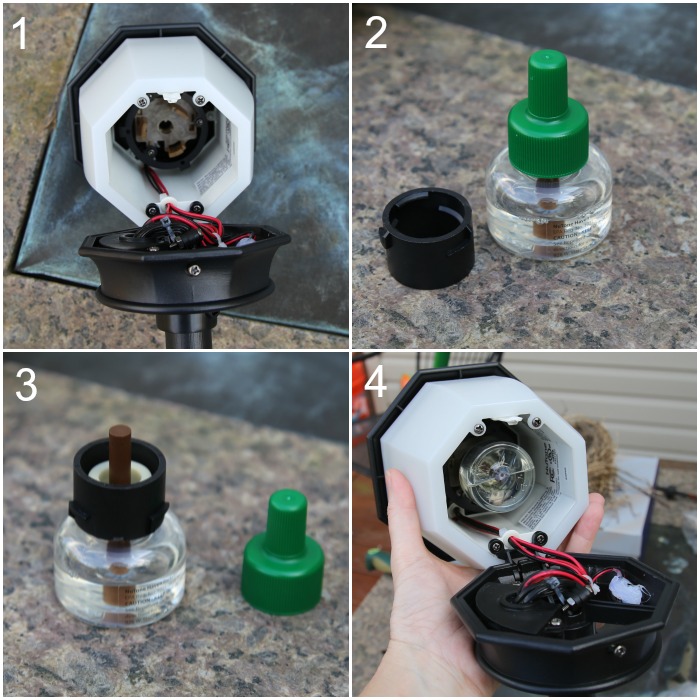
The next step was to insert the repellent inside the fixtures. Simply unscrew the lantern top (step 1), remove the green cap from the repellent (step 2), twist on the black locking adaptor tightly (step 3) and then insert the repellent into the lantern and gently twist 1/4 turn to lock into place (step 4). Close lantern lid and secure screw.
Before connecting your lanterns to any cables, be sure to test each fixture by pressing the electrial copper wires to the controller. The LED light should illuminate. Next test the repellent vaporizer. Touch the wires labeled “vaporizer” to the controller. A green light should illuminate on your lantern. This means your fixture is in good working order and you can connect it to the ground cables.
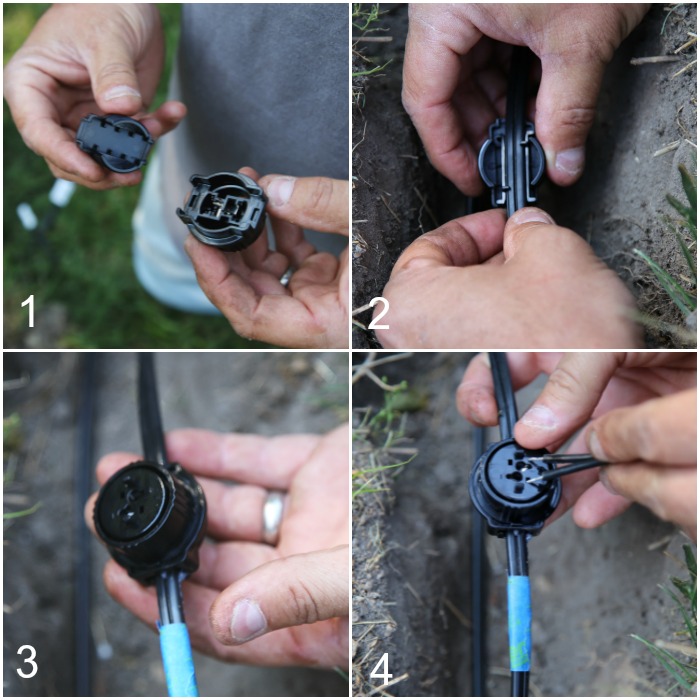
The Haven™ system comes with it’s own connectors. Choose where you want to place your fixtures. The connectors should be installed at the base of where you place the fixtures.
All you need to do is unscrew the round connector (Pic 1). Snap the bottom piece of the connector under the electrical ground cable (Pic 2) and then place the top piece of the connector back on and screw together tightly (Pic 3). Repeat for the other cable which you previously labeled “Repellent” or “Vaporizer” with the colored tape. Connect the fixture wires to the connectors by simply pressing small buttons on each connector and inserting the wire ends into the connector. Apply dielectric grease to the connections.
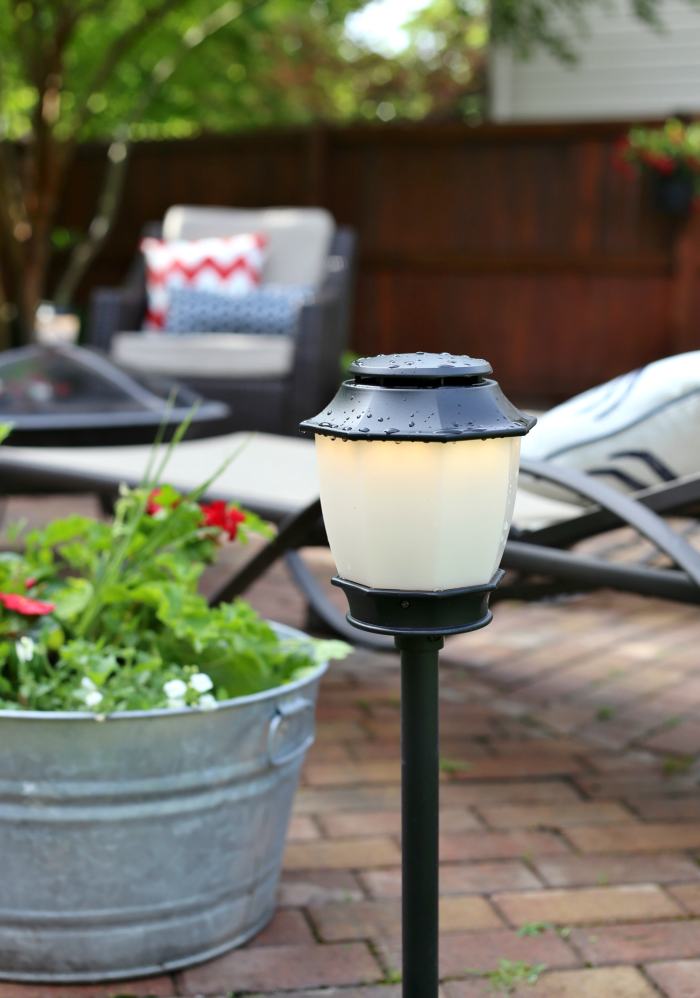
Bury the wires and enjoy your new lighting system with mosquito repellent!
Benefits of the Haven™ Backyard Lighting & Mosquito Repellent System:
- The Haven™ fixture combines attractive, efficient LED lighting with mosquito repellency, to enhance your patio, deck or yard.
- Each fixture repels biting mosquitos for 110 square feet. Four fixtures protect an average patio or deck (400 sq ft).
- It provides protection within 15 minutes of use.
- Odorless, silent, invisible during use.
- Child-resistant fixture opens with screwdriver for easy repellent cartridge replacement.
- Each 24 ml Haven Repellent Cartridge provides 90 days of protection when used 2.5 hrs/day.
- Mount on a deck post, railing, or a stake in the ground.
- Can be added to an existing low voltage lighting system.
- Won’t harm plants, flowers, shrubs or lawns.
Learn more about turning your yard into a haven by clicking play on the video below.
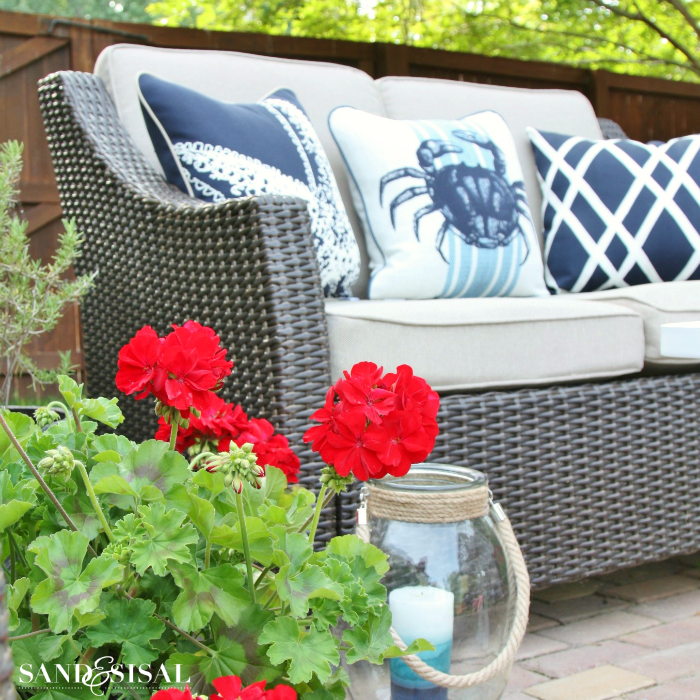
We are happy with how our new lights look! They illuminate our patio at night beautifully. Most of all I am excited to enjoy a mosquito free patio this summer! Thanks for stopping by my friends.
Where to purchase Nutone Haven System near you click here.
Check out how these bloggers also turned their backyard’s into a haven:
KIM
This post is sponsored by NuTone Haven™ Backyard Lighting & Mosquito Repellent System. All opinions are my own.
Related Posts:
Red, White, Blue Coastal Patio
Kim, Thank you for being HUMAN!! Sometimes our yards (and kitchens) are a mess! But after some sweat equity and prayers, we get it all in order again! Love your backyard and will be interested to hear how the new landscape lights work out! I love the red, white, and blue theme you have going, very cheerful. By the way, I have been keeping up with your kitchen remodel and it is simply stunning, gorgeous, breathtaking! I have to tell you that when I turn on my dishwasher, I think about you and give a sideways glance back at my dishwasher and pray! 🙂
So is this safe for people, pets and children? Has it been tested???? Good idea if it was a safe poison free method.
Hi Arlene! Here is a link to the Nutone Haven system’s frequently asked questions page. It talks about the specifics of the repellent. http://www.nutone.com/docs/havenpdfs/nutone-haven-faqs-032816.pdf
I wouldn’t use it, just because the epa says it’s safe doesn’t mean it is. Agent orange was said to be safe! There are safer natural ways to repel bugs. Thanks
Wow — since the mosquito is the unofficial state bird here in New Jersey — especially at the shore — these lights are the perfect solution! Thanks for letting us know about them!
Ha! You crack me up Laura! Thanks so much! They really are working out fabulous!
This is BRILLIANT!! I’m one of those people that bugs LOVE . . . so it sucks to hang out on the patio. I don’t like wearing tons of bug spray either. I want this ASAP.
Such a smart idea! Love the space, too!
What a great idea – perfect timing for summer too!
That’s the coolest repellant system I’ve ever seen. We just bought a new house that was vacant for four years…the yard is a mess and mosquito heaven! Would love one of these.
What a fantastic idea! We don’t use our backyard like we should because it is Mosquito Heaven.
I hear ya! We didn’t either. It takes 15 minutes to work (think AirWick) but once it starts it works! I live near the Dismal Swamp and our city spends more money per capital in the entire US for mosquito control but those darn bugs are still rampant. I’m taking my 400sq ft of mosquito free bliss and running with it!
Are there online stores that sell Nutone Haven?
Hi Mike! Here is the link to find a retailer that sells the system: http://www.nutone.com/haven/dlat-haven