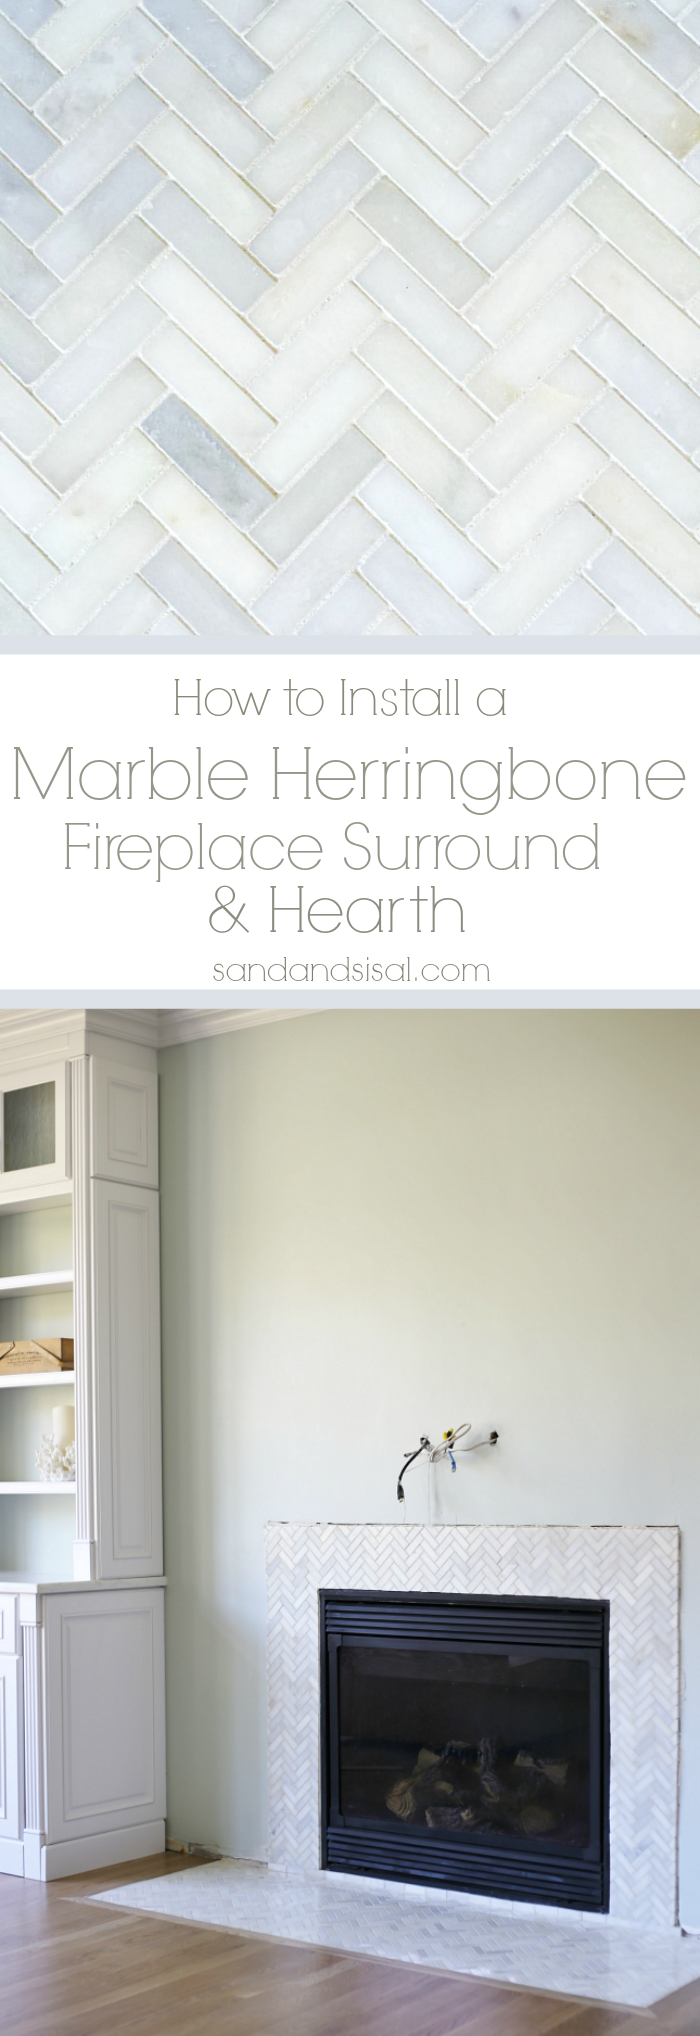
It has been nine months later after the flood, and I think I’m safe to say that we are finally seeing the rainbow at the end of this stormy landscape. Our kitchen is done, but the familyroom is still needing it’s final touches. As you all know, we decided to demo our existing brick fireplace and lower it to floor level. We decided to build our own mantel and tile everything ourselves. People, I am tired of paying subcontractors (especially when I know I can do just as good a job myself!). Today I want to share our experience on How to Install a Marble Herringbone Fireplace Surround and Hearth.
Before I get a bunch of email and comments about demolishining my brick fireplace, just know that I tried to love it for 10 years and it just was NOT working. The fireplace was originally a salmon brick color and then I whitewashed the brick to a nice and fresh white. The fireplace mantel was disporportionately high for the height of the room. It stood at almost 6′ tall! Way too tall for 9′ ceilings. One day, we both just decided, heck, our house is in shambles, why not just demo this and make it what we want. NOW WAS THE TIME!
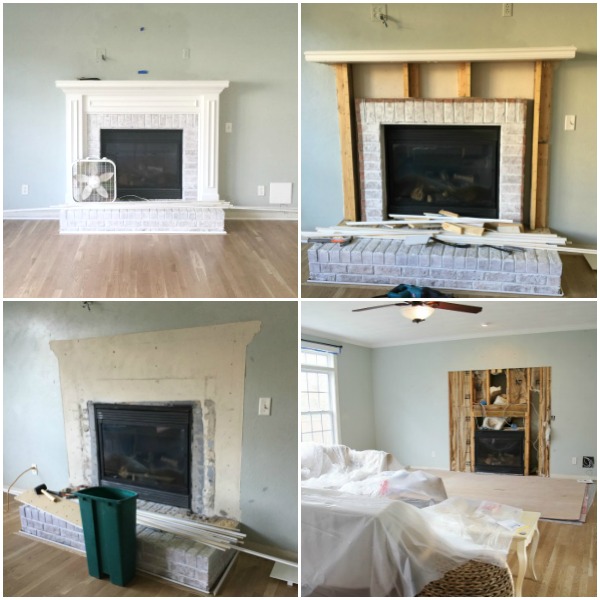
Hubs and I ripped out the brick and mantel surround and then had our contractor lower the entire gas fireplace to floor level. (Keeping it Real $$$: This did involved moving gas lines, and relocating the gas fireplace vent and siding outside our home).
Marble herringbone tile is so very hot right now. Marble is a classic choice for a fireplace surround and hearth regardless, but adding in the texture of herringbone is a nice modern and updated twist on the tried and true classic. I bought my 12×12″ marble herringbone, mesh-backed tile from Lowes. It was from their Allen + Roth collection – herringbone marble tile.
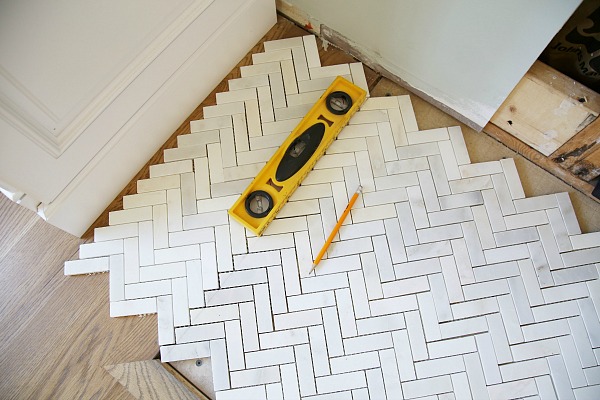
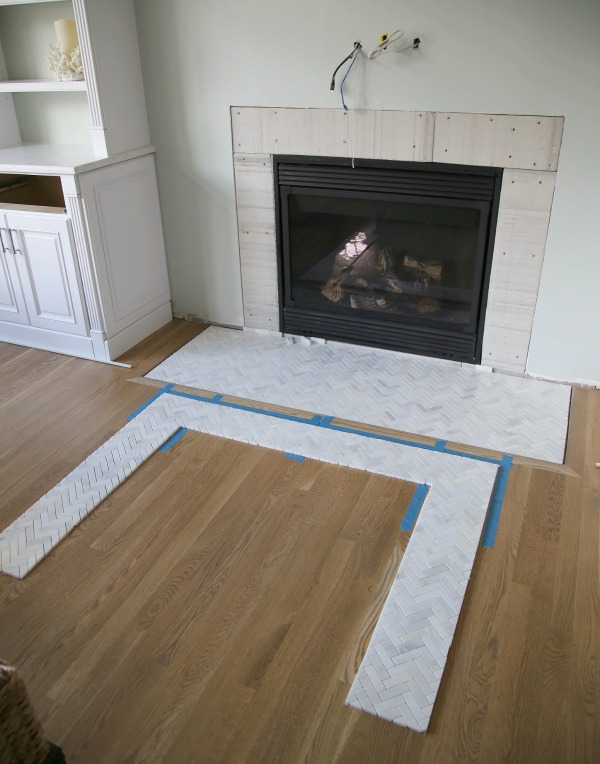
The first step was installing cement backer board (not shown on the surround in this pic) and dry fitting the tile. Dry fitting simply means you start laying out the tile and figure out what pattern and placement works best.

Once I knew how I wanted the placement of the tile then I took a straight level and drew a line with pencil along the edge that needed to be cut.
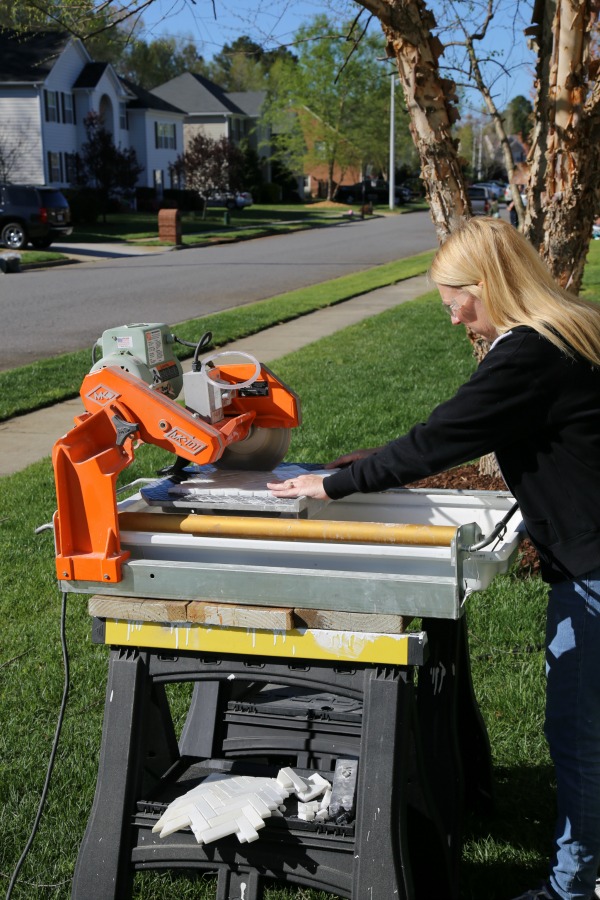
Cutting marble tile requires a wet saw. I LOVE WET SAWS! Please do not be scared by these. You can rent them from the big box home improvement stores and they are made for the DIY-er. I chose the smallest wet saw they had and rented it for a day (ie: have your plan ready to execute, especially if you are renting by the day).
The wet saw hooks up to bucket full of water and delivers a steady stream of water across the saw blade, keeping it cool, which allows a smooth and easy cut into stone or tile. You line up your tile mesh square onto the table plate and then push the table plate towards the saw blade. It glides smoothly and cuts through the marble tile like butter. I am a notorious rule breaker. This tile says to cut with the mesh side up, but I found that the marble would chip horribly when I did that. Marble is very soft. So I cut all my tile with the mesh side down.
PS- SAFTEY FIRST: ALWAYS WEAR EYE & EAR WEAR PROTECTION.
Ok, so we rented this awesome tile cutting machine but we only had one day! We needed to plan everything out. This is most likely going to make every tile guy roll his eyes, but I’m not a tile guy. I’m a DIY-er. But to be honest, I think this was crazy smart of us, because we didn’t have the luxury of owning our own saw to use at leisure.
What we did was to measure the existing gas fire place insert dimensions and REPLICATE THOSE MEASUREMENTS on the floor with painter’s tape. My photos don’t show the full amount of tape we used, but we recreated the entire surround dimensions onto the floor. Then we dry fitted all the tile and cut the tile to the exact specifications. Making sure the entire surround would fit seemlessly with eachother.
The inside cuts were what we tried to focus on vs. the outside cuts which we knew would be overlapped by the wood surround and mantel that was to be built next.
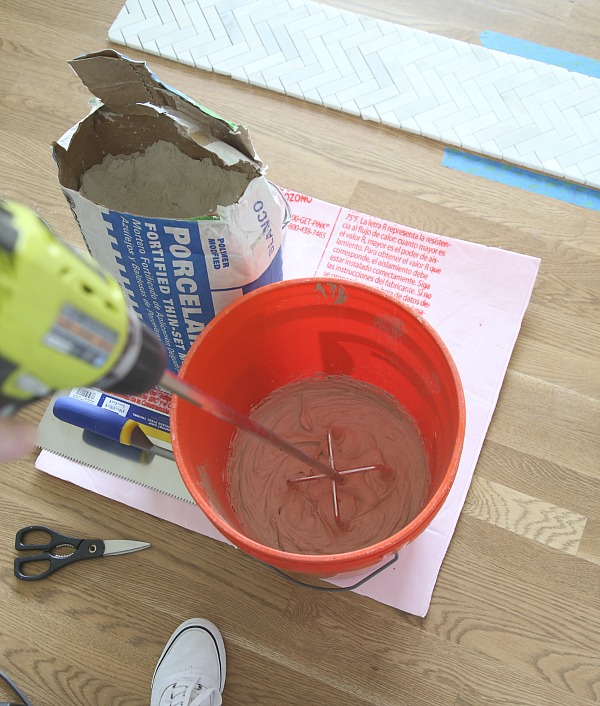
Time to mix the mortar. Now if you are laying transparent, white marble, which is crazy absorbent, then you seriously need to use what all the experts recommend. And that is white thinset. Use a mixing paddle attachment for your drill and follow the directions on the bag of thinset mortar. It is rather easy to mix and should have the consistency of peanut butter.
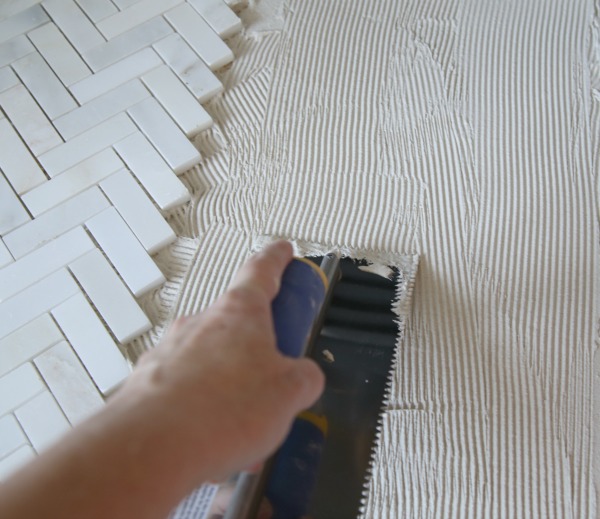
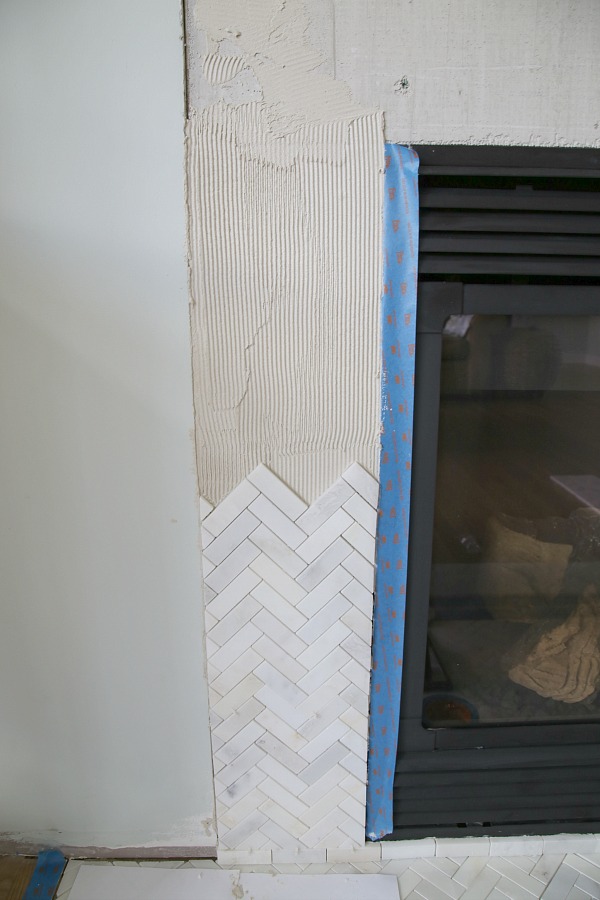
Use a v-groove trowel with 1/8″ grooves to apply a nice and consistent layer of thinset to the cement backerboard. Apply the tile, mesh side down, and then evenly tamp down the tile. Work in very small sections (only one or two 12×12 tile sections at a time).
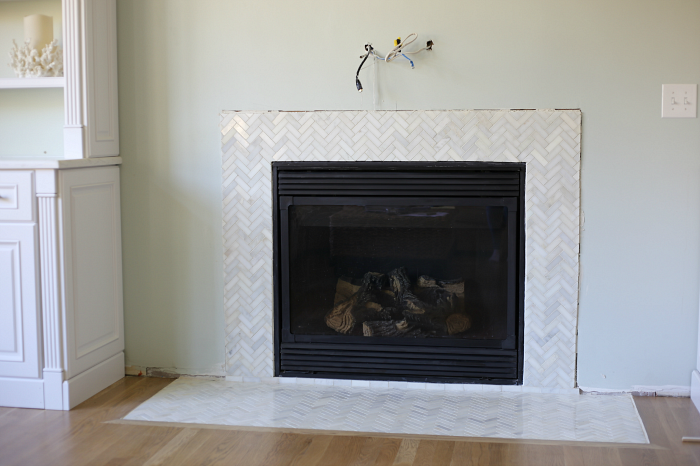
After the marble herringbone fireplace hearth is done then you can move onto the tiling the surround.
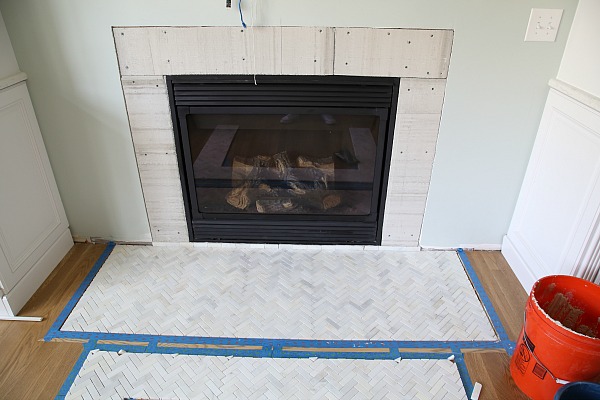
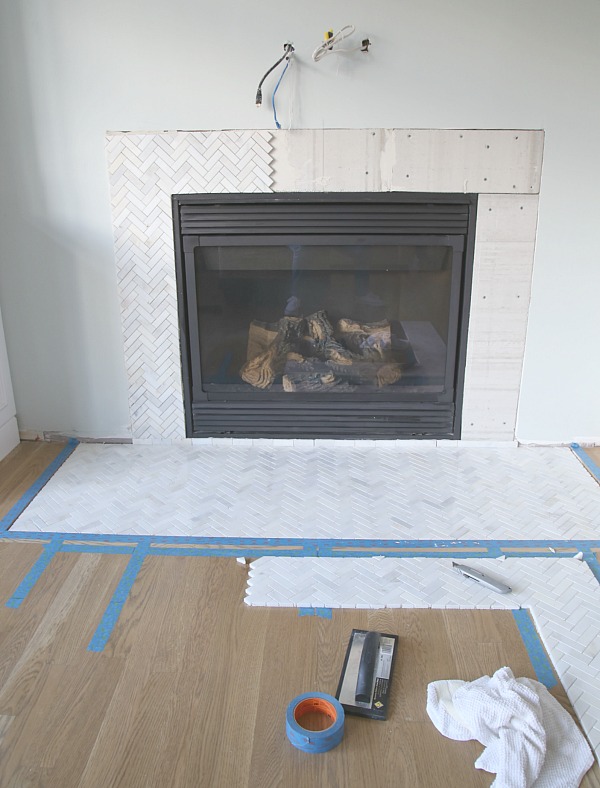
Be sure to tape off and protect the metal and glass fireplace. I did not tape and protect mine enough and now I’m regretting it. Use a plastic bag or craft paper. Whatever you use, just tape it all off! Mortar and grout will drip and ruin the metal and glass if you don’t.
Those wires you see sticking out of the wall is where the mantel will be and where the cable and electric outlets will be built in. 😉 After tiling is done, you MUST seal the marble. Buy a sealer that specifically mentions white marble. Some sealers will totally change the color of your marble, so do your due diligence in research. Like I said before, white marble is very absorbent and will take on the color of your thinset, your grout and your sealer. Regardless of how white the substances are that you choose, your marble will change color. Embrace it! This is natural. You are already familiar with how stones turn rich colors when they are wet, right? Well marble tile is the same.
Follow the manufacturer’s instructions for how long the thinset needs to set before grouting. I have used several brands of grout before and I tried a new one. And I will be totally honest, I don’t necessarily recommend the brand I used because it dried too fast. I used a pre-mixed white sanded grout. Wear gloves! Apply the grout with 45° rubber float, pressing it into the grout lines. Scrape off any excess.
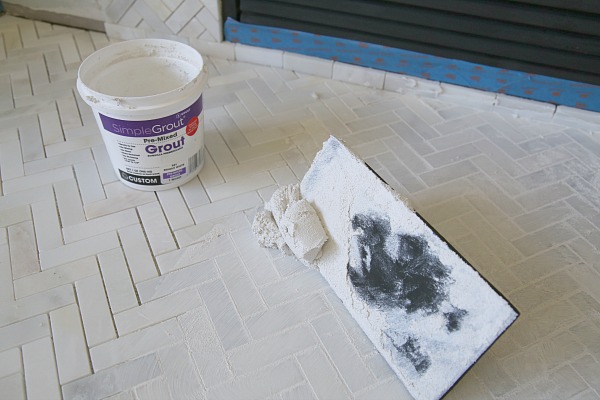
Work in small sections and with a wet sponge and wipe off as much grout on top of the tile as possible, being mindful to not wipe out the grout in the tile lines. It would be wise to fill a large bucket of clean water to work with.
After a few hours a haze on the tile will appear. Buff all of it off with a soft clean cloth.
(Tip: do not dump this grout water down your kitchen sink! It has sand in it and will destroy your garbage disposal)

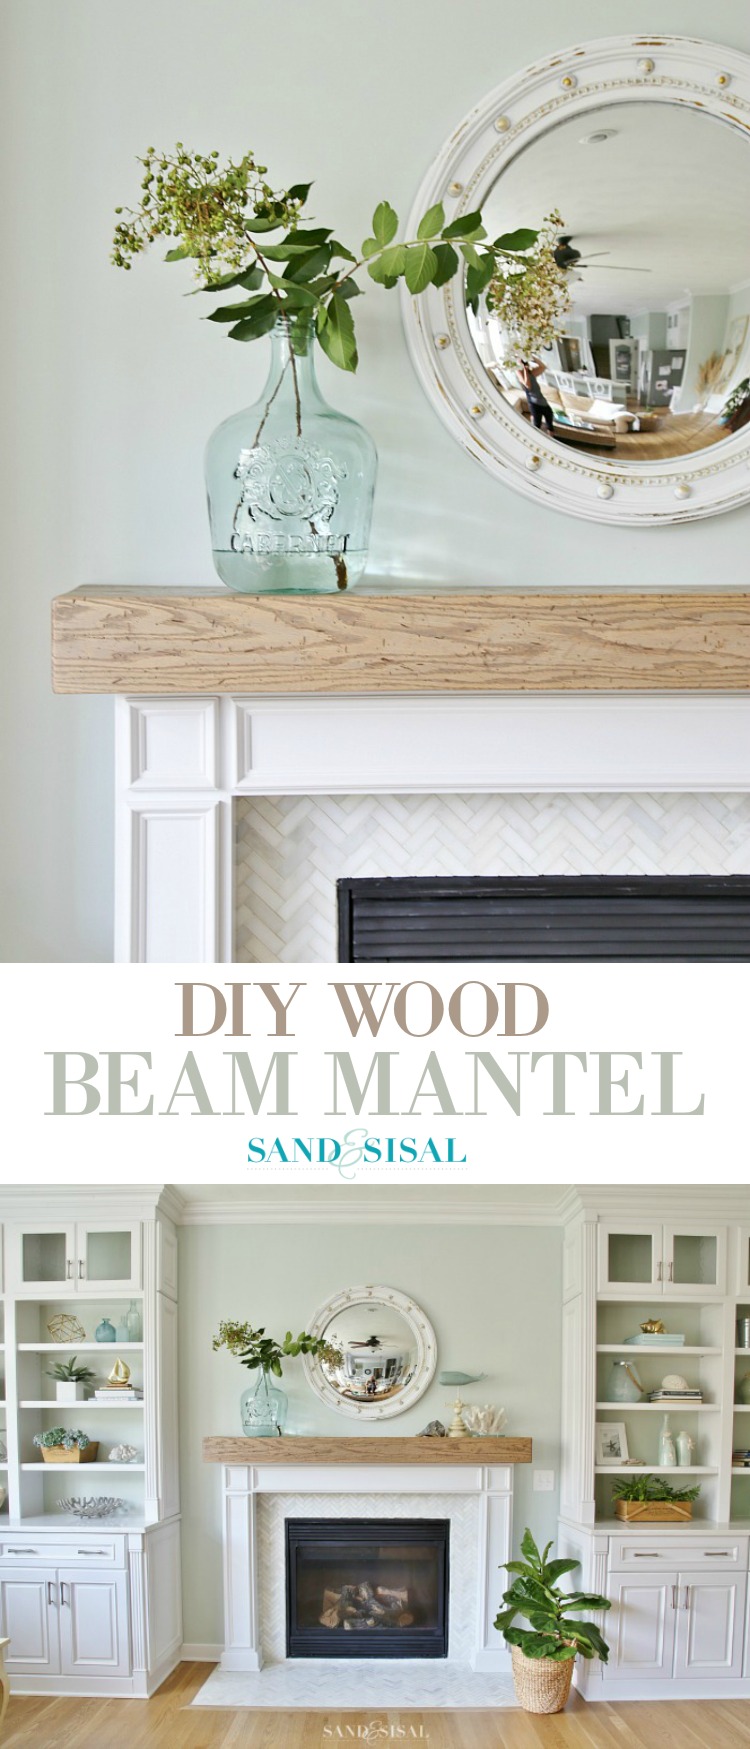
Voila! It’s done! Now it’s time for PART 2! I will soon be revealing how we build the new mantel and wood surround.
Want to do this? Pin How to Install a Marble Herringbone Fireplace Surround for future reference!
Happy Tiling!
KIM
NEXT: DIY Wood Beam Mantel
You might also like
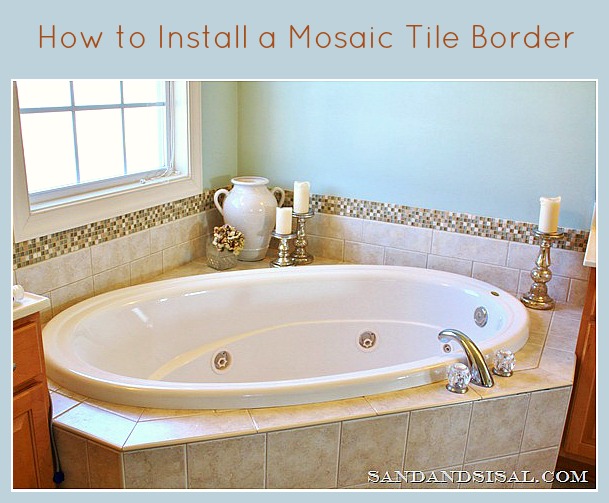
How to Add a Glass & Stone Tile Border
How to Decorate a Mirror with Tile
Fireplace demo + Weathered Oak Floor Reveal
OMG! The fireplace is gorgeous! You are so talented, Kim! Me, not so much! I’m one of the ones who pay out to the subcontractors when I need something done. Can’t wait for part 2 and the rest of your kitchen! I’m obsessed with your blog!
Beautiful! I love the marble tile and we just installed something similar on the kitchen backsplash.
What sealer did you use?
I am just about to do this myself! Curious what the width of your hearth is as well as how you finished off the edge of the tile?
Hi Byn! The hearth 2’deep x 5’11” wide. The edge of the tile is just a simple but very straight cut, nothing extra. We allowed for a 3/8″ grout line around the edges which butts up to the wood trim. The wood flooring is trimmed out around the hearth. Hope that helps. ~KIM
Hi Kim, Looks amazing!
What are your dimensions of the herringbone around your fireplace?
Is the Tile flush with the fireplace? If so did you have to use thinner backboard to offset the drywall?
Thanks, my wife and I love what you did are have started demoing our fireplace!
Steven
Hi Steven!
The tile dimensions are 8 inches all the way around. Only a little over 6 inches is exposed though. The fireplace insert is flush with the backboard, not the tile. When we built the wood molding surround, we purposely made the inside panels of the white wood surround 1/4 inch less deep than the outside panels to accommodate/allow for the thickness of the tile. Hope that helps. Be sure to see this post that follows: DIY Wood Beam Mantel https://www.sandandsisal.com/2016/08/diy-wood-beam-mantel.html
Good luck on your fireplace reno! ~ KIM
Hi! Love your fireplace! How many square feet of tile did you purchase for the marble surround ? I’ve heard that with herringbone there is a lot of waste so want to get an idea of how many sq feet I should purchase for a similar project . Thanks!
Hi Nuri! To be honest I do not remember the square footage or how many boxes we bought of the tile. I want to say 7-10 boxes but I can’t be sure. Always buy more than you need and plan as well as possible. We actually didn’t have a ton of waste because we worked hard to map it beforehand. Any extra can be returned. Wish I could help you out more! Best of luck on your project! ~KIM
I know this thread is older but am I just finding it now and had to comment. Kim, you continue to amaze and inspire me! I absolutely love your home and the way you have personalized your space is really a work of art. We’re heading into a kitchen reno soon – bye bye builder grade everything- and your kitchen has been my inspiration from the get go. Ours is on a much smaller scale, but in terms of color choices and the coastal feel, my mind always returns to your gorgeous kitchen. The one thing I’m really bummed out about though, is my husband’s not on board with the Lunada Bay Tile that I fell in love with.
That is the most stunning tile and I’m having a hard time finding the perfect tile to go with the Sea Salt walls and white cupboards. I got a sample of a 3 x 6″ glass subway tile in seafoam and I like it, but dont feel ‘wowed’ by it. Husband loves it of course, lol.
If you have a moment I’d love to hear what you would have gone with if Lunada Bay was not an option. All the best and I love your work!
Hi Tracy!
Thank you so much for your kind words! I had chosen that Lunada Bay tile long before we even had a kitchen flood and had to renovate. It was stored in my “dream kitchen files”. Ha! Let’s see, if I didn’t go with the Lunada tile then my second choice was to do the backsplash in the marble herringbone like I did around the fireplace. It provided texture, pattern and yet is classic. I would have used a lot more aqua/seaglass colored kitchen accessories on the counters to break up the white. Today I might have chosen something different even. I’ve see soooooo many gorgeous tile options lately at Floor & Decor that blow my mind. Do you all have one of those near you? If you do, I highly recommend checking them out. You know you could always do a large square of a different tile right behind the stove, to create a pretty accent spot.
Hope that helps some! Good luck in your decision making!
KIM